How to Propagate Cocoplum?
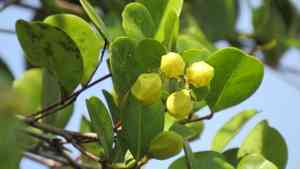
Cocoplum reproduces most effectively from cuttings acquired in the spring or summer seasons. While moderately difficult to propagate, the emergence of new foliage signifies successful establishment. A rooting stimulant can assist in promoting root development.
When Is the Optimal Time to Propagate Cocoplum?
Propagation Method
Cutting
Propagation Period
Spring, Summer
What Equipment Is Used for Cocoplum Propagation?
Sharp pruning shears
Utilized for obtaining clean and precise cuttings from cocoplum. Minimizes damage to the parent plant and aids in quicker healing and rooting of the cuttings.
Rooting hormone
Applied to the severed end of the cutting to stimulate and hasten root formation. Particularly beneficial for cocoplum cuttings to boost propagation success rates.
Sterile potting mix
Offers a clean, pathogen-free environment for new cocoplum cuttings to establish roots. Lowers disease risk and supports healthy root growth.
Propagation tray or pots
Receptacles used to hold the sterile potting mix and keep cocoplum cuttings upright. Ensures proper air circulation and moisture retention vital for root initiation.
Plastic covers or domes
Create a humid microclimate around the cocoplum cutting, essential for preventing dehydration and encouraging root establishment.
Heat mat (optional)
Maintains a steady soil temperature, which can be crucial for cocoplum cuttings to form roots more effectively, especially in cooler climates or seasons.
How to Propagate Cocoplum?
Propagation Method
Cutting
Difficulty Level
Moderately Challenging
How to Nurture Your Newly Propagated Cocoplum?
How to Nurture Your Newly Propagated Cocoplum?
Following successful propagation, gradually introduce the new cocoplum plants to their typical growing conditions. Continue to irrigate them regularly to maintain moist but not waterlogged soil. Provide a balanced, slow-release fertilizer to support growth once they are well-established. These plants can endure various conditions but thrive best in full sun to partial shade, and they benefit from regular pruning to encourage bushiness and maintain their form. Monitor for pests or diseases and treat as needed. Acclimate them slowly to outdoor conditions if propagated indoors before planting them in their permanent spot.
Common Errors to Avoid When Propagating Cocoplum
Overwatering cuttings
Saturated soil can lead to cutting rot before roots can form, resulting in a failed propagation attempt for cocoplum.
Planting seeds too deep
Cocoplum seeds planted too deeply may not receive sufficient light or may struggle to reach the surface before exhausting their stored energy, leading to poor germination rates.
Ignoring soil composition
Using an unsuitable soil blend can hinder drainage and aeration, which are crucial for the root development of cocoplum.
Neglecting hygiene
Failing to use clean tools or planting mediums can introduce pathogens, potentially causing disease issues in a vulnerable cocoplum propagule.
Impatience with rooting process
Expecting rapid results can lead to premature transplanting or excessive disturbance, potentially harming the delicate roots of cocoplum during development.
Advice for Propagating Cocoplum
Proper cutting selection
Select healthy, non-flowering stems for cuttings to ensure vigorous growth and improve rooting chances for cocoplum.
Adequate moisture
Maintain consistent moisture but prevent waterlogging the soil to provide optimal rooting conditions for cocoplum.
Seed surface sowing
Gently press cocoplum seeds onto the soil surface or cover with a very thin layer of soil, as they require light for optimal germination.
Use of rooting hormone
Applying a rooting hormone to cuttings can enhance root development and increase the success rate of propagating cocoplum.
Environmental control
Provide a stable environment with controlled humidity and temperature to support the development of cocoplum during its early stages of growth.



