How to Transplant Jepson ceanothus?
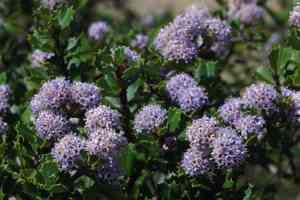
The ideal window for relocating jepson ceanothus spans from the latter part of spring to the beginning of summer, a phase characterized by consistent warmth that aids root development. Select a location bathed in sunlight, featuring soil that drains effectively. Carefully managing the root mass guarantees a smooth integration.
What Preparations are Needed Before Transplanting Jepson Ceanothus?
What is the Ideal Time for Transplanting Jepson Ceanothus?
For jepson ceanothus, the optimal period for relocation is during the mild warmth of late spring to early summer. This timeframe provides consistent temperatures and favorable soil conditions, allowing jepson ceanothus to establish comfortably in its new spot. Moving jepson ceanothus during these pleasant days promotes root growth before the challenges of colder months, giving your jepson ceanothus a strong start for flourishing.
How Much Space Should You Leave Between Jepson Ceanothus Plants?
When preparing to transplant your jepson ceanothus, remember to provide ample room for growth. Aim for a comfortable spacing of 5-10 feet (1.5-3 meters) apart. This ensures your jepson ceanothuss can develop without competing for essential nutrients and sunlight. Consider it giving each plant its own personal area!
What is the Best Soil Mix for Jepson Ceanothus Transplanting?
Before relocating your jepson ceanothus, let's prepare a welcoming environment for them! Choose well-draining soil and incorporate some compost as an initial fertilizer to nourish them. This organic boost will assist your jepson ceanothuss in settling in and thriving in their new location.
Where Should You Relocate Your Jepson Ceanothus?
Select a sunny location for your jepson ceanothuss where they can receive at least six hours of direct sunlight daily. They appreciate the sun just as we enjoy a bright, cheerful day! Just confirm no tall structures or trees will cast shade over their sunny haven.
What Equipments Should You Prepare Before Transplantation Jepson Ceanothus?
Gardening Gloves
To safeguard your hands while handling soil and jepson ceanothus.
Shovel or Spade
For excavating the jepson ceanothus and preparing the new planting site.
Watering Can or Hose
For hydrating the jepson ceanothus prior to and following transplantation.
Wheelbarrow
To move the jepson ceanothus and soil if required.
Pruning Shears
For trimming any damaged roots or branches.
Garden Fork
To loosen the soil around the root ball if moving from the ground.
Tarp or Burlap
For carrying the root ball and protecting the roots during transit.
Rooting Stimulant (optional)
To encourage root development after relocation.
How Do You Remove Jepson Ceanothus from the Soil?
How Do You Remove Jepson Ceanothus from the Soil?
From Ground: Hydrate the jepson ceanothus plant a day beforehand to moisten the earth. Dig a wide circle around the plant with a shovel, going deep enough to encompass most of the root ball. Use a garden fork if roots are dense. Gently pry the plant from the soil, preserving as much of the root ball as possible.From Pot: Water the jepson ceanothus to facilitate the removal process. Invert the container and gently tap the bottom to dislodge the plant. Support the plant's base with one hand, and with your other hand, slowly guide the root ball out. If roots are circling, carefully untangle them.From Seedling Tray: Water the seedlings to keep the soil intact. Use a spoon or a dibber to lift the seedling out, ensuring to include the roots and surrounding soil. Handle the seedlings by their leaves, not their delicate stems.
Step-by-Step Guide for Transplanting Jepson Ceanothus
Digging Hole
Prepare the new cavity in the ground where the jepson ceanothus will be moved. It should be twice as wide and equally as deep as the root ball.
Inspecting Roots
Examine the root ball of the jepson ceanothus for any compromised or dead roots and remove them with pruning shears.
Placing Plant
Position the jepson ceanothus in the center of the new hole, ensuring it rests at the same depth it was previously growing. Gently spread out the roots if necessary.
Refilling Hole
Carefully backfill the hole with soil, compacting it as you go to eliminate air pockets. Create a small mound around the plant's base to form a water retention basin.
Watering
Thoroughly water the jepson ceanothus after planting to settle the soil around the roots and provide essential moisture.
How Do You Care For Jepson Ceanothus After Transplanting?
Monitoring and Adjusting
Regularly check the soil's moisture level and adjust irrigation as needed. Ensure the jepson ceanothus is not in waterlogged conditions to prevent root decay.
Mulching
Apply a layer of mulch around the base of the jepson ceanothus to retain soil moisture, regulate soil temperature, and reduce weed competition.
Protection
Safeguard the jepson ceanothus from pests and physical harm; use a guard if necessary. Avoid high-traffic areas when selecting a transplant location.
Pruning
Trim any damaged or diseased branches to direct the jepson ceanothus's energy towards establishing new roots instead of repairing upper growth.
Troubleshooting Common Issues with Jepson Ceanothus Transplantation.
When is the best time to transplant jepson ceanothus?
Relocate jepson ceanothus during the mild warmth of late spring to early summer for optimal establishment.
What spacing should jepson ceanothus have when transplanting?
Provide ample space for jepson ceanothus, aiming for 5-10 feet (1.5-3 meters) between plants to promote air circulation and growth.
Why is my jepson ceanothus wilting after transplantation?
Wilting may indicate shock or insufficient hydration. Ensure adequate watering and provide shade if needed during the initial weeks post-transplant.
How deep should I plant jepson ceanothus's root ball?
Plant jepson ceanothus's root ball at the same depth it was previously growing. Planting too deep or shallow can hinder its establishment.
Should I amend the soil when transplanting jepson ceanothus?
It's beneficial to incorporate compost or a native soil mix to help jepson ceanothus adapt to its new environment.
How often should I water jepson ceanothus after transplanting?
Water jepson ceanothus consistently until established, then gradually decrease frequency. Avoid overwatering to prevent root rot.
How can I tell if jepson ceanothus has enough sunlight after transplanting?
Observe jepson ceanothus's growth patterns. Sufficient sun typically results in healthy leaf development and overall vigorous growth.
What signs indicate that the jepson ceanothus did not survive the transplant?
Persistent wilting, leaf discoloration, and an absence of new growth after several weeks may suggest jepson ceanothus has not survived the relocation.
Can I transplant jepson ceanothus during the fall or winter?
It's risky. Moving jepson ceanothus outside the ideal season could impede root development and adaptation to the new site.
Why are the leaves of my transplanted jepson ceanothus yellowing?
Yellowing leaves might indicate a nutrient deficiency or stress. Ensure proper soil nutrients and care for post-transplant recovery.



