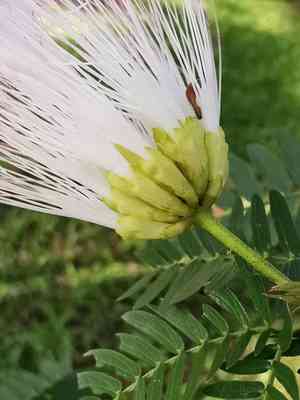
How to Transplant Surinamese Stickpea?
The most favorable time to move surinamese Stickpea is at the beginning of the cooler season, offering a calm acclimation period without undue strain. Choose a location bathed in sunlight with soil that drains effectively to boost vigor after transplantation.
Essential Preparations Before Relocating Surinamese Stickpea
Optimal Period for Surinamese Stickpea Relocation?
The most suitable time for moving surinamese Stickpea is during the tranquil, cool period from late autumn to early winter. This timing allows surinamese Stickpea to establish its root system without intense heat, ensuring it awakens in spring in its new spot, ready for vigorous development. Choosing this calm season for transplanting facilitates a smooth transition, setting the stage for vibrant spring blooms.
Required Spacing Between Surinamese Stickpea Plants?
For your surinamese Stickpea plant, allocate space appropriately. Each plant requires approximately 8-10 feet (2.4-3 meters) of surrounding area for proper development. This guarantees your plant ample room to flourish without competing for resources.
Best Soil Blend for Surinamese Stickpea Transplanting?
Surinamese Stickpea thrives in well-drained soil, such as loamy or sandy types. Prepare the ground by incorporating a foundational fertilizer rich in organic matter. This will supply the plant with the necessary nutrients for robust and healthy growth.
Ideal Location for Your Surinamese Stickpea?
When selecting a site for your surinamese Stickpea, choose a sunny location. This plant prefers full sunlight. Providing the correct amount of light is crucial for good growth and flowering. Happy transplanting!
Equipment Needed Before Surinamese Stickpea Transplantation
Gardening Gloves
To safeguard your hands while handling soil and surinamese Stickpea.
Shovel or Trowel
This tool will be used to excavate the holes where your surinamese Stickpea will be replanted.
Gardening Pruner
For trimming off damaged or dead branches from the root ball prior to transplanting.
Watering Can
To irrigate surinamese Stickpea once it's moved to its new home.
Mulch
To assist the soil in retaining moisture after surinamese Stickpea is transplanted.
Stakes and Plant Ties
These are essential if surinamese Stickpea requires additional support post-transplantation.
How to Extract Surinamese Stickpea from the Soil?
How to Extract Surinamese Stickpea from the Soil?
From Ground: First, moisten the soil around the surinamese Stickpea plant. Use a shovel or spade to dig a wide trench around the plant, ensuring the root ball remains intact. Carefully work the spade beneath the root ball to lift the plant from its original spot.From Pot: Water the surinamese Stickpea before beginning. Turn the pot sideways, gently hold the plant by its base, and tap the bottom of the container until the plant slides out. Avoid pulling the stem to prevent harm.From Seedling Tray: If surinamese Stickpea is in a seedling tray, start by carefully separating individual plants. Hold the stem, invert the tray, and gently ease the plant out, ensuring the roots remain undamaged.
Step-by-Step Guide for Transplanting Surinamese Stickpea
Preparation
Start by preparing the planting hole. It should be twice the width of the surinamese Stickpea's root ball but no deeper. Place a layer of nutrient-rich topsoil at the bottom of the hole.
Removing the Plant
Follow the 'removal process' instructions based on whether your surinamese Stickpea is currently in the ground, a container, or a seedling tray.
Placing the Plant
Position surinamese Stickpea in the hole. The top of its root ball should be level with the ground's surface.
Backfill the Hole
Refill the hole with soil, firmly compacting it around the base of surinamese Stickpea to eliminate air pockets.
Watering
Thoroughly water surinamese Stickpea after planting.
Mulching
Spread a layer of mulch around the base of surinamese Stickpea to help the soil retain moisture.
Post-Transplant Care for Surinamese Stickpea
Watering
Keep the soil around surinamese Stickpea consistently damp, but not waterlogged, for the initial weeks after transplanting to aid in strong root establishment.
Pruning
Once surinamese Stickpea has begun to adapt to its new surroundings, regularly inspect it and remove any withered or dead branches with a pruner.
Staking
If your surinamese Stickpea is tall or has a slender stem, stake the plant to provide additional support and keep it upright. Remember not to tie surinamese Stickpea too tightly to the stake. Monitor and adjust as needed.
Addressing Common Issues with Surinamese Stickpea Transplantation.
When is the optimal time to transplant surinamese Stickpea?
The best period to transplant surinamese Stickpea is during S9-S10. This timeframe offers the highest chance for establishment before colder weather.
How much space does surinamese Stickpea require during transplanting?
Surinamese Stickpea needs ample space for optimal growth. Maintain a distance of approximately 8-10 feet (2.5-3 meters) when transplanting.
What should be the depth of the hole when transplanting surinamese Stickpea?
Excavate a hole as deep as the root ball and twice its width. This provides surinamese Stickpea sufficient room for root establishment after transplantation.
Is pruning surinamese Stickpea necessary before transplanting?
Pruning is not mandatory, but it helps reduce stress on surinamese Stickpea. Trim back about one-third of the plant to encourage healthier growth after transplant.
Does surinamese Stickpea need a specific soil type for successful transplanting?
Surinamese Stickpea is not particular about soil type. However, well-drained soil with slight acidity is most beneficial for its growth post-transplant.
How should I care for surinamese Stickpea after transplant?
After transplanting, water surinamese Stickpea thoroughly and regularly. Protect it from temperature extremes, and consider using a root stimulator for quick establishment.
What kind of watering schedule does surinamese Stickpea need after transplanting?
Surinamese Stickpea prefers moist, but not soggy, soil. Water it thoroughly after transplanting and then maintain consistent watering until it is firmly established.
Can I use fertilizer when transplanting surinamese Stickpea?
Yes, but wait until new growth appears on surinamese Stickpea. Initially, the plant needs to prioritize root establishment over top growth.
Do I need to stake surinamese Stickpea after transplanting?
Staking is usually not required for surinamese Stickpea unless it is very tall or in a windy location. If necessary, remove the stake once the plant is stable.
Can I transplant surinamese Stickpea into a pot?
Yes, you can transplant surinamese Stickpea into a pot, ensuring adequate room for growth. Remember to provide proper drainage to prevent waterlogging.


