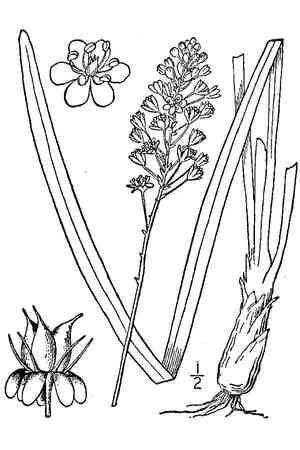
How to Transplant Fly poison?
The ideal period for relocating fly poison is as late spring transitions into the mild onset of summer, offering moderate temperatures and consistent growing environments. Choose a new site with adequately draining earth in an area receiving partial shade. Helpful advice: minimize disruption to the root system to guarantee fly poison flourishes post-transplant.
Necessary Preparations Before Relocating Fly Poison?
Optimal Period for Relocating Fly Poison?
Moving fly poison during the peak of spring, as the ground becomes active again, promotes strong root development. Utilizing this vigorous growth period provides fly poison with the best start in its new spot!
Required Spacing Between Fly Poison Plants?
When rehousing fly poison, aim for a separation of approximately 12 inches (30 cm) to 3 feet (91 cm). This ensures ample room for growth and flourishing without nutrient competition!
Best Soil Mixture for Fly Poison Relocation?
For fly poison, combine well-draining soil with a touch of balanced fertilizer prior to planting. The perfect beginning for robust development!
Optimal Location for Your Fly Poison?
Select a site for your fly poison that receives partial shade to full sun. They appreciate a mix of both throughout the day to display their best!
Equipment to Prepare Before Relocating Fly Poison?
Gardening Gloves
To safeguard your hands while handling soil and plants.
Shovel or Spade
For excavating fly poison from its original position.
Garden Trowel
To refine the relocation hole and manage small details.
Watering Can or Hose
For hydrating fly poison before and after its move.
Measuring Tape
To maintain correct spacing among multiple relocated plants.
Wheelbarrow
For moving fly poison and any necessary soil amendments.
Pruning Shears
For trimming any damaged roots or foliage prior to relocation.
How to Extract Fly Poison from the Soil?
How to Extract Fly Poison from the Soil?
From Ground: Start by watering fly poison to moisten the soil, facilitating easier removal. Using a shovel or spade, dig around the plant to create a wide perimeter around the root ball. Gently slide the shovel beneath the root mass and carefully lift fly poison from the ground.From Pot: Water the soil in the container beforehand. Tilt the pot sideways and tap its sides to loosen fly poison's root ball. Grasp the plant's base and gently pull it out, supporting the root ball to keep it intact.From Seedling Tray: Water the seedlings to ensure the soil is damp. Use a garden trowel or your fingers to carefully separate individual fly poison plants from their cells, taking care not to harm the roots.
Step-by-Step Guide for Relocating Fly Poison
Relocation Preparation
Ensure fly poison's current soil is damp to assist in removing the plant without root damage.
Excavating the New Hole
Dig a hole in the ground that is twice as wide and equal in depth to fly poison's root ball to provide ample space for the roots.
Plant Positioning
Carefully place fly poison's root ball into the new hole, ensuring it is not planted deeper than its previous growth level.
Backfilling the Hole
Gradually refill the hole around fly poison with native soil, gently tamping down to eliminate air pockets and secure the plant.
Initial Watering
After fly poison is in place, water it thoroughly to settle the soil around the roots and help minimize relocation shock.
How to Care for Fly Poison After Relocation?
Initial Watering
Water fly poison generously immediately after relocation to help settle the soil and hydrate the roots.
Monitoring
Inspect the plant daily for the first week, looking for signs of relocation shock, such as wilting or yellowing leaves.
Subsequent Watering
Water fly poison as needed to maintain soil moisture, especially during hot or dry periods.
Mulching
Apply a layer of organic mulch around fly poison's base to help retain moisture and regulate soil temperature.
Pruning
Remove any damaged or diseased foliage to encourage healthy development.
Addressing Common Issues with Fly Poison Relocation.
When is the best time to relocate fly poison for optimal growth?
For best outcomes, relocate fly poison from late spring through early summer, when conditions are mild.
How much space does fly poison require when being relocated?
Allow fly poison room to thrive by providing 12 inches to 3 feet (30 cm to 91 cm) between plants.
What soil conditions are ideal for relocating fly poison?
Relocate fly poison into well-drained, fertile soil with a neutral to slightly acidic pH for healthy growth.
Should I water fly poison immediately after relocating?
Yes, water fly poison generously right after relocation to help establish roots in their new environment.
How deep should I plant fly poison's bulbs when relocating?
Position fly poison's bulbs at a depth of approximately 5 inches (13 cm), ensuring they are securely anchored.
What's the best way to prepare fly poison's planting site?
Clear the area of weeds and incorporate organic matter into the soil before relocating fly poison.
Can fly poison tolerate relocation during hot weather?
It's best to avoid relocating fly poison during high temperatures; aim for cooler, overcast days instead.
How can I protect fly poison after relocating?
Mulch around fly poison to retain moisture and regulate soil temperature, but keep mulch away from the stems.
Is it necessary to fertilize fly poison after relocating?
After relocating, wait a few weeks to fertilize fly poison to prevent burning the newly forming roots.
What should I do if fly poison's leaves wilt after relocating?
Wilting is normal; ensure consistent watering and avoid direct sunlight until fly poison recovers.


