How to Transplant Gray alder?
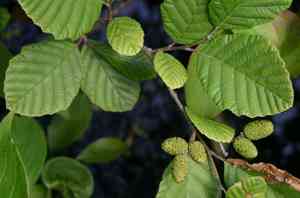
The optimal time for transplanting gray alder is the early spring season, when its growth capacity is at its peak. Select a location featuring damp earth, dappled sunlight, and shelter from strong gusts. Careful manipulation of the root structures during relocation guarantees successful establishment.
Essential Preparations Before Relocating Gray Alder
Optimal Timing for Gray Alder Transplant?
The most favorable period for moving gray alder is in the latter part of the spring season. This timeframe allows the plant to establish its root system in mild temperatures before the summer heat. Placing gray alder in its new location during this gentle warming phase promotes robust growth, as it aligns with gray alder's natural emergence cycle. By selecting this season, gray alder benefits from increasing daylight and warmer soil, avoiding frost stress, ensuring a smooth transition and healthier development. It's a harmonious moment that aligns with nature's signal for renewal, making gray alder transplantation a rewarding endeavor for any gardening enthusiast.
Required Spacing Between Gray Alder Plants?
When planting gray alder, consider its growth habit. Provide each plant approximately 20-25 feet (6-7.6 meters) of space for optimal development. Carefully measure the distance to ensure adequate room for proper growth.
Ideal Soil Blend for Gray Alder Transplanting?
Gray alder thrives in well-drained sandy, silty, or loamy soil. Prepare the ground with a nitrogen-rich base fertilizer for better acclimatization. If uncertain, consult your local gardening store for nitrogen-rich fertilizer recommendations.
Where to Replant Your Gray Alder?
Selecting a location with full sunlight or partial shade is best for gray alder. They require ample light but can endure some shade during the day. If your garden has areas receiving around 6 hours of sunlight, that's the perfect spot for your plant.
Equipment Needed Before Transplanting Gray Alder?
Gardening Gloves
These keep your hands clean and protect them from sharp stones or thorns in the soil.
Garden Fork
Excellent for breaking up soil clumps and making the ground more hospitable for gray alder's roots.
Shovel or Spade
Essential for digging up gray alder from its current spot and excavating the new hole.
Trowel
Perfect for refining the planting hole's shape and incorporating compost or fertilizer.
Watering Can or Hose
Crucial for ensuring the newly transplanted gray alder receives sufficient water.
Bucket
Needed for carrying compost or to transport the dug-up plant without causing damage.
Gardening Pruners
If gray alder has extensive roots, these will help you trim them without harming the plant.
How to Extract Gray Alder from the Soil?
How to Extract Gray Alder from the Soil?
From The Ground: Start by using a shovel or spade to dig a wide circle around gray alder, leaving ample space to avoid root damage. Gently work your tool beneath the plant and lift it carefully. Place the plant into a bucket for transport. From a Pot: If gray alder is in a pot, first water it thoroughly to moisten the soil and roots, then turn the pot sideways and gently pull on the plant's base. The plant and its root ball should slide out. If not, roll the pot and try again. From a Seedling Tray: Water the tray, then press lightly on the bottom of the seedling cell until the gray alder plant emerges with its roots and soil intact.
Step-by-Step Guide for Transplanting Gray Alder
Preparation
Use your garden fork to loosen the soil in the chosen area for gray alder. This will facilitate planting and aid the plant's root system in establishing itself.
Dig Hole
Use your shovel or trowel to dig a hole twice as wide and as deep as gray alder's root ball.
Insert Plant
Place the gray alder plant into the hole, ensuring it sits at the same depth as in its original location.
Backfill
Backfill the hole with soil, gently firming it with your hands to eliminate any air pockets. Be careful not to cover gray alder's stem.
Water
Once planted, water gray alder thoroughly using your watering can or hose.
Post-Transplant Care for Gray Alder
Monitoring
Observe gray alder daily for signs of stress, such as wilting or yellowing leaves. Any change in the plant's appearance may indicate a need for more water or shade.
Pest Control
Apply appropriate eco-friendly pesticides to deter pests. Watch for common garden pests like snails and beetles.
Mulching
A layer of mulch around gray alder will help retain moisture and regulate soil temperature. Chopped leaves, straw, or wood chips make excellent mulch.
Pruning
If gray alder begins to develop disproportionate growth or excessive foliage, prune it to maintain balanced growth.
Support
If gray alder is a large plant, it may require staking post-transplant to keep it upright until its roots are established.
Addressing Common Gray Alder Transplantation Issues
When is the best time to transplant gray alder?
The ideal time to transplant gray alder is during the transition between summer and fall, known as S2. This is when the plant experiences the least stress.
What is the appropriate spacing between two gray alder during transplanting?
When transplanting gray alder, ensure ample space for growth. Aim for a distance of 20-25 feet (6.1-7.6 meters) between them.
What type of soil is best for transplanting gray alder?
Gray alder prefers well-draining soil rich in organic matter. A soil pH between 5.5 and 7.5 is optimal.
How deep should I plant gray alder during transplantation?
Place gray alder in a hole just deep enough to cover the root ball. This is typically around 2 feet (60 cm).
How should I water gray alder after transplant?
Water generously immediately after transplanting gray alder. Afterward, maintain moderate watering, always keeping the soil slightly moist.
How much sunlight does gray alder need after transplantation?
Gray alder thrives in both full sunlight and partial shade, but ensure it receives at least 6 hours of sun exposure daily.
How to effectively prepare gray alder's transplant hole?
Fill the transplant hole with a mixture of garden soil and compost for gray alder. Ensure it's twice as wide as the plant's root ball.
What aftercare is necessary once gray alder is transplanted?
Post-transplant, closely monitor gray alder for signs of stress or dehydration, adjust care as needed, and watch for pests.
What is the correct method to remove gray alder from its original spot for transplanting?
Gently loosen the soil around gray alder, then carefully lift it, ensuring minimal damage to its root ball during the process.
What should I do if the transplanted gray alder appears wilted?
A wilted gray alder likely needs water. Water it generously if the soil feels dry or it hasn't been watered since transplanting.



