How to Prune Gray alder?
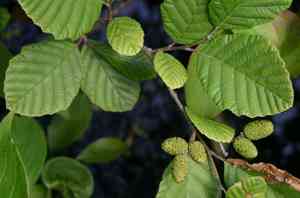
Boasting catkin blooms and resilience to saturated ground, gray alder thrives with appropriate attention. Trim during its inactive period in late winter or early spring to stimulate robust development. Eliminate lifeless, ailing, or inwardly directed limbs to uphold its framework and foster air movement. Reducing crowded sections improves light access, which is crucial for the plant's well-being. Refrain from extensive cuts to retain its inherent shape and lessen strain.
What Are the Benefits of Pruning Gray Alder?
What Are the Benefits of Pruning Gray Alder?
Trimming gray alder promotes robust development and maintains its desired form, improving the plant's look and well-being. Strategic cuts enhance light penetration and air circulation, crucial for gray alder's vitality.
What Is the Best Time for Pruning Gray Alder?
What Is the Best Time for Pruning Gray Alder?
Late winter and early spring are considered ideal for pruning gray alder because this period aligns with the end of its dormant phase but precedes significant new growth. Pruning at this time minimizes stress on gray alder, facilitates better wound recovery, and provides the plant with a strong foundation for the upcoming growing season. It also prevents the removal of buds that would later produce flowers or fruits. Pruning during these months supports a sturdy structure and healthy growth, avoiding potential disease or pest issues that can arise from pruning during the active growing season or in wet conditions.
What Tools Do I Need to Prune Gray Alder?
Hand Pruners
Perfect for making accurate cuts on gray alder's smaller branches and twigs, fostering healthier growth and preserving its intended shape.
Loppers
Best for reaching higher or deeper parts of gray alder and cutting through thicker branches that hand pruners cannot manage.
Pruning Saw
Essential for removing larger limbs from gray alder that loppers cannot cut, ensuring clean cuts without harming the tree.
Pole Pruner
Useful for trimming gray alder's higher branches from the ground, ensuring safety and efficiency in tree care without needing a ladder.
Hedge Shears
Suitable for shaping gray alder when it is utilized as a hedge, allowing for uniform trimming of foliage and small branches.
Pruning Gloves
Protective gear to guard against scratches and sap during the pruning of gray alder, ensuring safety and comfort.
Sharpener
Crucial for maintaining the cutting edge of tools used on gray alder, ensuring clean cuts that promote rapid healing of pruned areas.
How to Prune Gray Alder
Step1: Identifying Prunable Parts
Identify the sections of gray alder that need trimming: dead wood, diseased limbs, and weak branches. Perform this identification during the dormant season to easily observe the tree's structure without leaves.
Step2: Tool Sterilization
Sanitize pruning tools before beginning. Clean them with a solution of 1 part bleach to 9 parts water to prevent disease transmission.
Step3: Removing Dead Wood
Begin with dead wood. Look for branches that lack living buds, are brittle, and dry. Trim these branches back to a living lateral branch or to the main trunk, making a cut flush with the branch collar, avoiding stubs.
Step4: Eliminating Diseased Limbs
Identify and remove diseased limbs. Cut well below the affected area into healthy wood. Ensure not to spread pathogens to other parts with the same pruning tool, sterilizing the tool after each cut if necessary.
Step5: Cutting Weak Branches
Trim weak branches that do not contribute to the overall structure or are rubbing against other branches. Cut them at their origin point or back to a strong lateral branch, ensuring the remaining branches have ample space to grow without interference.
Step6: Thinning the Canopy
Shape gray alder by selectively thinning the canopy. This allows air and light to penetrate the tree, fostering healthy growth. Be sure to maintain the tree's natural shape while doing so.
Step7: Debris Disposal
After pruning, clear away all debris and dispose of it properly, especially if it is diseased, to prevent any diseases from spreading in the garden.
Step8: Post-Pruning Watering
Water gray alder thoroughly after pruning to aid recovery, but avoid overwatering which can lead to root issues.
Step9: Health Monitoring Post-Pruning
Monitor gray alder after pruning for signs of stress or disease and ensure it receives proper care following pruning to encourage healthy regrowth.
Post-Pruning Care for Gray Alder
Post-Pruning Care for Gray Alder
Immediately after trimming gray alder, disinfect the cuts to prevent infection. Place gray alder in an area with moderate light and shield it from extreme temperatures. Maintain consistent humidity, as drastic changes can stress the pruned plant. Apply a balanced fertilizer to promote healing and growth but avoid excessive fertilization which can hinder recovery. Monitor gray alder for signs of distress like wilting or discoloration. If symptoms of infection, such as oozing or unusual growth, appear, treat promptly with an appropriate fungicide or pesticide.
Common Pruning Mistakes with Gray Alder
Ignoring Plant's Natural Shape
Disregarding the natural form of gray alder can result in an unnatural appearance and hindered growth. Gardeners should work with the plant's inherent shape rather than against it.
Excessive Pruning Stress
Over-trimming gray alder can cause stress to the tree. Removing more than one-third of the plant in a single season can lead to poor health and reduced vigor.
Improper Pruning Cuts
Making incorrect cuts, such as leaving stubs or tearing the bark, can expose gray alder to pests and diseases, impeding healing and potentially causing long-term damage.
Unclean Pruning Tools Disease Risk
Neglecting to clean and sanitize pruning tools before use can inadvertently introduce diseases to gray alder, affecting its health.
Common Pruning Tips for Gray Alder
Correct Angle for Clean Cuts
When removing branches from gray alder, make clean cuts at a 45-degree angle just above a lateral bud or branch to promote proper healing and new growth.
Remove Dead or Damaged Branches
Identify and remove any dead, diseased, or damaged branches to improve air circulation and light penetration, which benefits the overall health and structure of gray alder.
Thinning for Sunlight and Shape
Thinning out the center of gray alder can enhance the plant's form and allow sunlight to reach the lower branches, encouraging a fuller, more balanced shape.
Sharp Tools for Precise Cuts
Use sharp, well-maintained pruning tools specifically designed for the size of the branches being cut to ensure precise and clean cuts on gray alder.



