How to Transplant Water wattle?
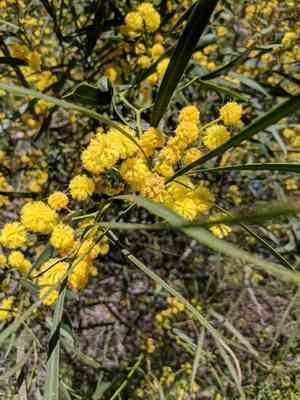
The ideal period for relocating water wattle is when the warmth of late spring transitions into the pleasant initial days of summer, offering prime conditions for development. Select a bright location with soil that drains effectively and thoroughly hydrate water wattle following its relocation to promote successful rooting.
Essential Preparations Before Relocating Water Wattle
Optimal Timing for Water Wattle Relocation?
The prime period for moving water wattle is from late spring to early summer. This favorable timeframe allows water wattle to acclimate gently to its new environment, with mild weather promoting strong root development. During this phase, nature's gentle conditions encourage water wattle to establish itself robustly, ensuring smooth integration into your garden. Aligning the transplant with this season significantly boosts success, as the moderate warmth and balanced soil moisture create an ideal setting for growth.
Required Spacing Between Water Wattle Plants?
Let's start with planting your water wattle! They appreciate ample room, so ensure they are spaced approximately 3-4 feet (0.91-1.22 meters) apart. This guarantees each plant has sufficient area to flourish and bloom!
Best Soil Blend for Water Wattle Transplanting?
Next, prepare the ground. Water wattle prefers soil that drains well, so a sandy or loamy type will be most suitable. Improve your soil with a foundational fertilizer rich in organic matter to give your plants an excellent start.
Where to Replant Your Water Wattle?
Finally, select a location! Water wattle thrives in sunlight. Therefore, choose a spot where they will receive full or partial sun for most of the day. This will keep them vibrant and flowering!
Equipment Needed Before Transplanting Water Wattle
Gardening Gloves
To safeguard your hands while handling soil and water wattle.
Shovel or Spade
For excavating holes in the ground to move the water wattle and removing it from its original spot.
Pruning Shears
To trim roots and branches of water wattle if necessary.
Garden Trowel
Useful for managing smaller water wattle plants and detailed tasks.
Watering Can
To hydrate the water wattle during and after the relocation process.
Wheelbarrow or Tarp
Helpful for safely moving the water wattle from one place to another.
Compost
To supply water wattle with essential nutrients in its new setting.
How to Extract Water Wattle from the Soil?
How to Extract Water Wattle from the Soil?
From Ground: Begin by moistening the water wattle plant's soil to make it easier to work with. Then, slowly dig a wide trench around the plant using a shovel or spade. This trench should be broad and deep enough to avoid harming the root system. Once done, carefully work the spade beneath the root ball to lift the plant.From Pot: First, water the water wattle to loosen the soil. Invert the container and hold the water wattle at its base, applying gentle pressure to the pot's sides and bottom until the plant releases. If the water wattle is stuck, use a gardening trowel to carefully free it.From Seedling Tray: If removing the water wattle from a seedling tray, gently squeeze the cell sides before popping the water wattle out. Remember to pull the water wattle by the leaf, not the stem, to prevent plant damage.
Step-by-Step Guide for Relocating Water Wattle
Prepare the Planting Site
Start by digging a hole that is twice the width of your water wattle plant's root system and approximately the same depth. If the soil quality is poor, incorporate some compost to enhance it.
Positioning the Plant
Carefully place your water wattle in the center of the hole, ensuring it is not planted deeper than it was originally. The top of the root ball should be just below the ground's surface.
Backfill the Hole
Use the excavated soil to fill in around the water wattle, pressing it down gently to eliminate any air pockets.
Water the Plant
After transplanting, thoroughly water the water wattle. The soil should be moist, but not waterlogged.
Post-Transplant Care for Water Wattle
Monitoring
Observe the water wattle plant for any indications of stress such as wilting, yellowing, or leaf drop. If these signs appear, the plant may require more water or shade.
Mulching
Applying a layer of mulch around the base of the water wattle will help retain moisture, suppress weed growth, and regulate soil temperature.
Pruning
Remove any dead or damaged foliage to encourage new growth and reduce stress on the water wattle.
Avoid Fertilization
Refrain from fertilizing the water wattle for the initial few weeks after transplanting, as this can cause additional stress.
Addressing Common Issues During Water Wattle Transplantation.
When is the best time to transplant water wattle?
The optimal period for relocating water wattle is during seasons 3-4. This typically corresponds to late summer through early fall.
What is the appropriate distance between each water wattle when transplanting?
For healthy development, ensure a spacing of 3-4 feet (approximately 1-1.2 meters) between each water wattle when transplanting.
What should I do if the water wattle wilts after transplanting?
Wilting often signals either excessive or insufficient watering. Adjust the watering schedule and ensure the plant is not exposed to intense sunlight.
How much sunlight does water wattle need after transplanting?
After relocation, water wattle requires a good balance of sunlight. Keep it in partial shade where it will receive 4-6 hours of sun daily.
What kind of soil is most favorable for water wattle?
Water wattle thrives best in well-drained, rich, loamy soil. Poor drainage could lead to root rot.
What should I do if water wattle doesn't show growth after transplanting?
Be patient. It may take several weeks for water wattle to establish and begin showing new growth. Avoid overwatering and fertilizing during this period.
What precautions to take while digging out water wattle for transplanting?
When excavating water wattle for relocation, be careful not to damage the root structure. Injured roots might hinder growth post-transplant.
What is the optimum depth of the hole for transplanting water wattle?
Dig deep enough to accommodate the root ball. Generally, the hole should be twice the width and equal depth of the rootball (approximately 10-12 inches or 25-30cm).
How to determine if water wattle has established well after transplanting?
Vigorous growth indicates successful transplant. Look for new shoots, leaves, and continuous growth as signs of water wattle's health.
What to do if water wattle leaves turn yellow after transplanting?
Yellow leaves might suggest a nutrient deficiency. Perform a soil test to confirm this. If verified, supplement your soil with organic compost or a balanced plant fertilizer.



