Boost Growth: How and When to Repot Your True forget-me-not Plant
1
The best times to transplant True forget-me-not are during spring and winter.
2
Confirm containers possess adequate drainage openings to avoid saturated soil.
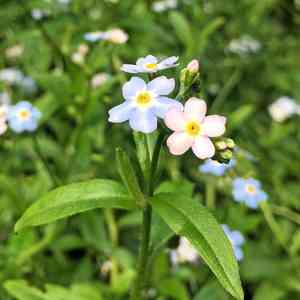
3
True forget-me-not flourishes in damp, well-draining soil under partial sun exposure.
Why Replant Your True forget-me-not?
Understanding Growth Patterns â Signs Your True forget-me-not Needs a New Container
As your True forget-me-not develops, you'll observe several indications that it requires replanting. Look for roots emerging from drainage openings or circling tightly within the pot. Additionally, if you notice stunted development, or the plant appears top-heavy or drooping despite adequate care, these signal that your plant has outgrown its current vessel. Replanting is crucial to offer more room for roots to spread and absorb nutrients effectively.
Benefits of Replanting â Enhancing Vitality and Strength
Replanting your True forget-me-not can significantly boost its health and vibrancy. Fresh substrate provides new nutrients and improves air circulation around the roots, leading to more vigorous growth. This process also removes old, depleted soil and potential pests hiding within. Plants that are replanted regularly often display better overall health, improved blooming, and resistance to diseases. Ensuring your True forget-me-not has ample space to grow can result in a more lush and vibrant specimen.
Selecting the Appropriate Time and Materials
Optimal Seasons for Replanting â Identifying Ideal Conditions
The best times to replant your True forget-me-not are in spring and winter. During these periods, the plant is either in an active growth phase (spring) or a dormant phase (winter), minimizing stress and encouraging quick adjustment to the new pot. Avoid replanting during extreme temperatures or when the plant is flowering, as these conditions can overly stress the plant. Careful timing ensures a smoother transition and better recovery.
Choosing the Perfect Container and Substrate for Your True forget-me-not
Selecting the correct pot and soil is vital for the successful replanting of your True forget-me-not. Opt for a container that is 2.5â5 centimeters (1â2 inches) larger in diameter than the current one to provide sufficient space for root expansion. Ensure the pot has adequate drainage holes to prevent waterlogging. For soil, a mix that retains moisture yet drains well is ideal. You can use a standard potting mix with added perlite or coarse sand to enhance drainage. Proper selection of pot and soil helps maintain optimal moisture levels and provides the necessary nutrients for development.
Step-by-Step Procedure for Replanting Your True forget-me-not
Preparing Your Plant and Work Area â A Clean Beginning
Before commencing, gather all required supplies: a new pot, fresh soil mix, watering can, and gardening tools. Ensure your workspace is clean and well-lit. Water your True forget-me-not a day prior to replanting to make the soil easier to manage. Lay down newspapers or an old sheet to catch any spilled soil. Preparation is key to a smooth replanting process and helps minimize stress on the plant.
Extracting Your Plant Safely â Minimizing Root Damage
To remove your True forget-me-not from its current pot, gently tap the sides to loosen the soil. Carefully hold the plant at the base and tilt the pot to ease the plant out. If it's stuck, use a dull knife to run around the edge of the pot. Take your time to avoid harming the roots. Once out, gently shake off excess soil from the roots and inspect them for any signs of decay or disease, trimming away any damaged parts. Careful handling during removal ensures the plant's roots remain intact and healthy.
Transplanting and Post-Care â Ensuring a Smooth Adjustment
Fill the bottom of the new pot with a layer of fresh soil, creating a small mound in the center. Place your True forget-me-not over this mound, spreading the roots evenly. Fill around the roots with more soil, pressing lightly to eliminate air pockets. Water the plant thoroughly to settle the soil. Place the replanted plant in a location with suitable light and temperature. Initially, keep it out of direct sunlight to reduce transplant shock. Proper transplanting and aftercare provide a conducive environment for the plant to establish itself quickly.
Aftercare Advice: Helping Your True forget-me-not Flourish Post-Replanting
Watering Instructions â Maintaining Moisture without Over-saturating
Post-replanting, it's crucial to water your True forget-me-not correctly. Keep the soil consistently moist but not waterlogged. Allow the top layer of soil to dry out before the next watering. Overwatering can lead to root rot, so ensure excess water drains out from the pot. Adjust your watering schedule based on the plant's response and the season. Proper watering practices are essential for the plant's recovery and continued growth.
Light and Placement â Discovering the Ideal Spot
After replanting, position your True forget-me-not in a spot with partial sunlight. These plants prefer bright, indirect light but can tolerate some direct morning or late afternoon sun. Avoid placing them in harsh midday sun, which can scorch the leaves. A location with consistent temperatures and good air circulation will help your plant thrive. Finding the right balance of light and shade ensures optimal growth and flowering.
Monitoring Development and Health â What to Observe
In the weeks following replanting, closely observe your True forget-me-not for signs of new growth and overall health. Look out for healthy green foliage, new leaf sprouts, and robust root development. Be vigilant for any signs of distress, such as yellowing leaves, wilting, or root rot. Promptly address any issues by adjusting care practices, such as watering frequency or light exposure. Regular monitoring helps ensure your plant adapts well to its new environment and flourishes.


