Boost Growth: How and When to Repot Your Penwiper plant Plant
1
The best period to transplant a Penwiper plant is in the spring or winter.
2
A Penwiper plant generally requires re-potting every two to three years.
3
Properly draining soil is essential for a healthy Penwiper plant.
Why Replant Your Penwiper Specimen?
Understanding the growth requirements of Penwiper flora
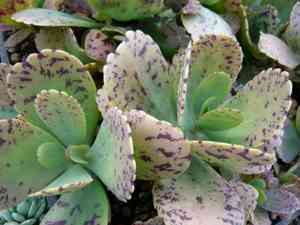
The Penwiper plant is a charming succulent recognized for its distinctive, spotted foliage resembling a penwiper. Like most succulents, it flourishes in well-draining substrate and demands ample sunlight. Over time, as your Penwiper plant matures, it will require more room to accommodate its expanding root structure. Replanting guarantees the plant has sufficient space to develop and access to fresh substrate, which replenishes nutrients and enhances overall plant vitality.
Indicators suggesting it's time for a new pot
There are several signs that indicate it's time to replant your Penwiper specimen. The most obvious indicator is when the roots begin to emerge from the drainage apertures, signifying the plant has outgrown its current container. Additionally, if you observe the soil drying out more rapidly than usual or the plant appearing top-heavy and unstable, these also suggest your plant needs a larger vessel. Finally, a lack of development despite proper care can indicate the plant has become root-bound and requires repotting.
Selecting the Appropriate Container and Substrate
Choosing the optimal pot size and material
When selecting a new container for your Penwiper plant, choose one that is 2-3 centimeters (approximately 1 inch) wider in diameter than the existing pot. This provides ample room for root expansion without overwhelming the plant. Materials such as terracotta or ceramic are ideal because they are porous, allowing for superior airflow and moisture regulation. Ensure the new pot has drainage holes to prevent water accumulation at the base, which can lead to root decay.
Recommended soil compositions for optimal development
The Penwiper plant thrives in well-draining soil, which is vital for preventing root rot. A cactus or succulent blend, typically available at garden centers, is an excellent option. These mixes usually contain components like sand, perlite, or pumice that improve drainage. If you prefer to create your own blend, combine two parts potting soil, one part perlite, and one part coarse sand for an effective, homemade succulent substrate.
The Replanting Procedure: A Step-by-Step Guide
Preparing your workspace and gathering necessary implements
Before you begin replanting your Penwiper plant, ensure you have all the required materials ready. You will need the new pot, appropriate soil mix, a small trowel or spoon, gloves, and a watering can. Start by covering your work area with newspaper or a plastic sheet to facilitate cleanup. Having everything within reach will streamline the process and reduce stress for both you and your plant.
Detailed repotting instructions
Begin by carefully extracting the Penwiper plant from its current pot, gently loosening the soil around the roots. If the plant is root-bound, you might need to carefully ease out the roots with your fingers. Once removed, inspect the root system; prune any dead or damaged roots with sterilized shears. Place a mesh or small stone over the new pot's drainage hole to prevent soil from escaping. Add a layer of soil mix to the bottom of the pot, position the plant, and fill in around it with more soil, pressing down lightly to eliminate air pockets. Water the plant lightly to help the soil settle.
Post-repotting care: Ensuring a smooth adjustment
After replanting your Penwiper plant, place it in a shaded location for a few days to help it acclimate to the new pot. Initially, avoid direct sunlight, as the plant might be in shock from the relocation. Water sparingly for the first week, allowing the roots to establish in the new soil. Gradually return the plant to its usual sunny spot and resume regular care; a proper aftercare regimen is crucial for the plant's recovery and continued growth.
Common Issues and Solutions in Replanting Penwiper Plant
Addressing root decay and other potential problems during repotting
Root decay is a common problem that can arise during repotting if the plant is overwatered or placed in poorly draining soil. To prevent this, always use well-draining soil and pots with drainage holes. If you discover root rot while repotting, trim away the affected roots and allow the healthy ones to dry out before replanting. Monitoring moisture levels and avoiding excessive watering can help prevent future occurrences.
Advice for handling delicate root systems and foliage
The roots and leaves of a Penwiper plant can be quite fragile, so handle the plant gently during repotting to prevent damage. Use clean tools to minimize the risk of introducing diseases or pests. If you need to manipulate the roots, do so slowly and carefully. When placing the plant into its new pot, ensure the roots are spread out evenly to promote healthy growth. Providing a stable, nurturing environment will help the plant adapt quickly to its new home.


