How to Prune Queen palm?
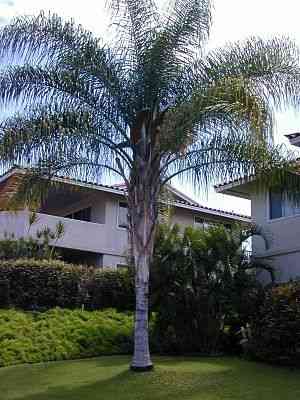
This majestic tropical palm, distinguished by its elongated, elegant fronds and sleek trunk, flourishes with little upkeep. Essential trimming methods for queen palm entail excising deceased or discolored fronds, seed clusters, and floral stems to preserve its well-being and visual appeal. The most suitable time for trimming is in late winter or early spring, ensuring no harm comes to emerging tissues. Trimming accentuates the tree's inherent shape, boosts its vitality, and averts potential dangers from falling matter. Always sanitize implements to inhibit the dissemination of pathogens.
What Are the Benefits of Pruning Queen Palm?
What Are the Benefits of Pruning Queen Palm?
Trimming queen palm promotes robust development and maintains its graceful shape. By selectively removing dead or overgrown fronds, queen palm's energy is redirected towards healthy growth, lowering disease risk and ensuring a tidy appearance.
What Is the Best Time for Pruning Queen Palm?
What Is the Best Time for Pruning Queen Palm?
These periods are considered ideal for trimming queen palm as they coincide with the plant's dormant phase, occurring before its main growth cycle begins. During this time, the plant's sap flow is reduced, which minimizes stress on the plant and prevents excessive sap loss, making it an optimal time for recovery. Furthermore, pruning prior to the spring growth spurt allows for better wound healing and enables the plant to channel its energy into producing new, healthy growth instead of sustaining old or potentially diseased branches. This timing also avoids disrupting the plant's flowering or fruiting cycles, which typically happen later in the year. By adhering to these guidelines, gardeners can help ensure the vitality and aesthetic form of queen palm, while minimizing potential harm to its health and productivity.
What Tools Do I Need to Prune Queen Palm?
Pole Saw
To reach higher fronds due to the queen palm's elevated height, which can render standard pruning tools ineffective for the upper sections of the palm.
Hand Pruners
For removing small, dead or dying fronds and flowers near the ground, as these tools offer precise cuts with minimal effort.
Lopper
When fronds are within arm's reach but require more cutting power, a lopper provides the necessary leverage to cut through thicker stems.
Chainsaw
For efficiently cutting through thicker fronds and trunks if needed, especially in mature queen palm specimens or during tree removal. This should only be used with appropriate safety gear and training.
Safety Gear
Crucial for preventing injuries during pruning, including gloves, safety glasses, and a hard hat, particularly given the height and size of the queen palm.
Pruning Saw
For medium-sized fronds and stems that are not easily managed by hand pruners or loppers, providing a portable and effective cutting tool.
How to Prune Queen Palm
Step1: Pruning Preparation
Gather the necessary tools for trimming queen palm, including sharp pruning shears, a saw for larger fronds, gloves, and safety goggles to protect against sharp frond tips and falling debris.
Step2: Frond Inspection
Examine queen palm for dead, brown, and damaged fronds. These typically hang below the horizontal plane, forming what is known as the 'skirt'. Healthy green fronds growing upwards should not be removed.
Step3: Removing Dead Fronds
Begin by removing the dead fronds. Make clean cuts where the frond stemâalso called the petioleâmeets the trunk. Avoid cutting into the trunk, as this can create wounds that may attract pests and diseases.
Step4: Cutting Brown Fronds
Continue removing brown fronds using the same technique as for dead fronds. Ensure each cut is clean and precise to prevent damage to queen palm's trunk and healthy fronds.
Step5: Trimming Damaged Fronds
Carefully remove any damaged fronds that are visibly broken, split, or wind-damaged using the appropriate tools. If only a portion of the frond is damaged, remove only that section, leaving the healthy part of the frond intact.
Step6: Tool Sanitization
Sanitize cutting tools between cuts with alcohol or a 10% bleach solution to prevent the spread of disease from one frond to another.
Step7: Frond Disposal
Properly dispose of removed fronds as they can harbor pests and fungal spores that might infect queen palm if left nearby.
Step8: Cleanup
Finish by clearing any remaining leaf debris around queen palm. This will help maintain a neat appearance and deter pests.
Step9: Post-pruning Monitoring
Monitor queen palm after trimming for signs of stress or disease. Watch for excessive wilting or yellowing of fronds, which may indicate over-pruning or shock.
Post-Pruning Care for Queen Palm
Post-Pruning Care for Queen Palm
Immediately after trimming queen palm, water thoroughly to reduce stress. Ensure queen palm is in a stable environment with indirect light, ideal humidity (40-60%), and warm temperatures (between 70-90°F). Begin a fertilization regimen with a balanced, slow-release palm fertilizer to promote recovery. Monitor queen palm for wilted fronds or oozing cuts, which can indicate stress or infection. If such symptoms are observed, reduce environmental stress and consult a specialist. Consistent care ensures queen palm's healthy regrowth.
Common Pruning Mistakes with Queen Palm
Avoid Over-Pruning to Prevent Pencil Point Effect
Excessive trimming of fronds can lead to the 'pencil point' effect, severely reducing queen palm's ability to photosynthesize. This can significantly slow growth or even make the tree vulnerable to diseases.
Do Not Remove Healthy Green Fronds
Removing green fronds instead of only the dead or dying ones can be harmful to queen palm's health. Green fronds are vital for photosynthesis and energy production for the tree.
Trim Fronds Away from Trunk to Avoid Damage
Trimming too close to the trunk can damage queen palm's trunk and create entry points for pests and diseases. It is crucial to avoid cutting the frond too near the base.
Sterilize Pruning Tools to Prevent Disease
Failing to sterilize pruning tools can introduce diseases to queen palm. Always use clean and sterilized tools to prevent the spread of disease.
Prune in Dry Conditions to Reduce Disease Risk
Pruning during wet conditions can increase the likelihood of disease spread. Always trim queen palm during dry weather conditions if possible.
Common Pruning Tips for Queen Palm
Remove Only Completely Brown Fronds
Only remove fronds that are entirely brown, as this indicates they are dead and no longer contributing to queen palm's growth or health. This approach places less stress on the tree and ensures enough fronds remain for photosynthesis.
Cut Fronds 2-3 Inches from Trunk
When trimming queen palm, cut each frond at least 2-3 inches away from the trunk to prevent potential damage to the trunk and minimize the risk of disease.
Use Sharp, Clean Tools for Precise Cuts
Use sharp, clean tools for pruning to make precise cuts and avoid tearing queen palm's fronds, which can lead to unnecessary stress or infection.
Recycle Pruned Fronds as Mulch or Organic Waste
Recycle trimmed fronds from queen palm as organic waste or use them as mulch around the base of the tree. They can provide nutrients as they decompose and also help retain soil moisture.
Monitor for Distress Signs after Pruning
Monitor queen palm for any signs of distress after pruning, such as slowed growth or unusual leaf discoloration, to detect and address any issues early.


