How to Prune Mexican plum?
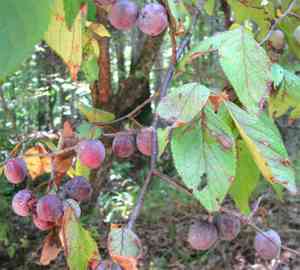
A deciduous tree featuring aromatic white-pink flowers, mexican plum thrives with trimming to preserve its well-being and visual appeal. The most effective time for pruning is in late winter or early spring, while the tree is dormant but before new shoots emerge. Essential methods involve excising dead or ailing wood, reducing dense branches to enhance light exposure and air movement, and forming the crown. Judicious pruning aids in generating abundant blooms, warding off illnesses, and fostering a sturdy framework.
What Are the Benefits of Pruning Mexican Plum?
What Are the Benefits of Pruning Mexican Plum?
Trimming mexican plum promotes robust development and maintains its desired form. It ensures a sturdy framework, enhancing air circulation and sun exposure, crucial for healthy growth and abundant blooms or fruit.
What Is the Best Time for Pruning Mexican Plum?
What Is the Best Time for Pruning Mexican Plum?
Pruning mexican plum in late winter and early spring is optimal, typically before the plant exits dormancy and new growth commences. This timing allows fresh cuts to mend quickly with the start of the growing season, minimizing stress on mexican plum. Furthermore, during dormancy, the absence of foliage offers a clear view of the plant's structure, enabling more precise cuts. Pruning at this time aids in preserving the plant's intended shape, eliminating any dead or diseased wood, and fostering healthy growth and prolific flowering in the upcoming season. It also prevents sap loss, which is usually more prevalent in warmer weather, thereby safeguarding the plant's vitality. Adhering to these guidelines can optimize the health and aesthetic appeal of mexican plum.
What Tools Do I Need to Prune Mexican Plum?
Hand Pruners
Essential for making clean cuts on smaller branches of mexican plum, typically under 3/4 inch in diameter. Perfect for shaping and removing dead or diseased wood without harming the plant.
Loppers
Featuring longer handles, these provide leverage for cutting branches up to 2 inches thick and are ideal for reaching into the canopy of mexican plum to trim without causing undue stress to the plant.
Pruning Saws
Required for branches exceeding 2 inches in thickness that hand pruners and loppers cannot manage. The saw enables precise cuts on mexican plum, reducing damage and ensuring healthy regrowth.
Pole Pruners
Useful for cutting branches that are out of reach on a taller specimen of mexican plum. They help maintain the tree's shape without needing ladders, enhancing safety during the pruning process.
Hedge Shears
Though not typically used for mexican plum, they can be appropriate if the tree has been shaped into a hedge; suitable for trimming small, leafy branches to maintain the desired hedge form.
Gardening Gloves
Protect hands from thorns, rough bark, and sap of mexican plum, providing a better grip on tools and branches.
Cleaning Supplies
To prevent disease transmission, tools should be cleaned after use on mexican plum, especially if cutting diseased wood. Cleaners like alcohol or a bleach solution can be utilized.
How to Prune Mexican Plum
Step1: Safety Preparations for Pruning
Safety preparation: Wear protective gloves and safety goggles. Ensure all pruning tools are clean and sharp to prevent disease spread and make precise cuts.
Step2: Optimal Pruning Timing
Best time to prune: Prune mexican plum during late winter to early spring, before new growth begins. This timing allows wounds to heal quickly without exposing the tree to harsh mid-winter conditions.
Step3: Identification of Dead Branches
Identify dead wood: Look for branches that lack buds, are brittle, and appear dull and lifeless. These branches will not bend if gently flexed.
Step4: Pruning Dead Branches
Prune dead wood: Make clean cuts with pruning shears or a saw, depending on branch thickness, just outside the branch collar. The branch collar is the swollen tissue where the branch meets the main trunk or another large branch.
Step5: Spotting Diseased Limbs
Identify diseased limbs: Look for limbs showing signs of disease such as discoloration, unusual growths, or visible pests. These symptoms may indicate a need for removal to prevent disease spread.
Step6: Removing Diseased Limbs
Prune diseased limbs: Make cuts well below affected areas, ensuring complete removal of the diseased portion. If the entire limb is affected, remove it at its origin using the same technique as with dead wood.
Step7: Finding Broken Branches
Identify broken branches: Locate any branches damaged by weather, animals, or other external forces. Broken branches may hang loosely or have a sharp, unnatural break.
Step8: Trimming Broken Branches
Prune broken branches: Trim back to the nearest lateral branch, bud, or to the main trunk if necessary. If the break is halfway through a limb, make a clean cut to remove the entire damaged section.
Step9: Tree Shaping and Canopy Management
Shaping mexican plum: After removing dead, diseased, and broken branches, you can shape mexican plum for aesthetic purposes. However, avoid over-pruning. Generally, no more than 25% of the canopy should be removed in a single season.
Step10: Disinfection of Pruning Tools
Disinfect tools: After pruning, disinfect all cutting tools with a solution of 1 part bleach to 9 parts water to prevent disease spread to other plants.
Step11: Care After Pruning
Post-pruning care: Water mexican plum deeply after pruning to help alleviate stress on the tree. Apply mulch around the base of mexican plum without letting it directly touch the trunk to retain soil moisture and provide nutrients.
Post-Pruning Care for Mexican Plum
Post-Pruning Care for Mexican Plum
Following pruning, mexican plum should be situated in a spot with ample light but shielded from intense direct sunlight. Optimal recovery necessitates consistent humidity and avoiding extreme temperatures. Begin a fertilization regimen with a balanced slow-release fertilizer to encourage healing and growth. Regularly inspect the prune site for signs of distress, such as discoloration or oozing, indicating infection. Should symptoms appear, promptly apply a suitable fungicide or bactericide and adjust care as needed to address plant stress.
Common Pruning Mistakes with Mexican Plum
Over-pruning: Stress and Low Flowering
Excessive pruning, which can stress mexican plum and result in poor growth and reduced flowering.
Improper Branch Cutting: Collar Damage
Cutting branches flush against the trunk, which can harm the collar and lead to disease.
Pruning in Disease-Prone Periods
Pruning during times of high disease risk, which can expose mexican plum to infections.
Using Dull or Dirty Pruning Tools
Employing dull or unclean tools that create rough cuts and heighten the risk of disease transmission.
Ignoring Dead or Diseased Wood Removal
Failing to remove dead or diseased wood, which can impede mexican plum's overall health and vigor.
Common Pruning Tips for Mexican Plum
Clean, Sharp Cuts for Quick Healing
Utilize clean, sharp tools to make precise cuts that mexican plum can heal from quickly, reducing disease risk.
Angled Cuts Above Buds for Outward Growth
Ensure cuts are made at an angle just above a bud facing away from the plant to encourage outward growth.
Thinning for Air Circulation and Disease Prevention
Thin out crowded branches to ensure good air circulation, which helps prevent disease in mexican plum.
Prompt Removal of Dead or Diseased Branches
Prune out any dead, damaged, or diseased wood as soon as it's noticed to maintain mexican plum's health.
Cautious Pruning to Retain Natural Shape
Preserve the natural shape of mexican plum by being careful not to over-prune; aim to remove no more than one-third of the total growth.



