How to Prune Garlic chives?
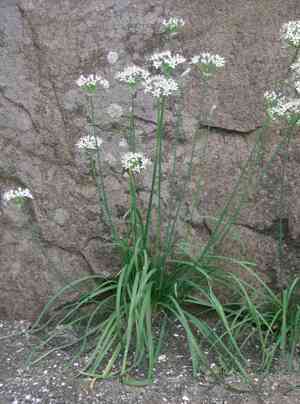
This enduring herb features broad, aromatic foliage and star-shaped, pale flowers. For garlic chives, trim away one-third of the mature leaves to encourage fresh development. Excising flower stems boosts leaf generation. Perform pruning in early spring prior to vigorous growth or in late summer following blooming. Eliminate compromised or ailing leaves at any point. Advantages of pruning encompass heightened plant vitality, better air movement, and avoidance of self-propagation.
Advantages of Trimming Garlic Chives
Advantages of Trimming Garlic Chives
Trimming garlic chives promotes robust development and maintains its form. This is crucial for fostering dense foliage and preventing uncontrolled spreading, aligning with its natural growth patterns and visual appeal in gardens.
Optimal Time for Trimming Garlic Chives
Optimal Time for Trimming Garlic Chives
Trimming garlic chives in early spring is best as it prepares the plant for the upcoming growing season by removing any dead or damaged leaves that have accumulated over the winter, thereby encouraging healthier new growth. Additionally, cutting back in late summer is beneficial as it helps manage the plant's size, removes faded flowers to stimulate new blooms, and can also encourage a fresh flush of leaves that can be harvested before the end of the growing season. These specific periods ensure that garlic chives has sufficient time to recover and establish growth before the stress of extreme weather conditions, such as winter cold or summer heat, maximizing both plant vitality and yield.
Necessary Tools for Trimming Garlic Chives
Hand Shears
Hand shears are perfect for shaping and trimming garlic chives, allowing for accurate cuts without harming the delicate leaves and stems.
Scissors
A sharp pair of scissors can be utilized for harvesting garlic chives or performing minor trimming, which is helpful for maintaining plant health and stimulating new growth.
Bypass Pruners
Bypass pruners are suitable for cutting through thicker garlic chives foliage or flower stalks, as their design enables clean, close cuts without crushing plant tissues.
How to Trim Garlic Chives
Step1: Pre-Pruning Health Assessment
Evaluate the overall health of garlic chives before beginning the trimming process. Ensure the plant is actively growing and not dormant to better withstand pruning stress.
Step2: Prepare Sanitized Trimming Tools
Gather sharp, clean pruning shears or scissors for precise cuts. Disinfect tools with a diluted bleach solution or rubbing alcohol to prevent disease transmission.
Step3: Identify Yellowed Leaves
Locate the yellowed leaves on garlic chives. These are typically older and may be found at the plant's base. They might indicate nutrient deficiencies, overwatering, or simply natural aging.
Step4: Carefully Remove Yellowed Leaves
Cut the yellowed leaves at their base where they emerge from the main clump, being careful not to harm new shoots or green, healthy leaves. Use a single, clean cut for each yellow leaf.
Step5: Spot Withered Stems
Identify withered stems, which often appear dry, brittle, and brown. These are usually old flower stalks that have completed their life cycle or stems damaged by environmental factors.
Step6: Properly Trim Withered Stems
Trim withered stems near their base, just above the point where new growth might be emerging. Be careful to preserve any nearby new stems that are healthy and green.
Step7: Clear Trimming Debris
After removing unwanted yellowed leaves and withered stems, collect and dispose of all trimming debris. This helps prevent the spread of pests and diseases.
Step8: Readjust Soil and Water Plant
Lightly compact the soil around garlic chives if it was disturbed during trimming, and thoroughly water the plant to aid its recovery from the process.
Step9: Observe Plant Post-Trimming
Monitor garlic chives over the next few days to ensure it responds well to trimming. If additional yellowed leaves or withered stems appear, repeat the above steps as needed.
Step10: Fertilize After Trimming
Consider fertilizing garlic chives after trimming to replenish nutrients and encourage healthy new growth, especially if yellow leaves indicated a nutrient deficiency.
Care for Garlic Chives After Trimming
Care for Garlic Chives After Trimming
Following the trimming of garlic chives, ensure immediate adequate watering to help reduce stress and support recovery. Maintain a balance of sunlight and shade, avoiding extreme temperatures, and keep the surrounding humidity moderate. Apply a balanced, slow-release fertilizer to replenish nutrients, encouraging vigorous growth. Regularly inspect garlic chives for any signs of distress or infection, represented by discolored foliage or wilting. If symptoms are present, adjust care and consult a plant health expert.
Common Trimming Errors with Garlic Chives
Unchecked Flower Stalks Lead to Energy Waste
Failing to remove the flower stalks of garlic chives after blooming, which can lead to unwanted seeding and energy diversion from foliage growth.
Excessive Trimming Damages Plant Crown
Cutting back garlic chives too severely or too close to ground level, potentially harming the plant crown and reducing its vitality.
Overlooked Yellowed Leaves Promote Disease
Ignoring the removal of yellowed or dead leaves, which can encourage disease and diminish the aesthetic appeal of garlic chives.
General Trimming Advice for Garlic Chives
Base Cutting Spent Flower Stalks Boosts Foliage
Remove spent flower stalks by cutting them at the base to encourage garlic chives to produce new, flavorful leaves and prevent self-sowing.
Clean, Sharp Shears Ensure Healthy Cuts
Use clean, sharp shears to make precise cuts on garlic chives and avoid tearing or bruising the leaves, which can make the plant vulnerable to diseases.
Regular Deadheading Encourages Fresh Growth
Regularly deadhead garlic chives by removing old foliage to promote fresh growth, keeping the plant looking neat and healthy.


