How to Propagate Winter daffodil?
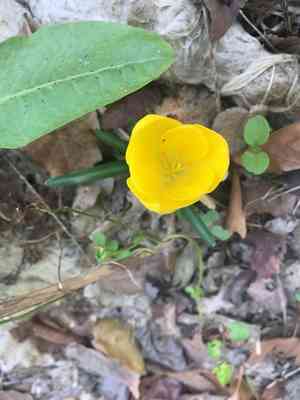
Sternbergia lutea is a perennial bulb that flourishes in sun-drenched locations with soil that drains effectively. Enthusiasts of Sternbergia lutea should choose tuber separation, the most successful method for propagation, carefully dividing clumps once the leaves have withered. Verify that every new segment possesses a minimum of one growing point. Replant them at their initial depth, and arrange them with adequate spacing for future development.
Optimal Time for Winter Daffodil Propagation
Propagation Method
Utilize The Tubers
Propagation Period
Spring
Tools for Winter Daffodil Propagation
Garden Trowel
A garden trowel is crucial for excavating and lifting winter daffodil tubers without harm. Its slender blade aids in carefully loosening soil around tubers, minimizing root disturbance.
Gardening Gloves
Gardening gloves are essential for hand protection when handling winter daffodil tubers, especially in rocky or hard soil. They also help prevent skin irritation from soil contact.
Sharp Knife or Shears
A sharp knife or shears are vital for cleanly dividing any tubers that require separation. This ensures a smooth cut, reducing tuber damage and promoting quicker healing and improved post-propagation growth.
Labeling Stakes and Marker
Labeling stakes with a permanent marker can be used to identify newly planted winter daffodil tubers. This is particularly important for tracking growth and ensuring correct identification across different seasonal appearances of winter daffodil.
Watering Can with a Fine Rose
A watering can with a fine rose is recommended for gently irrigating newly planted or propagated winter daffodil tubers. This tool delivers a soft spray that won't disturb soil or expose tubers, protecting against desiccation or root exposure.
Post-Propagation Care for Winter Daffodil
Post-Propagation Care for Winter Daffodil
After propagation, winter daffodil requires a sunny spot with good drainage to flourish. Water plants sparingly as winter daffodil is drought-tolerant and needs little moisture. Fertilization is usually unnecessary, but a light bulb fertilizer application can be given in early spring when growth starts. As foliage dies back after late spring or summer flowering, reduce watering and let bulbs rest until the next growth cycle. Protecting bulbs from excessive winter moisture helps prevent rot.
Common Errors to Avoid When Propagating Winter Daffodil
Overwatering
Excessive watering of winter daffodil can lead to root rot, as the bulbs prefer drier conditions during their dormant phase.
Deep planting
Planting winter daffodil bulbs too deep may hinder their emergence or delay growth due to excessive soil cover.
Ignoring pots drainage
Cultivating winter daffodil in containers without proper drainage can cause water accumulation around roots, fostering fungal diseases.
Bulb damage
Rough handling during the separation of winter daffodil bulbs can injure them, impairing their ability to grow and propagate successfully.
Neglecting spatial requirements
Insufficient spacing between winter daffodil bulbs during planting can lead to nutrient competition and impede proper development.
Advice for Propagating Winter Daffodil
Gentle separation
Carefully detach winter daffodil offsets from the parent bulb, ensuring each offset retains a portion of its root system for sustenance.
Appropriate depth
Plant winter daffodil bulbs at the correct depth, typically two to three times the bulb's height.
Soil composition
Utilize well-draining soil for winter daffodil to prevent water from pooling around the bulbs.
Balanced fertilization
Apply a balanced fertilizer to winter daffodil after planting to encourage robust root development without over-fertilizing, which can harm the plant.
Spatial arrangement
Space winter daffodil bulbs adequately apart to allow for growth and prevent overcrowding.



