How to Propagate Spring squill?
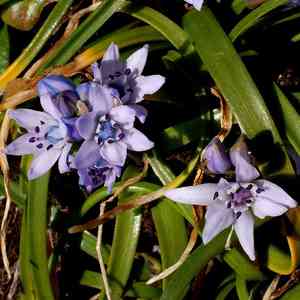
The reproduction of spring squill is efficiently achieved through its corms. For optimal development, carefully detach the corms from the mature specimen while it is inactive, ensuring no harm comes to them. Choose vigorous and sound corms for transplanting into a porous substrate that replicates their natural environment. Place them at a shallow depth, just beneath the soil surface, which assists in their initial safeguarding and moisture preservation.
Optimal Time for Spring Squill Propagation
Method of Propagation
Utilize The Tubers
Propagation Period
Spring
Tools Required for Spring Squill Propagation
Sharp knife or scalpel
A keen knife or scalpel is vital for making clean cuts through the tuberous roots of spring squill without causing undue harm. Precise incisions help deter disease and encourage quicker healing and root formation.
Garden trowel
Employed for carefully excavating the plant during the tuber division process. A garden trowel with a slender, sharp blade is particularly useful for lifting spring squill without disturbing adjacent plants or damaging the tubers.
Potting mix
A potting mixture that drains well and is rich in nutrients supports vigorous growth after propagation. For spring squill, a blend containing sand or perlite improves drainage, which is crucial for their well-being and minimizing the chance of root rot.
Pots or trays
These are necessary for planting the separated tubers. Using pots or trays allows for regulated soil conditions and easier management of the young plants until they are established and ready for outdoor transplanting.
Label
Labels are important for tracking propagation dates and any specific care instructions. Labeling helps ensure that spring squill receives appropriate care throughout its propagation and growth cycle.
Watering can with a gentle spray
A soft spray is important for moistening the potting mix without overwatering or dislodging the newly planted tubers of spring squill. It promotes ideal moisture levels, essential for root development and plant establishment.
Post-Propagation Care for Your Spring Squill
Post-Propagation Care for Your Spring Squill
Once spring squill is established, water sparingly as it prefers well-drained conditions. During the active growth period, if rainfall is scarce, additional watering may be necessary. Avoid excessive watering to prevent root rot. Fertilization is generally not required, but a light application of a balanced fertilizer at the start of the growing season can encourage healthier growth. Finally, shield spring squill from extreme temperatures and frost, providing cover or mulch if needed.
Common Errors to Avoid When Propagating Spring Squill
Overwatering
Providing too much moisture can lead to root rot in spring squill, which thrives in well-drained soil. Overwatering deprives roots of oxygen, preventing nutrient absorption and eventually causing the plant to wilt and perish.
Using dense soil
Employing compact or clay-heavy soil can impede the root development of spring squill. Dense soil hinders proper water drainage and restricts adequate root expansion, stunting the plant's growth.
Deep planting
Spring squill's bulbs should not be buried too deeply as this can hinder their ability to sprout effectively. Deep planting may result in delayed emergence or a complete failure to sprout.
Advice for Propagating Spring Squill
Well-draining soil
Utilizing a well-draining soil mix enhances the health of spring squill by preventing water accumulation around the roots, thereby reducing the risk of root diseases. This provides an optimal environment for root growth and nutrient uptake.
Shallow planting
Spring squill's bulbs flourish best when planted superficially. This positioning aids in the emergence and health of the shoots by reducing the energy the plant needs to initiate growth.
Adequate spacing
Providing sufficient room between each spring squill bulb ensures better air circulation and light exposure, which is crucial for the plant's development. Proper spacing can prevent disease spread and foster a robust growth environment.



