How to Propagate Chaparral currant?
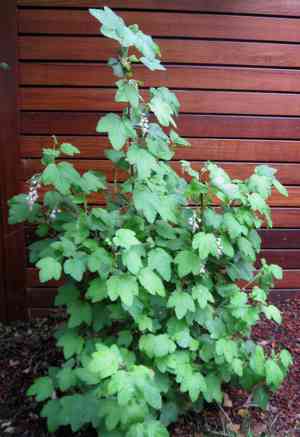
Ribes malvaceum flourishes when reproduced via cuttings. Initiating with robust stem sections encourages superior root formation. Employ a rooting stimulant to boost root development and embed them in a porous soil blend to avert root decay. Guarantee steady hydration and supply gentle, filtered sunlight until roots are firmly established, subsequently allowing for their relocation to the permanent site.
Optimal Time for Chaparral Currant Propagation
Propagation Method
Cutting
Propagation Period
Autumn,Winter
Tools for Chaparral Currant Propagation
Sharp Pruning Shears
Essential for clean, precise cuts during chaparral currant propagation, sharp shears prevent tissue damage, promoting better healing and rooting. Clean cuts minimize disease risk and stress, vital for the plant's health and successful rooting.
Rooting Hormone
Available as powder, gel, or liquid, rooting hormone significantly boosts rooting success for chaparral currant cuttings. Applying it to the fresh cut base stimulates faster root growth than untreated cuttings, increasing the percentage of successful root establishment for healthy plant development.
Sterile Potting Mix
Crucial for chaparral currant propagation, sterile potting mix prevents pathogens from harming vulnerable cuttings. It provides a clean, controlled environment, reducing soil-borne disease risk and fostering root growth. Choose a lightweight, well-draining mix for chaparral currant's specific moisture needs during early root development.
Propagation Tray with Humidity Dome
A propagation tray with a humidity dome creates an ideal environment for chaparral currant cuttings by maintaining high humidity and stable temperatures. This setup mimics a greenhouse, preventing cuttings from drying out before rooting. The dome also protects against pests and diseases while allowing light, essential for growth.
Chaparral Currant Propagation Guide
Propagation Difficulty
Moderately Difficult
Caring for Newly Propagated Chaparral Currant
Caring for Your Newly Propagated Chaparral Currant
After successful chaparral currant propagation, gradually acclimate rooted cuttings by removing any plastic cover. Ensure ample light, but avoid direct sun to prevent scorching. Keep soil moist, not waterlogged. As plants establish, slowly harden them off outdoors over several weeks before permanent transplanting.
Common Propagation Errors for Chaparral Currant
Over-watering during root development
Excessive moisture can cause root rot or fungal diseases, severely hindering chaparral currant's ability to establish a strong root system. Chaparral currant prefers well-draining soil, and too much water impedes proper root aeration.
Using non-sterilized tools or containers
Propagation involves delicate processes where pathogens can be introduced. Unsterilized tools or containers can introduce bacteria or fungi, leading to infections that compromise chaparral currant's growth or survival.
Ignoring soil composition
Chaparral currant thrives in well-draining, fertile soil. Using poorly drained or unsuitable soil can impede root development and water uptake, stressing the plant and potentially leading to poor growth or death.
Chaparral Currant Propagation Advice
Use healthy and disease-free cuttings
Selecting robust, disease-free cuttings ensures a higher propagation success rate. Weak or diseased cuttings may root poorly or transfer diseases to new plants, severely impacting chaparral currant's health and development.
Maintain optimal humidity
Chaparral currant benefits from a humid environment during the initial rooting phase to prevent cuttings from drying out. Covering cuttings with a plastic dome or regular misting can create necessary humid conditions without waterlogging the soil.
Adequate spacing in planting
Sufficient space between propagated cuttings allows for proper air circulation, crucial for preventing mold and fungal growth. This spacing also ensures each cutting receives adequate sunlight and nutrients, promoting stronger growth in chaparral currant.



