How to Propagate Spring madia?
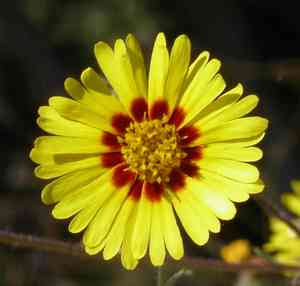
Madia elegans flourishes when reproduced by seeding. Cultivators ought to employ a growing medium that drains effectively and sustain steady hydration without oversaturation. To achieve peak development, position the seeds in a brightly lit area, guaranteeing they acquire sufficient illumination. A thin layer of earth can boost germination success, and lightly disrupting the soil's top layer will aid in controlling rivalry from other vegetation. Consistent observation and careful tending foster successful seedling emergence and vigorous maturation.
Optimal Period for Spring Madia Propagation
Propagation Method
Seeding
Propagation Season
Spring
Tools for Spring Madia Propagation
Seed trays or flats
Seed trays are vital for the initial planting of spring madia's seeds. These containers aid in uniform seed distribution and offer ample room for early development. They enable gardeners to manage numerous seeds efficiently, boosting germination rates by maintaining consistent moisture and temperature.
Vermiculite or perlite
Lightweight and porous, vermiculite or perlite is essential for enhancing aeration and moisture retention in the growing medium for spring madia. Incorporating these materials into the seed starting mix helps prevent soil compaction, supports proper root development, and ensures effective drainage, critical for the delicate initial stages of spring madia's growth.
Fine mist spray bottle
A spray bottle that produces a fine mist is crucial for watering spring madia seeds without disturbing them. The gentle mist ensures that seeds and young sprouts receive sufficient moisture without being dislodged or buried deeper, which could impede their germination and growth.
Heat mat
Given spring madia's preference for specific temperature ranges during germination, a heat mat is advantageous. This device provides a steady heat source, which can be vital for germination, especially in cooler climates or indoor settings, helping to create an ideal germination environment.
Grow lights (optional)
For propagators starting spring madia indoors or in areas with insufficient sunlight, grow lights are an optional but highly beneficial tool. These lights help simulate natural sunlight, promoting better growth and ensuring that spring madia's seedlings develop robustly and healthily in the absence of adequate natural light.
How to Propagate Spring Madia?
Propagation Type
Simple
Caring for Newly Propagated Spring Madia
Caring for Newly Propagated Spring Madia
Post-propagation, spring madia needs full sun and well-draining soil to flourish. Avoid excessive watering, which can cause root rot. As seedlings mature, thin them to prevent overcrowding and encourage strong, healthy development. Fertilization is usually not required, but a light application of balanced fertilizer can be given in spring if growth appears slow. Regularly check for pests and diseases and treat promptly if necessary.
Common Errors to Avoid When Propagating Spring Madia
Overwatering seedlings
Excessive watering of spring madia seedlings can lead to root rot, impeding their development and overall health.
Deep seed sowing
Planting spring madia's seeds too deep can hinder germination or result in weaker seedlings due to insufficient light exposure.
Ignoring soil structure
Using a soil mix that lacks proper drainage can cause waterlogging, which is harmful to spring madia's roots and overall plant vigor.
Tips For Propagating Spring Madia
Use well-draining soil
Choosing a soil mix with good drainage ensures that spring madia's roots have a healthy environment for growth, reducing the risk of diseases like root rot.
Moderate watering
Providing a balanced amount of water encourages healthy growth without over-saturating the soil, which is crucial for the delicate seedlings of spring madia.
Surface sowing
Lightly covering the seeds of spring madia with soil or not covering them at all enhances light exposure, which is essential for optimal germination rates.



