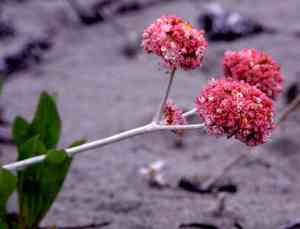
How to Propagate Seaside buckwheat?
Eriogonum latifolium flourishes across various environments, rendering it a adaptable garden specimen. Reproduction is frequently accomplished via cuttings that readily establish roots. Select robust, non-blooming stalks and embed them in a substrate with good drainage. Provide them with moderate illumination and steady hydration to encourage root formation. With diligent care and minimal disruption, fresh shoots will generally emerge in time.
Optimal Propagation Period for Seaside Buckwheat
Propagation Type
Cutting
Propagation Season
Spring,Summer
Tools Required for Seaside Buckwheat Propagation
Sharp pruning shears
Utilized for making clean, precise cuts on seaside buckwheat. Clean cuts help prevent disease and promote healthier root development during propagation.
Rooting hormone
Boosts root formation in seaside buckwheat cuttings. Dipping cut ends in rooting hormone stimulates faster and more effective root growth, increasing propagation success.
Sterilized potting mix
Offers a pathogen-free environment essential for delicate seaside buckwheat cuttings, fostering healthy root growth without soil-borne disease risks.
Propagation trays or small pots
Used for planting initial cuttings. They aid in maintaining necessary humidity and temperature, vital for successful rooting of seaside buckwheat.
Plastic covers or humidity domes
Maintain high humidity around seaside buckwheat cuttings, crucial to prevent drying out before roots can establish.
Heat mats
Provide bottom heat, which can enhance rooting success of seaside buckwheat cuttings by maintaining optimal soil temperature, encouraging quicker root growth.
Method for Propagating Seaside Buckwheat
Propagation Type
Moderately Difficult
Post-Propagation Care for Your Seaside Buckwheat
Post-Propagation Care for Your Seaside Buckwheat
Following propagation, ensure seaside buckwheat receives consistent moisture, especially during its initial growth season, to establish a strong root system. Position the plant in full sun to partial shade, replicating its natural coastal setting. While drought-tolerant once mature, regular watering during prolonged dry spells will encourage growth. Apply a slow-release fertilizer during the growing season for essential nutrients. Monitor for pests or diseases and treat as needed. Finally, as seaside buckwheat thrives in coastal conditions, it tolerates salty soils and winds, making it ideal for seaside landscapes.
Common Errors to Avoid When Propagating Seaside Buckwheat
Overwatering
Excessive watering can cause root rot, which is harmful to seaside buckwheat. Its natural habitat suggests a need for well-drained soil and moderate moisture.
Using poor draining soil
Employing a soil mix that lacks proper drainage can retain too much moisture, suffocating the plant's roots, hindering growth, and potentially leading to decay.
Overcrowding
Seaside buckwheat requires ample space for root expansion. Overcrowding can restrict access to vital nutrients and diminish overall plant vigor.
Ignoring lighting conditions
Seaside buckwheat is adapted to full sun exposure. Propagating in low light can result in leggy growth and a weak plant structure.
Advice for Propagating Seaside Buckwheat
Soil preparation
Prepare a well-draining soil mix to emulate seaside buckwheat's natural coastal environment. This fosters healthy root development and helps prevent waterlogging.
Moderate watering
Water seaside buckwheat moderately, ensuring the soil is moist but not saturated. This balance is crucial for preventing root rot while providing necessary hydration.
Spacings
Allow sufficient room between propagules to ensure each has ample space to grow without competing for resources.
Lighting
Ensure seaside buckwheat is propagated in a location with full sun exposure to facilitate healthy growth and blooming patterns.


