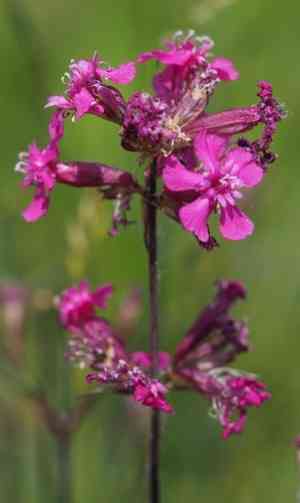
How to Transplant Sticky catchfly?
For optimal establishment of your sticky catchfly, plan its relocation during the period of natural revitalizationâgenerally from the onset of early spring through the peak of mid-spring. Select a location offering ample sunlight and soil that drains effectively to foster vigorous development. When transferring sticky catchfly, proceed gently to preserve the health of its root structure.
What Preparations are Needed Before Transplanting Sticky Catchfly?
What is the Ideal Time for Transplanting Sticky Catchfly?
The optimal period for relocating sticky catchfly is during early spring, right after the last frost. This time signifies the soil's revival and offers a perfect blend of cool dampness and increasing warmth, creating an ideal environment for sticky catchfly's roots to adapt and expand. Moving them during this window gives your sticky catchfly the full advantage of the growing season's commencement, encouraging vigorous development and a display of blossoms. Remember, assisting nature by transplanting at this moment can prompt sticky catchfly to gracefully adorn your garden with its vibrant presence.
How Much Space Should You Leave Between Sticky Catchfly Plants?
Hello, gardening enthusiast! When transplanting your lovely sticky catchfly, aim for a cozy yet ample spacing. Approximately 6 to 9 inches (15 to 23 cm) between each plant will be perfectly fine. This will provide them with sufficient room to thrive without feeling cramped.
What is the Best Soil Mix for Sticky Catchfly Transplanting?
Your sticky catchfly will flourish in soil that drains well and is rich in nutrients. Consider preparing a comfortable bed by incorporating some compost or a balanced, slow-release fertilizer. A little preparation now will give your sticky catchfly a happy beginning!
Where Should You Relocate Your Sticky Catchfly?
Sunshine is a friend to sticky catchfly! Select a location for transplanting where they will receive full sun for the majority of the day. If you're enjoying the sunshine, it's likely your sticky catchfly will be content there too.
What Equipments Should You Prepare Before Transplantation Sticky Catchfly?
Gardening Gloves
To safeguard your hands while handling soil and sticky catchfly.
Trowel
For excavating small sticky catchfly plants or making holes for relocation.
Shovel or Spade
To unearth larger sticky catchfly plants with extensive root systems.
Watering Can or Hose
To hydrate the sticky catchfly before and after relocation.
Secateurs or Pruning Shears
To trim any damaged roots or foliage.
Garden Fork
To loosen the soil surrounding the plant's rootball.
Rooting Hormone (optional)
To stimulate root development if desired.
Wheelbarrow or Plant Dolly
For effortless transportation of larger sticky catchfly plants.
Mulch
To aid in retaining soil moisture around the relocated sticky catchfly.
How Do You Remove Sticky Catchfly from the Soil?
How Do You Remove Sticky Catchfly from the Soil?
From Ground: Start by thoroughly watering the sticky catchfly to moisten the soil. Carefully dig a wide circle around the plant with a shovel or spade, being careful not to harm the root ball. Use a garden fork if the soil is dense. Gradually work beneath the plant, lifting it gently to preserve as much of the root system as possible.From Pot: Water the sticky catchfly to facilitate easier root removal. Tilt the pot sideways and tap the bottom or sides to dislodge the plant. Support the plant by its base and gently ease it out of the pot. If it resists, use a trowel to carefully pry around the inner edge.From Seedling Tray: Dampen the soil in the tray before attempting to extract a sticky catchfly seedling. Use a trowel or a dibber to gently lift the seedling by pushing up from the bottom of the cell. Handle the seedling by its leaves, not its delicate stem, to minimize damage.
Step-by-Step Guide for Transplanting Sticky Catchfly
Prep Beforehand
Ensure the new site is prepared for your sticky catchfly, with the hole pre-dug to minimize its time out of the soil.
Root Pruning
Trim any broken or excessively long roots with secateurs to encourage new growth.
Transplant Hole
Dig a hole twice as wide and as deep as the root ball. Loosen the soil at the bottom with a fork.
Plant Positioning
Place the sticky catchfly in the center of the hole at its original planting depth. Spread the roots outwards.
Soil Backfill
Gently refill the hole with soil, tamping down lightly to ensure good contact between roots and soil.
Water Deeply
Immediately after planting, thoroughly water the sticky catchfly to settle the soil and remove air pockets.
Mulch Application
Apply a layer of mulch around the sticky catchfly, keeping it away from the stem to prevent rot.
How Do You Care For Sticky Catchfly After Transplanting?
Regular Watering
Maintain consistent soil moisture, especially during the initial growing season, to help sticky catchfly establish.
Pruning
Remove any dead or damaged foliage to promote healthy, new growth on your sticky catchfly.
Monitoring
Watch for signs of transplant shock, such as wilting or yellowing, and address them promptly.
Mulching
Replenish the mulch layer as needed to preserve soil moisture and control weeds.
Feeding
After sticky catchfly has settled, consider a balanced, slow-release fertilizer to encourage vigorous growth, if not previously covered.
Troubleshooting Common Issues with Sticky Catchfly Transplantation.
How much space does sticky catchfly need when transplanting?
Space sticky catchfly 6 to 9 inches (15 to 23 cm) apart to ensure ample growing room and airflow.
When is the best time to transplant sticky catchfly?
Transplant sticky catchfly in the time window from early to mid-spring for optimal root establishment.
What soil conditions favor sticky catchfly after transplanting?
Aim for well-draining soil with a mix of compost to provide sticky catchfly with a nutrient-rich environment.
How deep should I plant sticky catchfly's roots?
Plant the roots of sticky catchfly to the same depth as in the original pot to prevent stem rot.
Can I transplant sticky catchfly during summer or fall?
It's best to avoid summer or fall; spring provides the most suitable conditions for sticky catchfly's root growth.
Why are my transplanted sticky catchfly wilting?
Wilting could be due to water stress or root disturbance. Ensure even moisture and handle roots gently.
Should I fertilize sticky catchfly after transplanting?
Wait a few weeks post-transplant before introducing fertilizer to avoid burning the developing roots of sticky catchfly.
Is full sun exposure necessary for transplanted sticky catchfly?
Sticky catchfly thrives with plenty of sunshine. Choose a spot that receives several hours of direct sun daily.
How often should I water sticky catchfly after transplanting?
Keep the soil moist but not waterlogged, watering once or twice weekly, depending on weather conditions.
What should I do if sticky catchfly doesn't flower after transplanting?
Be patient; sticky catchfly may need a season to adjust. Ensure adequate light, water, and nutrients to promote blooming.


