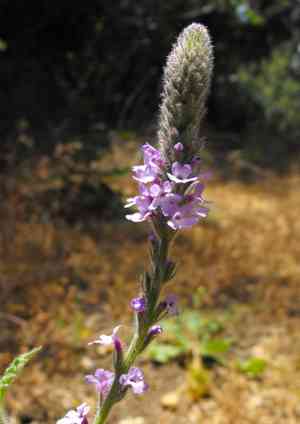
How to Transplant Western vervain?
The optimal period for transplanting western vervain spans from the latter part of spring into the initial weeks of summer, or alternatively, throughout the mild temperatures of late fall, to facilitate root development. Select a location bathed in sunlight featuring soil that drains effectively to foster robust development.
What Preparations are Needed Before Transplanting Western Vervain?
What is the Ideal Time for Transplanting Western Vervain?
The optimal period for relocating western vervain spans from the warmer days of late spring through the initial phase of summer, and again as autumn's chill sets in. These intervals offer western vervain prime growing conditions due to moderate temperatures and relatively stable weather, fostering root establishment without the strain of extreme heat or cold. By transplanting during these seasons, you provide western vervain a strong start in its new spot, leveraging the gentle seasonal shifts to encourage robust development. Utilizing these preferred transplanting windows not only supports vigorous growth but also enhances the vitality and longevity of your western vervain, ensuring a thriving presence in your garden for many years.
How Much Space Should You Leave Between Western Vervain Plants?
When preparing to move your western vervain, ensure each plant has ample room to thrive. Aim to space them approximately 18-24 inches (45-60 cm) apart. This allows the roots sufficient space to expand and the foliage enough area to absorb sunlight.
What is the Best Soil Mix for Western Vervain Transplanting?
For your western vervain, select a soil that drains well and is rich in organic material. Before transplanting, mix in a balanced, slow-release fertilizer to give your plants an excellent start. A blend with equal parts nitrogen, phosphorus, and potassium is ideal; always adhere to package directions for the correct quantity.
Where Should You Relocate Your Western Vervain?
Your western vervain will flourish in a location that receives abundant sunlight! Choose a spot where the plant can get at least six hours of direct sun daily. A sunny position will help your western vervain thrive, promoting healthy growth and blooming.
What Equipments Should You Prepare Before Transplantation Western Vervain?
Gardening Gloves
To safeguard your hands while handling soil and plants.
Shovel or Garden Spade
For digging around and beneath the plant for removal.
Hand Trowel
Used for excavating small holes or refining the new planting site.
Watering Can or Hose
To hydrate the western vervain before and after its relocation.
Pruning Shears
To trim any damaged roots or foliage.
Wheelbarrow or Garden Cart
For transporting the western vervain from one spot to another.
Measuring Tape
To determine the correct spacing between plants.
Garden Fork
To loosen the soil in the area designated for transplanting.
Mulch
To apply around the base of western vervain post-transplant for moisture retention.
How Do You Remove Western Vervain from the Soil?
How Do You Remove Western Vervain from the Soil?
From Ground: First, moisten the soil around the western vervain by watering it. Next, dig a wide trench around the plant using a shovel or spade, making sure to keep the root ball intact. Carefully use a garden fork to lift the plant from its original spot by working it under the root ball.From Pot: Water the western vervain in its container to facilitate easier root extraction. Then, turn the pot on its side and gently tap the bottom to loosen the plant. Carefully ease the plant out by its base, supporting the root ball with your hands.From Seedling Tray: Water the seedlings to keep the soil damp, which makes removing individual plants simpler. Use a hand trowel or a dibber to gently lift each western vervain seedling, taking care not to harm the delicate roots. Handle the seedlings by their leaves to avoid injuring the stems.
Step-by-Step Guide for Transplanting Western Vervain
Preparation
Ensure all necessary tools and equipment are ready and easily accessible.
Removal
Follow the appropriate removal procedure based on whether the western vervain is from the ground, a pot, or a seedling tray.
Transportation
Carefully move the western vervain to its new location using a wheelbarrow or garden cart.
Hole Digging
Excavate a hole at the transplant site that is twice as wide and the same depth as the root ball.
Placement
Position the root ball of western vervain in the hole so its top is level with the surrounding soil surface.
Fill In
Backfill the hole with the excavated soil, gently firming it in place without excessive compaction to prevent air pockets.
Water
Thoroughly water the western vervain to settle the soil around the roots and eliminate any remaining air pockets.
Mulch Application
Apply mulch around the base, leaving a small space around the stem of the western vervain to prevent rot.
How Do You Care For Western Vervain After Transplanting?
Initial Watering
Provide ample water immediately after transplanting and maintain consistent moisture for several weeks.
Observation
Regularly inspect the western vervain for signs of stress, such as wilting or discolored leaves, and address issues promptly.
Adjustments
If the western vervain is in an unsuitable location due to unforeseen conditions, be prepared to move it.
Support Structures
If the western vervain is tall or susceptible to wind damage, consider adding a stake or other support to keep it upright.
Pruning
Trim away any damaged or unhealthy-looking foliage to help the western vervain redirect its energy towards root development and new growth.
Protection
Provide protection from pests or extreme weather conditions if necessary.
Troubleshooting Common Issues with Western Vervain Transplantation.
What's the best time to transplant western vervain?
The optimal transplanting seasons for western vervain are from late spring to early summer and in late fall.
How far apart should I space western vervain when transplanting?
Space each western vervain approximately 18-24 inches (45-60 cm) apart to ensure adequate room for growth.
Why is my western vervain wilting after transplanting?
Western vervain may wilt due to transplant shock. Keep the soil moist and shield it from intense sunlight until it recovers.
How deep should I plant western vervain roots?
Plant western vervain at the same depth it was in its previous container, ensuring the top of the root ball is level with the soil surface.
What soil type is best for transplanting western vervain?
Western vervain thrives in well-draining soil rich in organic matter. Amend soil with compost if necessary.
Can I transplant western vervain on a hot day?
Avoid transplanting western vervain during hot conditions. Choose a cooler day or transplant in the evening to prevent stress.
Should I prune western vervain before transplanting?
Light pruning of damaged or overly long roots is beneficial, but avoid extensive pruning which can stress western vervain.
What watering schedule should I follow post-transplant?
Initially, water western vervain generously to settle the soil, then maintain consistent moisture, especially in the first few weeks.
How can I minimize transplant shock in western vervain?
Minimize transplant shock by keeping the roots moist, avoiding significant root disturbance, and shading the plant for a few days post-transplant.
When can I start fertilizing western vervain after transplant?
Wait until western vervain shows signs of new growth before applying a balanced fertilizer to avoid stressing the plant.


