How to Transplant Aaron's Rod?
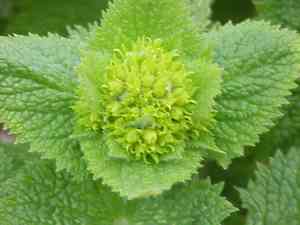
The optimal period for relocating aaron's Rod is during its peak growth phase, generally from the end of spring to the beginning of summer, which facilitates strong root establishment and adaptation. Select a location that receives ample sunlight and possesses soil with good drainage. It is crucial to note that aaron's Rod flourishes when transplanted thoughtfully, steering clear of intense sun exposure directly following the move.
Essential Preparations Before Relocating Aaron's Rod
Optimal Period for Moving Aaron's Rod?
The best time to transplant aaron's Rod is from late spring to early summer. This timeframe ensures a smooth root transition, leveraging mild weather for successful establishment. It provides your plants with the opportunity to flourish; this timing guarantees stable temperatures that help aaron's Rod settle into its new spot with minimal stress. Eager to grow, aaron's Rod will benefit from the long days and moderate nights to develop strong roots, paving the way for years of vigorous growth.
Recommended Spacing Between Aaron's Rod Plants?
When selecting a location for your aaron's Rod, allow approximately 12-18 inches (30-45 cm) between individual plants. This provides ample room for growth and development without competition for soil nutrients and sunlight.
Ideal Soil Mixture for Aaron's Rod Transplantation?
Aaron's Rod thrives in well-draining soil enriched with organic matter. Prior to planting, incorporate compost or aged manure to give your aaron's Rod a nutrient-rich start. A balanced, slow-release fertilizer will also aid in developing robust roots.
Where to Replant Your Aaron's Rod?
Choose a sunny location for your aaron's Rod! These plants flourish in areas that receive full sun for the majority of the day. A south-facing position is perfect, ensuring your aaron's Rod gets the abundant sunlight it needs to produce beautiful blooms.
Equipment Needed Before Transplanting Aaron's Rod?
Gardening Gloves
To safeguard your hands while handling soil and plants.
Spade or Shovel
For excavating the plant and preparing a new planting hole.
Watering Can or Hose
To hydrate the plant before and after its relocation.
Trowel
For more precise digging tasks and refining the planting site.
Soil Amendment (as needed)
To enrich the new planting area, based on soil analysis results.
Mulch
To help maintain soil moisture and regulate temperature after transplanting.
Wheelbarrow or Bucket
For transporting the plant and soil materials.
Pruning Shears
To trim any damaged or excessively long roots or foliage.
Garden Fork
To loosen the soil around the root ball during plant removal.
How to Extract Aaron's Rod from the Soil?
How to Extract Aaron's Rod from the Soil?
From Ground: First, water the aaron's Rod plant to moisten the soil. Dig a wide trench around the plant using a spade or shovel, ensuring the root ball remains intact. Gently work the spade beneath the root ball and carefully lift the plant from the ground.From Pot: Water the aaron's Rod plant thoroughly, then turn the pot onto its side. Gently tap the pot's sides and bottom to loosen the root ball. Carefully slide the plant out of the pot, making sure to support the stem and root ball.From Seedling Tray: Water the aaron's Rod seedlings to make the soil pliable. Use a trowel or a dibber to carefully lift each seedling from the tray, taking care to keep the soil around the roots undisturbed.
Step-by-Step Guide for Transplanting Aaron's Rod
Prepare Plant
Before attempting to move aaron's Rod, water the plant thoroughly the day prior to ensure the soil is moist, which will help protect the roots.
Digging Hole
Excavate a hole in the ground where aaron's Rod will be transplanted. The hole should be twice the width of the root ball and of equal depth to allow roots to spread.
Prepare Hole
Loosen the soil at the base of the hole with a garden fork. If necessary, incorporate soil amendments to improve soil structure.
Root Trimming
Examine the aaron's Rod's roots and trim any damaged or overly long roots with pruning shears.
Placement
Position aaron's Rod in the center of the hole. The plantâs crown should be level with the surrounding soil surface.
Refill Hole
Gradually backfill the hole with soil, gently firming the soil around the root ball to eliminate air pockets without compacting it too much.
Watering
Water aaron's Rod thoroughly after planting to settle the soil and provide moisture to the roots.
Mulching
Apply mulch around the base of aaron's Rod to conserve moisture, reduce weed competition, and maintain consistent soil temperatures.
Supports Installation
If aaron's Rod is tall or the location is windy, install stakes or other supports at this time to prevent plant damage.
Post-Transplant Care for Aaron's Rod
Immediate Watering
Right after transplanting, water aaron's Rod generously to help settle any disturbed soil and provide hydration for the roots.
Consistent Watering Schedule
Establish a regular watering routine to keep the soil around aaron's Rod consistently moist (but not waterlogged), especially during the initial growing season after transplanting.
Monitoring For Stress
Observe aaron's Rod for signs of transplant shock, such as wilting, leaf drop, or discoloration. If symptoms appear, provide additional care with watering and shading if needed.
Adjusting Supports
Check and adjust any supports or stakes as aaron's Rod grows to ensure they remain effective and do not harm the plant.
Limited Fertilization
Avoid fertilizing aaron's Rod immediately after transplanting to prevent root burn. Wait for indications of new growth, signaling the plant's recovery, before applying any fertilizer.
Resolving Common Issues with Aaron's Rod Transplantation.
How do I know the best time to transplant aaron's Rod?
The optimal period is 'late spring to early summer', allowing for robust root establishment before extreme heat or cold.
What is the ideal spacing when planting multiple aaron's Rod?
Aim for a spacing of about 12-18 inches (30-45 cm) between aaron's Rod plants to provide ample room for growth.
Why are my aaron's Rod seedlings wilting after transplant?
Wilting can be due to shock. Ensure careful handling, adequate watering, and avoid direct sun for a few days post-move.
How deep should I plant aaron's Rod seedlings?
The root ball should be level with the soil surface, sufficiently anchoring aaron's Rod without burying the stem base.
Can I transplant aaron's Rod on a hot, sunny day?
Prefer cooler, overcast days or evening hours to minimize transplant shock and hydration stress for your aaron's Rod.
What soil conditions benefit aaron's Rod post-transplant?
Well-draining soil enriched with compost helps aaron's Rod thrive. Avoid waterlogged areas to prevent root rot.
How much should I water aaron's Rod after transplanting?
Water thoroughly to settle the soil around the roots, then follow with regular watering to keep the soil consistently moist.
Should I use fertilizer immediately after transplanting aaron's Rod?
Initially, skip fertilizer as it can harm new roots. After a few weeks, a mild feeding can support growth.
My aaron's Rod looks droopy days after transplanting, is this normal?
It can be normal as aaron's Rod adjusts. Providing shade and sufficient water helps, but avoid overwatering.
What should I do to prepare aaron's Rod for winter post-transplant?
Ensure aaron's Rod is well-watered heading into fall, apply mulch to insulate roots, and refrain from fertilizing late in the season.



