How to Transplant Red feather clover?
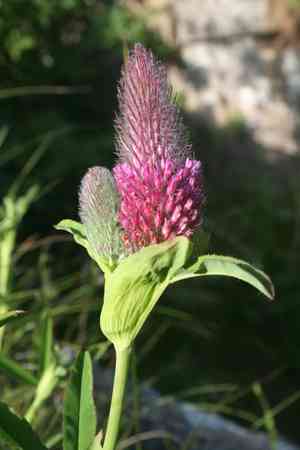
The ideal period for relocating red feather clover extends from the onset of early spring through the vitality of late spring, guaranteeing strong development. Select a location that receives full sun to partial shade, featuring soil that drains effectively, to achieve the best results.
What Preparations are Needed Before Transplanting Red Feather Clover?
What is the Ideal Time for Transplanting Red Feather Clover?
Moving red feather clover during the period from early spring's awakening until the onset of full bloom season guarantees optimal root development prior to summer. This timing allows red feather clover to develop a strong root system, crucial for enduring summer heat and dryness. During this phase, the soil is damp yet warming, which encourages healthier root growth and lessens transplant shock. The mild temperatures are gentle on red feather clover's foliage, while increasing daylight stimulates vigorous growth. By planting your red feather clover at this point, you are providing it with the best possible start in its new location, ensuring a lush, thriving presence in your garden for future seasons.
How Much Space Should You Leave Between Red Feather Clover Plants?
When relocating red feather clover, aim to provide each plant with ample individual space. A distance of 15-18 inches (38-46 cm) between each red feather clover will ensure they have sufficient room to thrive!
What is the Best Soil Mix for Red Feather Clover Transplanting?
Before settling your red feather clover into its new home, prepare a site with soil that drains well. It flourishes best with some compost or a balanced slow-release fertilizer mixed in to give it a robust beginning!
Where Should You Relocate Your Red Feather Clover?
Your red feather clover loves to absorb sunlight! Select a spot that receives full sun to partial shade, ensuring these little sun-lovers get their light requirement for most of the day.
What Equipments Should You Prepare Before Transplantation Red Feather Clover?
Gardening Gloves
To safeguard your hands while handling soil and plants.
Hand Trowel
For excavating seedlings or smaller plants from containers or trays during transplantation.
Shovel or Garden Spade
Necessary for digging up red feather clover from the ground with minimal root disturbance.
Watering Can or Hose
To hydrate red feather clover before and after transplanting to help mitigate shock.
Pruning Shears
To trim any damaged roots or leaves prior to transplanting.
Garden Fork
To loosen the soil around red feather clover in its current spot.
Wheelbarrow or Garden Cart
For moving red feather clover and soil if needed.
Mulch
To aid in retaining soil moisture and regulating temperature around the transplant site.
How Do You Remove Red Feather Clover from the Soil?
How Do You Remove Red Feather Clover from the Soil?
From Ground: First, water the red feather clover plant to moisten the soil. Then, dig a wide trench with a shovel or spade around the plant, being careful not to cut into the root ball. Use the garden fork to gently lift the root ball from the ground with care.From Pot: Water the red feather clover to facilitate easier root removal. Place your hand at the base of the plant and invert the pot, gently tapping the bottom to release the plant. If necessary, use the hand trowel to loosen the soil around the pot's edges.From Seedling Tray: Water the seedlings to simplify the transplant process. Use the hand trowel to carefully lift each red feather clover seedling, ensuring a clump of soil remains attached to protect the roots.
Step-by-Step Guide for Transplanting Red Feather Clover
Digging the Hole
Excavate a hole in the chosen spot that is twice the width of the red feather clover's root ball and equally deep.
Checking Root Health
Inspect the red feather clover's root ball for roots that are circling or girdling. If present, gently separate them or use pruning shears to make vertical cuts.
Placing the Plant
Carefully lower the red feather clover into the hole, ensuring the top of the root ball is level with the surrounding soil surface.
Backfilling Soil
Partially fill the hole with soil, firming it around the lower roots. Water thoroughly to help the soil settle, then complete the backfilling.
Applying Mulch
Spread a layer of mulch around the base of red feather clover, avoiding contact with the stem, to help conserve moisture.
How Do You Care For Red Feather Clover After Transplanting?
Watering Consistency
Water red feather clover generously immediately after transplanting and then regularly to maintain consistent soil moisture.
Observing
Monitor red feather clover for indications of stress, such as wilting or discolored leaves, and address them promptly.
Pruning
Trim any dead or dying foliage to help red feather clover prioritize establishing new roots.
Support Structures
If red feather clover is a tall variety or situated in a windy area, consider staking or providing other forms of support to prevent damage.
Troubleshooting Common Issues with Red Feather Clover Transplantation.
What's the best time of year to transplant red feather clover?
The optimal period for transplanting red feather clover is during the refreshing coolness of early to late spring.
How far apart should I plant red feather clover?
Position red feather clover approximately 15-18 inches (38-46 cm) apart to ensure adequate space for growth.
What soil conditions favor red feather clover after transplanting?
Transplant red feather clover into well-draining soil enriched with organic matter for prime growth.
Why is my transplanted red feather clover wilting?
Red feather clover may wilt if under stress. Ensure proper watering, avoid planting too deeply, and initially shield it from strong winds or excessive sun.
How much water does red feather clover need after transplanting?
Keep the soil consistently moist to help red feather clover establish, but prevent waterlogging to avoid root rot.
Should I fertilize red feather clover right after transplanting?
Wait a few weeks post-transplant before gently introducing a balanced fertilizer to help red feather clover acclimate.
Can red feather clover be transplanted on a hot sunny day?
It's preferable to transplant red feather clover on a cloudy day or during cooler hours to minimize transplant shock.
Can I mulch around my transplanted red feather clover?
Mulching aids in retaining moisture and regulating soil temperature. Apply a thin layer around red feather clover, avoiding direct stem contact.
What's the sign that red feather clover is ready for transplant?
Red feather clover is ready when roots fill the pot but are not extensively circling. Transplant gently to prevent root damage.
How do I handle transplant shock in red feather clover?
For transplant shock, keep the soil around red feather clover moist, provide shade, and refrain from fertilizing until new growth emerges.



