How to Transplant Annual thymelaea?
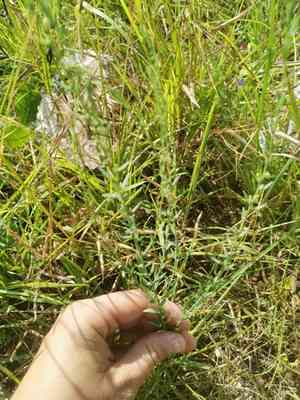
Annual thymelaea flourishes when relocated into gradually warming earth from mid-spring to late spring. Place them in a sunny, adequately drained location. Careful handling is crucial for their delicate root systems during the transfer. This period encourages vigorous development.
What Preparations are Needed Before Transplanting Annual Thymelaea?
What is the Ideal Time for Transplanting Annual Thymelaea?
The optimal time to relocate annual thymelaea is during the vibrancy of spring, specifically from mid to late spring. This timeframe offers increasing daylight and moderate temperatures, creating perfect conditions for annual thymelaea to establish its root system. Moving annual thymelaea then ensures it benefits from spring's gentle rains and rising warmth, fostering vigorous development. Furthermore, by transplanting annual thymelaea in this season, you provide it with a head start before summer's heat, allowing it to become well-rooted and resilient. A friendly reminder to all garden enthusiasts â your annual thymelaea will appreciate your choice of this period of renewed growth!
How Much Space Should You Leave Between Annual Thymelaea Plants?
Hello, gardening enthusiast! For your annual thymelaea, aim for a comfortable spacing of approximately 8-10 inches (20-25 cm) between plants. This provides each specimen ample room to thrive without overcrowding!
What is the Best Soil Mix for Annual Thymelaea Transplanting?
Soil preparation is crucial! Create an ideal environment for your annual thymelaea using well-draining loamy soil. Incorporating a balanced, slow-release fertilizer will give your plants a healthy start. Consider it a welcoming meal for your greenery!
Where Should You Relocate Your Annual Thymelaea?
Sunlight enthusiast alert! Locate a bright spot where your annual thymelaea can receive at least 6 hours of direct sunlight daily. A well-lit position helps your plant flourish and enhances your garden's appeal.
What Equipments Should You Prepare Before Transplantation Annual Thymelaea?
Gardening Gloves
To safeguard your hands while handling soil and plants.
Shovel or Garden Spade
For excavating the transplant hole and assisting in removing the annual thymelaea from its current spot.
Watering Can or Hose
To hydrate the annual thymelaea prior to and following transplantation.
Garden Trowel
For managing smaller plants or refining the planting hole.
Measuring Tape
To ensure correct spacing between transplanted annual thymelaea specimens.
Pruning Shears
For trimming any damaged roots or foliage.
Wheelbarrow or Garden Cart
To transport the annual thymelaea and soil.
Mulch
To aid in retaining soil moisture and reducing weed competition around the annual thymelaea.
How Do You Remove Annual Thymelaea from the Soil?
How Do You Remove Annual Thymelaea from the Soil?
From Ground: Irrigate the annual thymelaea to moisten the soil. Utilize a shovel or spade to dig a wide circle around the plant, being careful to preserve the root ball's integrity. Gently slide the spade beneath the roots to lift the plant from the ground.From Pot: Begin by watering the annual thymelaea to facilitate its removal. Tilt the container sideways and gently tap or squeeze its sides to loosen the root ball. Carefully slide the plant out, supporting its base and root ball.From Seedling Tray: Water the tray to dampen the soil and roots. Use a garden trowel or your fingers to carefully lift the seedling from its cell, ensuring the root ball is supported and avoiding excessive root disturbance.
Step-by-Step Guide for Transplanting Annual Thymelaea
Preparation
Water the annual thymelaea in its original location before commencing the transplanting process to minimize stress and hydrate its roots.
Digging the Hole
Excavate a hole in the new site that is twice as wide and equivalent in depth to the annual thymelaea's root ball.
Root Ball Care
Gently remove any burlap or wrapping from the root ball. If the annual thymelaea is root-bound, lightly separate the roots to encourage outward growth.
Placement
Position the annual thymelaea in the center of the hole, ensuring it stands upright and at the same depth it was previously growing.
Soil Replacement
Backfill the hole around the annual thymelaea's root ball with soil, gently firming it to eliminate air pockets without compacting the soil excessively.
Watering
Thoroughly water the annual thymelaea after planting to settle the soil and hydrate the roots. Create a small depression around the base to help direct water to the root zone.
Mulching
Apply a layer of mulch around the base of the annual thymelaea, leaving some space clear around the stem to prevent rot.
Initial Support
If necessary, provide temporary stakes or supports to help the annual thymelaea remain upright in its new location.
How Do You Care For Annual Thymelaea After Transplanting?
Watering
Regularly irrigate the annual thymelaea to maintain consistently moist soil, especially during dry periods in the weeks following transplantation.
Monitoring
Observe for indications of transplant shock, such as wilting or discolored leaves, and adjust care as required.
Pruning
Remove any dead or damaged foliage to stimulate new growth and alleviate stress on the annual thymelaea.
Support
Inspect and adjust any stakes or supports as the annual thymelaea develops to ensure stability and prevent constriction or harm.
Weeding
Keep the area surrounding the annual thymelaea free of competing weeds that could vie for nutrients and water.
Troubleshooting Common Issues with Annual Thymelaea Transplantation.
Why is my annual thymelaea wilting after transplanting?
Wilting may indicate transplant shock. Ensure careful handling and adequate watering post-transplant.
How much should I water annual thymelaea after transplanting?
Water annual thymelaea thoroughly upon transplanting, then maintain consistent moisture without saturating the soil.
When is the best time to transplant annual thymelaea?
The optimal transplanting period is from mid-spring to late spring when the weather is mild.
How far apart should I space annual thymelaea when transplanting?
Position annual thymelaea approximately 8-10 inches (20-25 cm) apart to allow sufficient room for growth.
What kind of light does annual thymelaea need after transplant?
Place annual thymelaea in a location with full sun exposure to ensure healthy growth post-transplant.
What should I do if annual thymelaea isn't growing after transplant?
Verify proper soil conditions and light; adjust watering and await signs of new growth.
Why are the leaves of annual thymelaea turning yellow after transplanting?
Yellowing leaves might signal over-watering or poor drainage. Check moisture levels and adjust as needed.
How do I prepare the soil for transplanting annual thymelaea?
Enrich the soil with compost for nutrients and ensure it drains well before planting annual thymelaea.
Can I transplant annual thymelaea during hot weather?
It's best to transplant annual thymelaea during cooler parts of the day in mild spring weather.
What size pot should I use if transplanting annual thymelaea indoors?
Select a pot with ample space for root development, roughly 1-2 inches (2.5-5 cm) larger in diameter than the root ball.



