How to Transplant Vegetable hummingbird?
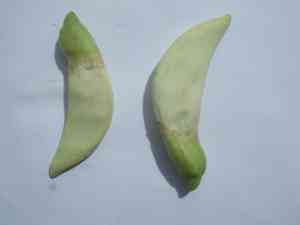
Relocate vegetable hummingbird during early spring's mild temperatures to enhance root development. Select bright locations featuring fertile, adequately draining soil. Careful acclimation is crucial for a successful transfer, guaranteeing the vigorous growth of vegetable hummingbird.
What Preparations are Needed Before Transplanting Vegetable Hummingbird?
What is the Ideal Time for Transplanting Vegetable Hummingbird?
Starting the relocation of vegetable hummingbird in the pleasant warmth of early to mid-spring promotes root development prior to summer. This timing guarantees strong growth, utilizing moderate temperatures for optimal progress.
How Much Space Should You Leave Between Vegetable Hummingbird Plants?
When moving vegetable hummingbird, ensure adequate spacing between each plant. We suggest approximately 3-4 feet (0.9-1.2 meters) apart. This allows them room to grow without excessive competition for nutrients and sunlight.
What is the Best Soil Mix for Vegetable Hummingbird Transplanting?
Before relocating vegetable hummingbird, prepare the soil with a fertile, well-draining base fertilizer. Loamy soil is perfect. Incorporating organic compost also boosts nutrient content and helps vegetable hummingbird flourish.
Where Should You Relocate Your Vegetable Hummingbird?
Select a sunny spot to plant your vegetable hummingbirdâthey love bright conditions! They require at least six hours of direct sunlight daily. Morning sun with afternoon shade is a good placement choice.
What Equipments Should You Prepare Before Transplantation Vegetable Hummingbird?
Gardening Gloves
To safeguard your hands while handling soil and the vegetable hummingbird plant.
Shovel or Spade
To excavate a wide trench around the vegetable hummingbird plant in its current and new positions.
Garden Trowel
To create a deep hole in the new spot and extract the plant from smaller containers.
Pruning Shears
For any necessary root or stem trimming of the vegetable hummingbird plant before and after the move.
Watering Can or Hose
To hydrate the soil surrounding the plant before and after its relocation.
Wheelbarrow
To transport the vegetable hummingbird plant from its original location to the new one, especially if it's a large specimen.
Gardening Fork
To gently lift the roots of the vegetable hummingbird plant.
Plant Stakes and Ties
To provide support for the vegetable hummingbird plant in windy conditions.
How Do You Remove Vegetable Hummingbird from the Soil?
How Do You Remove Vegetable Hummingbird from the Soil?
From Ground: First, water the vegetable hummingbird plant to moisten the soil. Then, use a shovel or spade to dig a wide trench around the plant, keeping the plant's root ball undisturbed. Carefully slide the shovel or gardening fork beneath the root ball to lift the plant, ensuring minimal harm. If the vegetable hummingbird plant is large, consider using a wheelbarrow for easy transport to the new site.From Pot: If the vegetable hummingbird plant is in a container, water it thoroughly. Turn the pot on its side, hold the plant at its base, and gently ease it out. Use a trowel if needed. If the plant is root-bound, carefully untangle the roots.From Seedling Tray: Water the seedling tray and then carefully lift each individual vegetable hummingbird plant with its roots and attached soil without causing damage.
Step-by-Step Guide for Transplanting Vegetable Hummingbird
Digging Hole
Create a hole deep and wide enough in the new location using your shovel or spade so that the vegetable hummingbird plant's root ball rests just below the ground level. The hole's width should be twice the size of the root ball.
Preparing Plant
Inspect the vegetable hummingbird plant, use your pruning shears to trim any damaged or excessively long roots. If the plant was root-bound in its previous pot, gently loosen the roots.
Planting
Position the vegetable hummingbird plant in the hole so that the crown is just beneath the surface level. Backfill the hole with soil and lightly firm down around the base of the plant to eliminate any air pockets.
Watering
Water the vegetable hummingbird plant thoroughly after planting.
Staking
If your vegetable hummingbird plant is tall or in a breezy spot, stake it to offer support.
How Do You Care For Vegetable Hummingbird After Transplanting?
Watering
Consistent watering is essential for the initial weeks post-transplant to encourage root development. Water the vegetable hummingbird plant when the top inch of soil dries, but avoid over-saturating.
Pruning
Remove any dead or dying foliage to redirect the plantâs energy towards new growth.
Monitor Growth
Keep a close watch on the vegetable hummingbird plant's development. Slow growth or yellowing leaves can indicate plant stress. If these signs appear, re-evaluate your care routine to ensure it meets the plant's requirements.
Frost Protection
If you reside in a region with frosts, ensure you safeguard your vegetable hummingbird plant during colder periods.
Insect and Disease Watch
Regularly inspect your vegetable hummingbird plant for indications of pests or diseases. Early detection and intervention can save your plant.
Troubleshooting Common Issues with Vegetable Hummingbird Transplantation.
When is the best time to transplant vegetable hummingbird?
The optimal period to move vegetable hummingbird is S1-S2. This seasonal window provides the most favorable growing conditions for the plant.
What is the ideal spacing when transplanting vegetable hummingbird?
For the best growth of vegetable hummingbird, maintain a distance of 3-4 feet (approximately 1-1.2 meters) between each plant.
Why is my transplanted vegetable hummingbird wilting?
Wilting can be a result of transplant shock. Keep the soil consistently moist, but prevent overwatering. Mulching can also help retain soil moisture.
How deep should the hole be for transplanting vegetable hummingbird?
The hole should be twice as wide and equal in depth to the root ball of the vegetable hummingbird. This allows roots to spread and establish easily.
What should I do if the leaves of my transplanted vegetable hummingbird are yellowing?
Yellowing leaves can indicate a nutrient deficiency. Ensure the soil has sufficient nutrients; consider using a slow-release fertilizer suitable for vegetable hummingbird.
How much sunlight does a transplanted vegetable hummingbird need?
Vegetable hummingbird prefers full sun to partial shade. Ensure your new location receives a minimum of 6 hours of sunlight daily for vigorous growth.
What type of soil is best for transplanting vegetable hummingbird?
Vegetable hummingbird thrives in well-drained soil. A blend of loamy and sandy soil rich in organic matter is ideal for this plant's overall development.
How often should I water vegetable hummingbird after transplanting?
Water vegetable hummingbird thoroughly after transplanting. Afterward, water as needed to keep the soil moist, depending on weather conditions. Excessive watering can lead to root rot.
How do I help vegetable hummingbird adjust after transplanting?
Facilitate transition, minimize transplant shock by gradually acclimating vegetable hummingbird to its new environment, and maintaining soil moisture. A layer of mulch also helps regulate soil temperature and conserve moisture.
Why isn't my transplanted vegetable hummingbird flowering?
Ensure adequate sunlight, water, and nutrients. Lack of flower production can signal stress from unsuitable conditions or a need for fertilizer. Be patient, vegetable hummingbird may require time to establish and bloom.



