How to Transplant Roundhead bulrush?
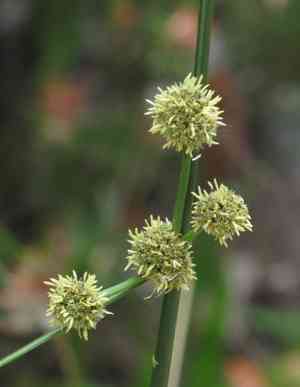
The optimal period for relocating roundhead bulrush is during nature's resurgence, guaranteeing vigorous development. Select a site that receives abundant solar exposure and possesses damp earth. Should it be necessary, enrich the ground to enhance its capacity for moisture absorption. A helpful tip: Exercise care during handling to preserve the root system.
What Preparations are Needed Before Transplanting Roundhead Bulrush?
What is the Ideal Time for Transplanting Roundhead Bulrush?
The optimal period for relocating roundhead bulrush is the spring season, offering warmer soil and mild weather perfect for root establishment. This timeframe provides a balance of rainfall and growth-promoting temperatures, aiding the transition of roundhead bulrush into its new home. By selecting this window for moving roundhead bulrush, you support its vigorous development and successful integration into the garden, ultimately ensuring a lush, healthy plant.
How Much Space Should You Leave Between Roundhead Bulrush Plants?
When getting ready to transplant your roundhead bulrush, ensure each plant is spaced approximately 1 foot (0.3 meter) apart. This will provide your roundhead bulrush ample room to grow and flourish happily!
What is the Best Soil Mix for Roundhead Bulrush Transplanting?
Preparing the perfect soil for your roundhead bulrush would involve a loam-based mixture with some added compost. Be sure to incorporate a foundational fertilizer to supply the necessary nutrients for your roundhead bulrush to thrive. Slow-release fertilizers are an excellent choice for beginners!
Where Should You Relocate Your Roundhead Bulrush?
Place your roundhead bulrush in a spot where it receives plenty of sunlight. However, make sure it's not exposed to intense afternoon sun – a location that gets morning sun would be perfect. This will support the healthy growth of your roundhead bulrush!
What Equipments Should You Prepare Before Transplantation Roundhead Bulrush?
Gardening Gloves
These will shield your hands from dirt and potential injury while handling the roundhead bulrush plant.
Spade or Shovel
To dig into the ground and carefully extract the plant from its original spot without harming its root system.
Garden Trowel
This useful tool is ideal for digging smaller holes when relocating seedlings or small roundhead bulrush plants.
Watering Can or Hose
For supplying essential moisture before and after the transplanting process.
Wheelbarrow
Helpful for moving if the roundhead bulrush plant is large, or if you are transplanting multiple plants.
Pruning Shears
These are used to trim away any dead or damaged parts of the plant before and after relocation.
Gardening Fork
To help loosen the soil around the plant before removal from its initial location.
How Do You Remove Roundhead Bulrush from the Soil?
How Do You Remove Roundhead Bulrush from the Soil?
From Ground: Before extracting the roundhead bulrush from the ground, ensure the soil is not dry; water it if needed. Using a spade or shovel, carefully begin to dig around the plant, making sure you are not too close to risk damaging the roots. Gradually work your way under the root ball, gently lifting as you go until the plant is free.From Pot: If moving the roundhead bulrush plant from a pot, first water the plant, then turn the pot sideways, hold gently to the base of the plant, and tap the edge of the pot against any hard surface. As the plant loosens, slide it out from the pot.From Seedling Tray: For young seedlings, first water the tray thoroughly. Then, gently hold the roundhead bulrush seedling at its base, and use a gardening trowel or even a spoon to scoop out the seedling along with its soil.
Step-by-Step Guide for Transplanting Roundhead Bulrush
Loosening the Soil
Begin by loosening the soil in the area where you intend to plant the roundhead bulrush. This facilitates easier root penetration and establishment.
Digging the Hole
Use your shovel or garden trowel to excavate a hole that is twice as wide and equally as deep as the root ball of your roundhead bulrush plant.
Inspecting the Plant
Examine the plant and its roots. Use your pruning shears to remove any damaged or dead sections. Never pull these out as you might harm the plant.
Placing the Plant
Position the plant in the center of the hole, ensuring it's neither too deep nor too high. The top of the plant's root ball should be level with or slightly below the soil surface.
Backfilling
Fill in around the plant with soil, gently firming it as you proceed.
Watering
After planting, water the roundhead bulrush thoroughly to help it settle and eliminate any air pockets in the soil.
How Do You Care For Roundhead Bulrush After Transplanting?
Watering
Water the roundhead bulrush consistently for the initial few weeks post-transplant, ensuring the soil remains slightly moist. Be careful not to over-water, as this can lead to root rot.
Mulching
Apply a layer of mulch around the base of the roundhead bulrush to help retain moisture, suppress weeds, and regulate soil temperature.
Pruning
In the first year after transplanting, you might need to prune more often to remove any dead or dying parts of the roundhead bulrush as it establishes in the new location.
Check for Pests/Diseases
Monitor your roundhead bulrush plant for signs of pests or disease, and take action at the first indication of trouble. Healthy plants recover more quickly from the stress of relocation.
Troubleshooting Common Issues with Roundhead Bulrush Transplantation.
When is the ideal time to transplant roundhead bulrush?
The best time is during the S1-S3 period, as it gives roundhead bulrush the best chance to establish itself before the more extremes of weather kick in.
What is the proper spacing to adhere to when transplanting roundhead bulrush?
Roundhead bulrush needs room to grow, so ensure they are spaced at least 1 foot (approximately 30 cm) apart.
How deep should I plant the roundhead bulrush during transplanting?
Each roundhead bulrush should be planted at the same depth as its original planting pot. This allows for optimal root growth and helps the plant adjust to its new environment.
What type of soil preparation does roundhead bulrush need before transplanting?
Roundhead bulrush prefers well-drained soil. You should prepare the site by removing any weeds and breaking up the soil to keep it loose.
How frequently should I water roundhead bulrush after transplanting?
Initially, roundhead bulrush should be watered thoroughly immediately after transplanting. Afterwards, maintain consistent moisture, avoiding over or under watering. It's best to assess moisture levels in the top 2 inches (5 cm) of soil.
What should I do if my transplanted roundhead bulrush plants start wilting?
If your roundhead bulrush plants start wilting, check their watering. They may need more water. Also, ensure they're not planted too deep and the surrounding soil is well-drained.
Should I fertilize roundhead bulrush after transplanting?
While roundhead bulrush generally doesn't require fertilizing after transplanting, if you notice slow growth or discoloration, you could use a balanced slow-release fertilizer. Avoid overfeeding which may cause harm.
How do I help roundhead bulrush recover when leaves turn yellow after transplanting?
Roundhead bulrush's leaves may turn yellow due to transplant shock, overwatering, or nutrient deficiencies. Adjust watering practices, ensure proper drainage and consider using a well-balanced fertilizer.
What is the suitable temperature range for transplanting roundhead bulrush?
Roundhead bulrush does well in a moderate temperature range. Extreme cold or heat could hinder growth, so seek to transplant in a period of stable, moderate temperature.
How much sunlight does roundhead bulrush need after transplanting?
Roundhead bulrush enjoys full sun to partial shade. After transplanting, initially protect it from harsh midday sun, gradually introducing it to more sunlight as it establishes.



