How to Transplant Sweet pitcherplant?
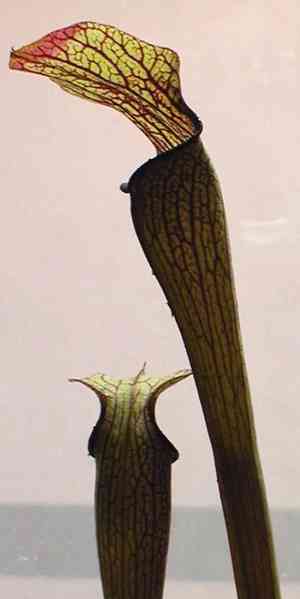
For optimal root development, the ideal period to relocate sweet pitcherplant is from the beginning to the middle of summer. Select well-lit, acidic, and consistently moist sites, mirroring the sweet pitcherplant's native wetland environment. Handle the root system with care and ensure the soil remains damp following the transfer.
What Preparations are Needed Before Transplanting Sweet Pitcherplant?
What is the Ideal Time for Transplanting Sweet Pitcherplant?
Moving sweet pitcherplant in late spring to early summer ensures it establishes itself prior to intense heat. This period promotes strong root development and adaptation. Relocating sweet pitcherplant at this time utilizes the warm ground, fostering better root anchoring. Optimal transplantation in late spring benefits from longer days, providing sweet pitcherplant ample sunlight for photosynthesis and growth. These moments offer sweet pitcherplant a full growing season ahead, maximizing its potential for healthy progression. The pleasant summer breezes and mild nights of late spring create the perfect environment for sweet pitcherplant to flourish post-transplant.
How Much Space Should You Leave Between Sweet Pitcherplant Plants?
When positioning your sweet pitcherplant, it's vital to provide ample room for expansion! Aim for a spacing of approximately 3-5 feet (about 0.9-1.5 meters) between each specimen. This promotes healthier development and guarantees each plant receives sufficient resources.
What is the Best Soil Mix for Sweet Pitcherplant Transplanting?
The sweet pitcherplant thrives in a well-drained, sandy to loamy soil blend that is slightly acidic. For an initial fertilizer, a slow-release type rich in nitrogen would be perfect. This will supply the essential nutrients for your plant's vigorous start!
Where Should You Relocate Your Sweet Pitcherplant?
For your sweet pitcherplant, seek a spot that receives ample indirect sunlight. While it enjoys sun exposure, direct and intense summer rays might be too harsh. The ideal location would offer partial sun or filtered shade.
What Equipments Should You Prepare Before Transplantation Sweet Pitcherplant?
Gardening Gloves
Useful for safeguarding your hands while handling the plant and soil.
Shovel or Spade
A tool to assist in digging the ground and extracting the plant from its initial spot.
Trowel
For more precise excavation and soil removal.
Watering Can
For hydrating the plant during and after relocation.
Garden Pruning Shears
To trim any dead or excess foliage before the move.
Wheelbarrow or Container
To transport the plant and soil.
Mulch
To aid in moisture retention around the plant after transplanting.
How Do You Remove Sweet Pitcherplant from the Soil?
How Do You Remove Sweet Pitcherplant from the Soil?
From Ground: Begin by watering the sweet pitcherplant plant to soften the surrounding soil for easier digging. Then, using a shovel or spade, excavate a wide trench around the plant, ensuring the root ball remains intact. Gently work the spade beneath the root ball and carefully lift the plant from the ground.From Pot: If the sweet pitcherplant plant is in a container, water it thoroughly to loosen the soil. Simply tilt the pot sideways and tap it gently to encourage the plant to slide out, being careful not to pull on the stems to prevent damage. If the plant is particularly root-bound, you might need a gardening knife to loosen the edges.From Seedling Tray: Water the tray to facilitate removal. Gently ease each sweet pitcherplant plant from its individual cell by pushing it up from the bottom, being careful not to tug at the stem, and gently separate the root ball for transplanting.
Step-by-Step Guide for Transplanting Sweet Pitcherplant
Preparation
Have all your tools ready and positioned near the planting site. Ensure the planting hole is twice the width of the root ball but no deeper.
Plant Removal
Using your gloves and tools, carefully extract the plant from its original location according to the previously mentioned scenarios.
Placement
Gently position the sweet pitcherplant plant in the center of the hole, making sure it's not too deep or too high; the top of the root ball should be level with the ground.
Filling
Backfill the hole with the excavated soil, pressing gently around the plant's base to eliminate any air pockets.
Watering
Water the sweet pitcherplant plant thoroughly immediately after planting to settle the soil around its roots.
Mulching
After watering, apply mulch around the plant's base to help retain moisture.
How Do You Care For Sweet Pitcherplant After Transplanting?
Watering
For the initial few weeks post-transplant, keep the soil around the sweet pitcherplant plant consistently moist but not waterlogged. This aids in the development of strong roots.
Trimming
Remove any leaves that yellow or wilt after transplanting as part of routine care; this will help the plant redirect energy to forming new roots and foliage.
Checking
Regularly inspect the plant for any signs of distress, such as wilting or discoloration, which may indicate transplant shock and necessitate adjustments in care.
Patience
Especially for larger plants, it may take time for the sweet pitcherplant plant to adapt to its new environment and show signs of growth. Do not be alarmed if the plant appears to be stagnant immediately after transplant; it is establishing its roots!
Troubleshooting Common Issues with Sweet Pitcherplant Transplantation.
When is the best time to transplant sweet pitcherplant?
The optimal period to move sweet pitcherplant is during late summer to early fall, or in horticultural terms, in S4-S5.
What is the recommended spacing for sweet pitcherplant?
Allow approximately 3-5 feet (about 0.9-1.5 meters) between each sweet pitcherplant to encourage healthy growth and efficient nutrient uptake.
How do I prepare the soil for transplanting sweet pitcherplant?
Begin by assessing the soil's pH level. Sweet pitcherplant prefers acidic soil with a pH of 4-5.5. Also, ensure the soil drains effectively.
How deep should I plant sweet pitcherplant?
Transplant sweet pitcherplant to a depth similar to its previous location. Never plant it deeper than it was in its original container or spot.
What to do if sweet pitcherplant looks wilting after transplanting?
Drooping leaves might indicate that sweet pitcherplant is experiencing transplant shock. Maintain proper watering, and keep it out of direct, harsh sunlight for a few days.
Why is my transplanted sweet pitcherplant not growing?
Sweet pitcherplant is a slow-growing species. However, if it shows no growth at all, ensure it's receiving adequate light, but not direct sunlight, and adjust watering if necessary.
What kind of feeding does a newly transplanted sweet pitcherplant need?
Sweet pitcherplant does not require additional fertilization as they obtain nutrients from insects and the soil. Excessive fertilizer can harm the plant.
Is it normal for sweet pitcherplant's leaves to turn yellow?
Yellow leaves can signal over-watering, insufficient light, or waterlogged soil. Adjust watering and consider improved light if the issue persists.
Can I transplant sweet pitcherplant in direct sun?
Sweet pitcherplant prefers partial sunlight with a few hours of direct sun. However, ensure it is not exposed to hot midday sun, which can stress the plant.
How often should the transplanted sweet pitcherplant be watered?
Sweet pitcherplant prefers consistently moist but not waterlogged soil. Be careful not to let the soil dry out completely, and equally, avoid drowning the plant.



