How to Propagate Sweet pitcherplant?
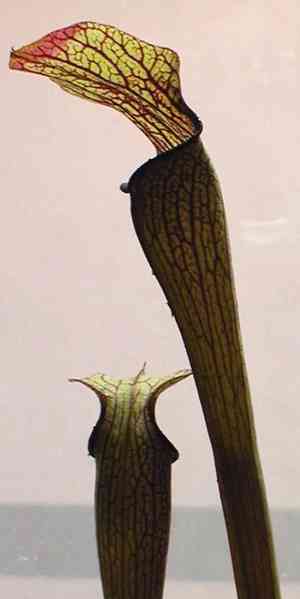
The sweet pitcherplant is successfully multiplied via separation, a technique well-suited to its clustered growth pattern. For optimal results, cultivators ought to divide established groupings during their inactive phase, ensuring each segment contains multiple growth points. These separated portions should be re-planted at their initial growing depth to foster quick rooting and vigorous development.
Optimal Time for Sweet Pitcherplant Propagation
Propagation Method
Division
Propagation Period
Spring,Autumn
Tools Required for Sweet Pitcherplant Propagation
Sharp Knife or Scalpel
A keen knife or scalpel is vital for making clean cuts through the rhizomes of sweet pitcherplant. This tool ensures precise, minimal-damage incisions, crucial for the health of the propagated plant sections. A clean cut promotes quicker healing and lessens the chance of infections at the cut sites.
Sterilizing Agent (e.g., alcohol or bleach solution)
Sterilizing agents are employed to sanitize tools before and after the propagation process. This prevents the transmission of diseases and pathogens between plants, especially important when propagating sweet pitcherplant to avoid contaminating its delicate tissues.
Gloves
Wearing gloves when handling sweet pitcherplant safeguards both the propagator and the plant. It helps prevent direct contact with potentially irritating plant saps or secretions and ensures the plant isn't contaminated by hand oils or residues.
Potting Media
A specific potting medium suitable for sweet pitcherplant, ensuring good drainage and aeration, is essential. This medium supports the growth of new roots, providing the necessary nutrients and environment to foster development post-propagation.
How to Propagate Sweet Pitcherplant?
Propagation Type
Easy
Post-Propagation Care for Sweet Pitcherplant
How to Care for Your Newly Propagated Sweet Pitcherplant?
Following propagation, position the newly potted sweet pitcherplant in a spot receiving partial sun, mimicking its natural bog habitat. Maintain high humidity by placing pots in a shallow tray of distilled water, allowing the water level to reach about a quarter of the way up the pot. Avoid using hard tap water, as sweet pitcherplant is sensitive to minerals. Regularly check the medium's moisture level and adjust water levels to prevent the soil from drying out.
Common Errors to Avoid When Propagating Sweet Pitcherplant
Overwatering
Excessive watering of sweet pitcherplant during propagation can lead to root rot and fungal infections, harming the plant's overall health and its ability to establish new growth.
Using Poor Drainage Mediums
Propagation mediums that lack proper drainage can cause water to accumulate around sweet pitcherplant's roots. This environment fosters diseases and may impede root development, which is crucial for successful propagation.
Planting Too Deep
Inserting sweet pitcherplant's rhizomes too deeply into the propagation medium can prevent them from getting enough oxygen, which is necessary for root and shoot development.
Neglecting Humidity Needs
Failing to provide a high humidity environment during the initial stages of propagation can result in the desiccation of sweet pitcherplant's sensitive new growths. This will likely lead to a lower success rate in propagation.
Advice for Propagating Sweet Pitcherplant
Use Well-Draining Medium
Choose a light, airy, and well-draining medium for propagating sweet pitcherplant to prevent waterlogging. A mixture of sphagnum moss with perlite is effective in maintaining the necessary balance between moisture retention and drainage.
Maintain High Humidity
Keep the humidity around sweet pitcherplant elevated during the initial propagation phases to encourage successful root and shoot development. Using a humidity dome or regular misting can help achieve this requirement.
Follow Shallow Planting
Plant sweet pitcherplant's rhizomes superficially. This exposes the rhizomes to ample air circulation and light, which are crucial for stimulating new growth.
Careful Water Management
While maintaining moisture is key, avoid overwatering by closely monitoring the moisture level of the propagation medium and adjusting as needed to prevent stagnation and root diseases.



