How to Transplant Nodding sage?
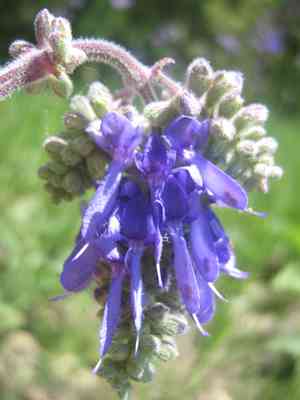
Nodding sage flourishes when transplanted between early and late spring, as this period offers moderate temperatures and reduced strain. Choose a site that receives full sun to partial shade and has soil that drains effectively. Provide ample water following the transplant to facilitate proper rooting.
What Preparations are Needed Before Transplanting Nodding Sage?
What is the Ideal Time for Transplanting Nodding Sage?
The best period to move nodding sage is from early to late spring. During this time, the ground begins to warm, and consistent moisture is more likely. This timing allows nodding sage to develop its root system before the summer heat arrives. Spring transplanting promotes healthier development and abundant blooms later in the season.
How Much Space Should You Leave Between Nodding Sage Plants?
When relocating nodding sage, position plants 18-24 inches (45-60 cm) apart to ensure ample room for growth and thriving. This spacing prevents overcrowding and facilitates good air circulation, crucial for robust plant health.
What is the Best Soil Mix for Nodding Sage Transplanting?
Prepare well-draining soil with a good amount of organic material for nodding sage. A blend of garden soil and compost works effectively. Incorporating a balanced, slow-release fertilizer can supply vital nutrients for growth. Aim for a soil pH of approximately 6.0-7.0 for optimal results.
Where Should You Relocate Your Nodding Sage?
Select a sunny location for nodding sage as it flourishes in full sunlight. Target at least 6-8 hours of direct sun daily. This ensures the plant receives sufficient light for vigorous growth and prolific flowering.
What Equipments Should You Prepare Before Transplantation Nodding Sage?
Gardening Gloves
To safeguard your hands while working with soil and plants.
Trowel
For excavating small holes and managing the plant's root mass.
Spade or Shovel
To dig a trench around and beneath the plant.
Watering Can or Hose
For hydrating the plant before and after relocation.
Pruning Shears
To trim any damaged roots or foliage.
Compost or Organic Matter
To enrich the soil in the new planting area.
Mulch
To help retain soil moisture post-transplanting.
How Do You Remove Nodding Sage from the Soil?
How Do You Remove Nodding Sage from the Soil?
From Ground: First, moisten the nodding sage plant's soil. Then, use a shovel or spade to dig a wide trench around the plant, keeping the root ball intact. Carefully work the spade under the root ball to lift the plant from its original spot.From Pot: Thoroughly water the nodding sage plant to hydrate its roots. Gently turn the pot on its side and tap the bottom to loosen the soil and roots. Carefully slide the plant out, supporting the root ball to prevent damage.From Seedling Tray: Use a small tool, like a trowel, to gently loosen the soil around the seedling. Carefully lift the seedling from the tray, ensuring as much of the root ball remains intact as possible.
Step-by-Step Guide for Transplanting Nodding Sage
Preparation
Ensure the new planting site is ready. Dig a hole twice as wide and as deep as the nodding sage plant's root ball.
Conditioning
Improve the soil in the new planting hole with compost or organic matter to enhance drainage and nutrient content.
Placing the Plant
Gently position the nodding sage plant into the hole, ensuring the top of the root ball is level with the surrounding soil.
Backfilling
Fill the hole with soil, pressing gently around the plant's base to remove air pockets. Avoid planting too deeply.
Watering
Thoroughly water the nodding sage plant to help settle the soil and establish its roots. Ensure water reaches the root zone.
Mulching
Apply a 2-3 inch layer of mulch around the plant's base to help retain moisture and regulate soil temperature.
How Do You Care For Nodding Sage After Transplanting?
Watering
Keep the soil around the nodding sage consistently moist, but not waterlogged, for the initial weeks post-transplant to aid in root establishment.
Pruning
Trim any damaged or dead foliage to lessen stress on the transplanted nodding sage and encourage healthy new growth.
Monitoring
Regularly inspect the plant for signs of stress or pest issues and address them promptly. Monitor soil moisture levels and adjust watering as needed.
Support
If the nodding sage plant is tall or prone to falling over, consider staking it to provide extra support until it is well-established.
Troubleshooting Common Issues with Nodding Sage Transplantation.
When is the best time to transplant nodding sage?
Relocate nodding sage from early to late spring for optimal growth and establishment in your garden.
What is the ideal spacing for transplanting nodding sage?
Ensure you space nodding sage 18-24 inches (45-60 cm) apart to allow ample room for growth.
How should I prepare the soil for transplanting nodding sage?
Enhance the soil by mixing compost or organic matter to improve drainage and fertility.
What type of soil does nodding sage prefer?
Nodding sage thrives in well-draining soil, ideally a mix that isnât too rich to avoid waterlogging.
How deep should I plant nodding sage?
Plant nodding sage at the same depth it was growing in its previous location for consistency.
What to do if nodding sage appears wilted post-transplant?
Wilting can occur due to transplant shock. Keep the soil moist and provide some shade initially.
How to handle the roots when transplanting nodding sage?
Gently loosen the root ball to encourage better root spread and avoid damaging the delicate roots.
How often should I water nodding sage after transplanting?
Water nodding sage thoroughly after transplanting and maintain consistent moisture for the first few weeks.
What should I do if nodding sage shows no new growth?
Check the soil drainage and light conditions, and ensure the plant is not stressed by extremes.
How to support weak nodding sage stems after transplanting?
Stake the stems gently or provide a small support until they establish and grow stronger.



