How to Transplant Korean tasselfern?
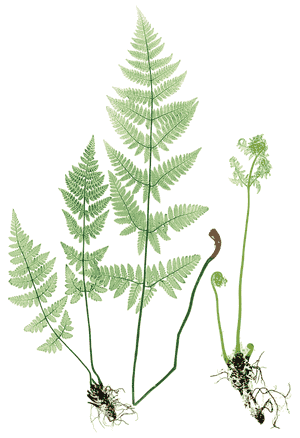
The ideal period for transplanting korean tasselfern is from mid to late spring, capitalizing on vigorous development after winter. Select a shaded location featuring damp, adequately draining earth. Exercise caution; korean tasselfern's root system prefers minimal disruption for successful establishment.
What Preparations are Needed Before Relocating Korean Tasselfern?
What is the Ideal Time for Relocating Korean Tasselfern?
The optimal period for moving korean tasselfern is during the mild conditions of mid to late spring. This timing perfectly aligns with korean tasselfern's growth cycle, allowing the fern to establish roots in moderate soil before the summer heat. Transplanting in these gentle months enables korean tasselfern to benefit from the season's adequate rainfall and mild temperatures, fostering a supportive environment for the newly placed fronds to thrive. Moving korean tasselfern in this season ensures a smooth transition, promising a vigorous display of green vitality throughout the growing period.
How Much Space Should You Leave Between Korean Tasselfern Plants?
Ensure to position korean tasselfern approximately 2-3 feet (60-90 cm) apart when transplanting. This will guarantee they have sufficient room to develop without competing for resources. Consider them like individuals in a room; they all require a bit of personal space to feel comfortable!
What is the Best Soil Mix for Korean Tasselfern Transplanting?
Before planting korean tasselfern, enrich your soil by incorporating organic matter and a balanced fertilizer. Aim for fertile, well-drained soil, as korean tasselfern appreciate moisture but not excessive wetness. The appropriate soil type will keep korean tasselfern content and flourishing!
Where Should You Relocate Your Korean Tasselfern?
Despite its preference for sun, try to select a spot for korean tasselfern that receives partial sunlight, ideally where it's shielded from intense midday rays. This can lessen the chances of korean tasselfern getting scorched by strong sun. Think of it as gentle sun exposure, not a severe burn, for your korean tasselfern!
What Equipment Should You Prepare Before Transplanting Korean Tasselfern?
Gardening Gloves
To safeguard your hands from dirt and sharp plant components.
Shovel or Spade
For excavating the ground and extracting the plant from its initial spot.
Garden Trowel
Useful for digging smaller holes and handling the plant with care.
Watering Can
It will be used to hydrate the plant before and after relocation.
Mulch
Helps to insulate the soil and maintain its moisture.
Pruning Shears
This tool is used to trim the fern and keep it tidy.
How Do You Extract Korean Tasselfern from the Soil?
How Do You Extract Korean Tasselfern from the Soil?
From Ground: Begin by thoroughly watering the korean tasselfern plant to facilitate easier removal. Use a shovel or spade to dig a wide trench around the plant, keeping the root ball intact. Gently, use the spade to lift the plant from beneath the root ball. Take care to ensure minimal damage.From a Pot: First, water your korean tasselfern plant well. Then, turn the pot sideways, hold the plant at its base, and carefully pull out the plant. Shake off excess soil and gently untangle the roots.From Seedling Tray: Water the seedlings before transplanting. They can then be easily lifted using a garden trowel. Handle the delicate seedlings with extra care to prevent damage.
Step-by-Step Guide for Relocating Korean Tasselfern
Preparation
Water the korean tasselfern plant one day prior to transplanting. This enhances the plant's chances of survival after the relocation.
Digging
Excavate a hole that is twice the width and the same depth as the plant's root ball. This provides ample room for the roots.
Placing the Plant
Position the plant in the hole, ensuring it is at the same depth as it was previously. Once placed, backfill the hole with the original soil.
Watering
Immediately after transplanting, water the plant generously. The soil should be damp, but not waterlogged.
Mulching
After watering, cover the area with a layer of mulch to keep the soil cool and moist.
How Do You Care For Korean Tasselfern After Relocation?
Monitoring
Regularly inspect the korean tasselfern for any indications of shock or stress, such as wilted leaves or stunted growth. This is vital in the initial weeks following transplanting.
Pruning
Utilize pruning shears to maintain a compact form and remove any damaged or dead fronds.
Watering
The korean tasselfern prefers consistently damp soil. Water it whenever the top layer of soil feels dry to the touch, but avoid overwatering.
Protection
Shield the plant from harsh weather conditions like scorching sun or strong winds, especially immediately after transplantation. It may need to be covered or moved temporarily.
Troubleshooting Common Issues with Korean Tasselfern Relocation.
What's the ideal time to transplant korean tasselfern?
The perfect time to transplant korean tasselfern is during the mid to late growing phases, often referred to as S2-S3 in gardening terms.
What's the correct spacing to maintain when transplanting korean tasselfern?
Allow approximately 2-3 feet, which is equal to 60-90 cm, between each korean tasselfern plant for the best growth outcomes.
What should I do if my transplanted korean tasselfern shows signs of wilting?
Ensure korean tasselfern is adequately watered and receiving enough shade. If the problem persists, check for root rot- a common issue in poorly drained soils.
How much sunlight does korean tasselfern require after being transplanted?
Korean tasselfern prefers low to partial light. After transplanting, place it in a location that only receives indirect sunlight for about half the day.
Why are my transplanted korean tasselfern leaves turning yellow?
Yellowing of leaves might be due to overwatering or incorrect soil pH. Check the moisture levels and ensure soil has a balanced acidity level.
Does korean tasselfern need any special soil type for successful transplanting?
Korean tasselfern thrives in well-drained, compost-rich soil. When transplanting, use organic matter enriched soil and assure proper drainage to prevent water logging.
What should be the pot size for transplanting korean tasselfern?
For successful transplanting, choose a pot that is twice as wide as the root ball. The pot should be at least 10 inches (approx. 25 cm) in diameter.
More tips on watering korean tasselfern post-transplanting, please?
Post-transplant, korean tasselfern needs frequent watering but caution against over-watering. During hot spells, it might need watering daily, otherwise every other day would be fine.
Are there any pests or diseases I should look out for after transplanting korean tasselfern?
Korean tasselfern is relatively pest-free. Nonetheless, keep an eye out for typical fern diseases such as leaf spot and root rot due to poor soil drainage.
Is fertilizing necessary post-transplanting of korean tasselfern?
Fertilizing isn't immediately necessary post-transplant. However, a slow-release fertilizer during the start of the growing season would benefit future growth.



