How to Transplant Water snowflake?
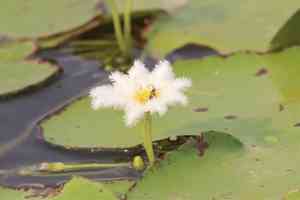
For water snowflake, the peak of mild weatherâlate springâis perfect for relocation, providing a mix of warmth and development prospects. Select bright, shallow aquatic environments, protecting them from strong flows or surges. Gentle Reminder: Careful manipulation fosters their successful initial establishment!
Essential Preparations Before Relocating Water Snowflake
Optimal Timing for Water Snowflake Relocation?
The prime window for moving water snowflake is the beginning of early summer. This timing guarantees that the cold season has passed, providing a gentle shift for the plant's root system and ideal growing conditions. Transplanting water snowflake during this period takes advantage of longer days, offering ample sunlight and stable temperatures, which promotes strong root establishment and resilience. Adhering to this schedule for transplantation encourages the robust health and captivating display of water snowflake's floating blooms throughout the upcoming sunny months.
Recommended Spacing Between Water Snowflake Plants?
For optimal growth of your water snowflake, position each plant approximately 2-3 feet (0.6m-0.9m) apart. This spacing allows sufficient room for root and foliage development without competition. It's a simple yet vital step for the plant's well-being.
Preferred Soil Mixture for Water Snowflake Transplanting?
Water snowflake thrives in well-draining, peaty or loamy soil. Prepare your garden by enriching the soil with compost or an all-purpose organic fertilizer. This small additional effort will significantly benefit your plant's growth!
Optimal Location for Water Snowflake Relocation?
Sunlight is crucial for your water snowflake! Select a site that receives full sun to partial shade. Excessive sunlight can cause leaf scorch, while insufficient light will hinder growth. Aim for a spot that gets about 6-8 hours of daily sunlight!
Tools Required Before Transplanting Water Snowflake
Gardening Gloves
To safeguard your hands from any sharp edges during the transplanting process.
Shovel or Spade
For excavating the new planting site and extracting the water snowflake from its current spot.
Watering Can or Hose
To hydrate the plant, both prior to and following the transplant.
Wheelbarrow or Container
To move the water snowflake from its original location to its new position in the garden.
Organic Compost
This will provide the plant with a nutrient-rich start in its new environment.
Mulch
Helps retain moisture and suppresses weeds that could compete with the water snowflake for nutrients.
Trowel
For more precise digging tasks, such as preparing a suitable hole in its new location.
Method for Removing Water Snowflake from the Soil
Method for Removing Water Snowflake from the Soil
From Ground: Start by watering the water snowflake the day before transplanting; this ensures hydration and makes the soil easier to work with. Using your shovel, dig a circle around the plant, being careful to cut wide rather than close to avoid root damage. Gently work your shovel beneath the root ball and carefully lift the plant from the ground. From Pot: Water the plant and allow it to settle. Invert the pot, placing your hand over the surface with stems between your fingers to support the soil and plant. Gently shake the inverted pot to slide the plant out with its soil. Avoid pulling too hard, as this could harm the plant. From Seedling Tray: Water the seedling tray. Carefully lift the water snowflake plant, ensuring you retrieve the roots and attached soil. It's often simpler to push from the bottom of the tray cell to remove the water snowflake.
Step-by-Step Instructions for Transplanting Water Snowflake
Preparation
Prepare the new planting hole. It should be twice the size of the water snowflake's root ball. Add a layer of compost to the bottom of the hole to encourage healthy growth.
Planting
Position the water snowflake in the center of the hole, ensuring the top of its root ball is level with or slightly below the ground surface. Backfill the hole, gently firming the soil around the roots.
Watering
Thoroughly water your water snowflake after transplanting to settle the soil around its roots and minimize transplant shock.
Mulching
Apply a layer of mulch around the water snowflake, but keep it a few inches away from the stems to prevent rot.
Post-Transplant Care for Water Snowflake
Monitoring
Observe the water snowflake closely during the weeks following transplantation. Ensure it is not wilting or showing signs of stress. If it does, it may require more water or protection from harsh weather.
Pruning
If the water snowflake continues to struggle after planting, consider trimming some of its upper growth. Pruning allows the plant to direct its energy towards developing strong roots.
Careful Watering
Over the next few weeks, water the water snowflake cautiously. The soil should remain moist, but not waterlogged. Excessive water can lead to root rot.
Resolving Common Issues with Water Snowflake Transplantation
When is the optimal time to transplant water snowflake?
Transplant water snowflake during the peak of S3, ensuring the environment is ideal for the plant.
What is the recommended spacing between each water snowflake plant during transplantation?
Ideally, a distance of 2-3 feet (60-90 cm) should be maintained between each water snowflake plant for proper growth.
What actions should I take if water snowflake leaves turn yellow after transplantation?
Yellow leaves may indicate overwatering or nutrient deficiency. Reduce watering and ensure your plant receives a balanced fertilizer.
How can I prevent water snowflake from wilting after transplantation?
To prevent wilting, gradually introduce water snowflake to its new location. Allow it to slowly adapt to the light, temperature, and humidity conditions.
What are the ideal soil conditions for transplanting water snowflake?
Water snowflake prefers well-draining soil rich in organic matter. Maintain a soil pH of around 6.5 for best results.
How much sunlight does transplanted water snowflake need?
Water snowflake thrives in full to partial sunlight. Approximately 4-6 hours of daily sunlight is ideal for the healthy growth of transplanted water snowflake.
How frequently should water be given to water snowflake after transplantation?
Water water snowflake thoroughly up to twice a week immediately after transplanting. Adjust as needed based on local climate and soil moisture levels.
What should I do if water snowflake's growth is stunted after transplantation?
Stunted growth can signal shock or root damage. Ensure water snowflake is not overwatered, receives adequate sun, and consider a root stimulator if necessary.
Why is my transplanted water snowflake not producing flowers?
Water snowflake may require some time to flower after transplanting. Be patient, provide appropriate care, and allow it to adjust to the new conditions.
Should I fertilize water snowflake after transplantation?
Yes, wait a couple of weeks after transplantation before lightly fertilizing water snowflake to avoid shocking the plant. Gradually increase as the plant becomes established.



