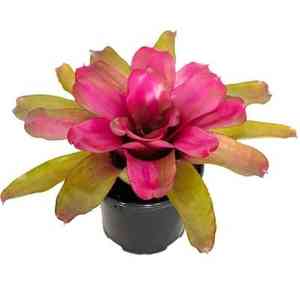
How to Transplant Blushing Bromeliad?
Transplanting blushing Bromeliad is most effective in cooler periods, which fosters a favorable setting for root development. Choose a spot with ample, diffused light and ensure the soil is damp and drains efficiently. Careful handling facilitates a less stressful adjustment.
What Preparations are Needed Before Transplanting Blushing Bromeliad?
What is the Ideal Time for Transplanting Blushing Bromeliad?
The best time to move blushing Bromeliad is during the calm period from late autumn to mid-winter. This timing allows blushing Bromeliad's roots to settle without the strain of extreme heat or active growth. Relocating blushing Bromeliad when the weather is cooler minimizes transplant shock and prepares blushing Bromeliad to flourish in the upcoming growing season. Gently introducing blushing Bromeliad to its new spot during this quiet interval gives it the rest needed to adapt and grow strong in spring.
How Much Space Should You Leave Between Blushing Bromeliad Plants?
When planting your blushing Bromeliad, ensure a spacing of approximately 1-2 feet (30-60 cm) from the center of each plant. This provides ample room for expansion and promotes healthy development.
What is the Best Soil Mix for Blushing Bromeliad Transplanting?
For your blushing Bromeliad, a fertile, well-draining soil is perfect. Before planting, incorporate some slow-release base fertilizer into your soil. This will boost nutrient availability and encourage vigorous growth.
Where Should You Relocate Your Blushing Bromeliad?
A spot receiving bright but indirect sunlight is perfect for the blushing Bromeliad. Excessive direct sun can cause color fading. Remember to place your plant in a pleasant location, away from harsh solar rays!
What Equipments Should You Prepare Before Transplantation Blushing Bromeliad?
Gardening Gloves
These will safeguard your hands while handling the soil and the blushing Bromeliad plant.
Trowel
This tool will enable you to carefully and precisely excavate the hole for your blushing Bromeliad plant.
Garden Spade or Shovel
These will assist in removing the blushing Bromeliad plant from its original spot, ensuring the root ball remains undamaged.
Watering Can or Hose
This will be used to hydrate your blushing Bromeliad plant throughout the transplant process to minimize any risk of dehydration.
Wheelbarrow or Container
Used for moving the blushing Bromeliad plant from its initial location to its new one.
Compost
To enrich the new planting site with quality organic matter, fostering root development and growth.
How Do You Remove Blushing Bromeliad from the Soil?
How Do You Remove Blushing Bromeliad from the Soil?
From Ground: Begin by thoroughly watering the blushing Bromeliad plant to facilitate its removal. Then, dig a wide trench around the plant using a garden spade or shovel, aiming to keep the root ball intact. Carefully maneuver the spade or shovel beneath the root ball to lift the plant from its original position. Ensure you avoid damaging roots during this process.From Pot or Container: If the blushing Bromeliad plant is in a pot, the initial step is to water it thoroughly. Then, tilt the pot sideways, gently holding the plant at its base while extracting the root ball. Try to retain as much soil around the roots as possible to reduce stress on the plant. If the plant is root-bound (roots are tightly coiled around the pot), you might need to cut through the roots using sterilized pruning shears.From Seedling Tray: Blushing Bromeliad seedlings are delicate and require careful handling. Water the tray, then use a dibber or a pencil to lift the seedling from the tray, keeping a clump of soil around the roots.
Step-by-Step Guide for Transplanting Blushing Bromeliad
Prep the new Site
Start by preparing the new planting location for blushing Bromeliad. Dig a hole that is approximately twice the size of the blushing Bromeliad's root ball. The hole should be deep enough so that the top of the root ball is level with the ground surface.
Moving the plant
Place the blushing Bromeliad in the wheelbarrow or a container. Be careful with the roots and leaves during transport.
Placing in Hole
Gently position the blushing Bromeliad and its root ball into the excavated hole. Ensure it stands upright, with the top of the roots just below ground level.
Fill Back the Soil
Refill the hole with compost and soil. Firmly pat the soil around the base to eliminate air pockets and keep blushing Bromeliad stable.
Watering
Water the plant generously after the transplant process to help settle the soil and minimize transplant shock.
How Do You Care For Blushing Bromeliad After Transplanting?
Temperature
Blushing Bromeliad thrives in warm temperatures, but extreme heat can harm the plant after transplanting. Therefore, try to maintain a consistent temperature, and provide a shadier spot in extreme heat.
Watering
Water the blushing Bromeliad plant thoroughly after transplanting it. Its soil should remain moist but not overly saturated. Over the first few weeks, water the plant regularly but ensure you do not overwater it.
Care
Watch for signs of transplant shock in the blushing Bromeliad, such as wilting or yellowing leaves. If these appear, move the plant to a more protected spot and ensure its watering needs are met. Some leaf drop is normal during adaptation. If the plant continues to decline, seek expert advice.
Troubleshooting Common Issues with Blushing Bromeliad Transplantation.
When is the best time to transplant my blushing Bromeliad?
Your blushing Bromeliad should ideally be transplanted during the late summer to fall season (S9-S11) to ensure optimal growth.
How should I space out my blushing Bromeliad during transplantation?
Spacing is vital for your blushing Bromeliad's health. Allow 1-2 feet (30.5-61 cm) between each plant to promote air circulation.
What are the signs that my blushing Bromeliad needs transplanting?
If your blushing Bromeliad is outgrowing its pot, or the soil is drying out quickly after watering, it's time to transplant.
How deep should I plant my blushing Bromeliad?
The base of your blushing Bromeliad should be level with or slightly above the soil surface. Never bury it too deeply.
Is there a specific transplanting technique for blushing Bromeliad?
Yes, before removing the blushing Bromeliad from its current pot, water it thoroughly. Then carefully lift from the root ball, not the stem.
What kind of soil is best for transplanting my blushing Bromeliad?
Blushing Bromeliad thrives in well-draining, slightly acidic soil. Regular potting soil mixed with some perlite and peat moss is ideal.
Should I prune my blushing Bromeliad before transplanting?
Yes, you should prune any damaged or diseased leaves before transplanting blushing Bromeliad. This helps to reduce stress and conserve energy.
How do I handle the roots when transplanting blushing Bromeliad?
Handle the roots gently. Loosen the outer roots slightly and remove any rotten ones before positioning the blushing Bromeliad in the new pot.
When should I start watering my blushing Bromeliad after transplantation?
After transplanting, give your blushing Bromeliad a good drink of water. It helps settle the soil and establish roots in the new place.
How do I care for blushing Bromeliad post-transplantation?
Once transplanted, place your blushing Bromeliad in partial shade to recover. Maintain watering and wait to fertilize until new growth is visible.


