How to Transplant Coyotillo?
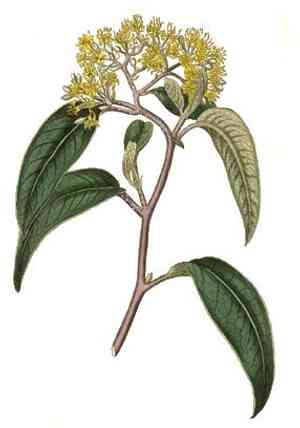
For coyotillo, the ideal period for relocation spans from the middle to the end of spring, as climatic conditions are conducive to root development. Select a brightly lit, adequately draining location, gradually introducing coyotillo to its new surroundings to foster robust development.
What Preparations are Needed Before Transplanting Coyotillo?
What is the Ideal Time for Transplanting Coyotillo?
The optimal period for relocating coyotillo is the beginning of mid to late spring. This timeframe offers ideal soil warmth and stable temperatures, vital for root development and reducing transplant stress. Moving coyotillo during this season guarantees a smooth transition with ample growing time ahead, fostering strong growth and resilience. By selecting this favorable window, you're setting coyotillo up for success, as it benefits from longer days and mild weather to flourish in its new spot.
How Much Space Should You Leave Between Coyotillo Plants?
Hello there, aspiring gardener! When preparing to rehome your coyotillo, remember to allow ample room for its growth. Aim for a generous spacing of approximately 10-15 feet (3-4.5 meters) between each plant. This will ensure they have sufficient area to expand their root systems and develop fully.
What is the Best Soil Mix for Coyotillo Transplanting?
For your coyotillo, you'll want to provide a supportive base. Seek out soil that drains well and is rich in organic matter. Before planting, incorporate a balanced, slow-release fertilizer to give your coyotillo a strong start. This will aid the plant in establishing itself and encourage vigorous growth.
Where Should You Relocate Your Coyotillo?
Your coyotillo thrives in sunlight! Select a location where it can receive full to partial sun for optimal development. Ensuring your chosen spot gets a good amount of daily sunshine will help your coyotillo flourish and bring you joy for many years.
What Equipments Should You Prepare Before Transplantation Coyotillo?
Gardening Gloves
To safeguard your hands while handling soil and plants.
Spade or Shovel
For excavating the plant and creating a new hole for relocation.
Garden Fork
To loosen the earth surrounding the plant's root ball.
Wheelbarrow
For moving the plant and soil.
Watering Can or Hose
To hydrate the plant before and after its transfer.
Pruner or Sharp Knife
To trim any damaged roots or branches.
Measuring Tape
To accurately space the new location for coyotillo.
Stakes and Ties
For providing support to coyotillo if necessary post-transplant.
How Do You Remove Coyotillo from the Soil?
How Do You Remove Coyotillo from the Soil?
From Ground: Water coyotillo thoroughly before transplanting. Dig a wide trench around the plant with a shovel, being careful not to harm the root ball. Gently lift the coyotillo out by prying under the root ball with a garden fork.From Pot: Tip the pot sideways and gently tap its sides and bottom to loosen the soil. Carefully slide the coyotillo out. If the plant is root-bound, you might need to cut the pot away without damaging the roots.From Seedling Tray: Moisten the soil in the tray. Use a spoon or a dibbler to gently lift the seedling by its root ball, minimizing root disturbance.
Step-by-Step Guide for Transplanting Coyotillo
Preparation
Gather all tools and equipment beforehand to ensure a smooth transplanting process for the coyotillo. Pre-water the plant to reduce transplant shock and to keep the root ball intact during removal. Prepare the new site by loosening the soil and ensuring proper drainage with the help of a garden fork and measuring tape for spacing requirements not covered earlier in the guide. In case of wind, have stakes and ties ready for support after planting. Measure the width and depth of the root ball to ensure you dig the correct size hole at the new site. Prepare a watering solution using a rooting hormone, if available, to promote root development after transplanting. Make sure to wear your gardening gloves to protect your hands during the entire process. Have the wheelbarrow ready for transporting the plant and for mixing soil with amendments if needed for the new site. Wear garden gloves to protect your hands throughout the process. Read all instructions carefully before starting to avoid any mistakes.
Excavation
Carefully dig a hole at the new site for coyotillo where each word in the phrase 'Step 2_Excavation' is capitalized. The hole should be twice as wide and the same depth as the root ball. Set aside the topsoil to backfill the hole after the coyotillo is placed into it. Remember to maintain the root ball's integrity during transport by using the wheelbarrow if necessary. Use the spade or shovel for digging the hole and the wheelbarrow for moving the coyotillo. Remember not to disturb the root ball and to keep it moist.
Planting
Once the excavation is complete, place the coyotillo in the center of the hole at the same depth it was growing before. Backfill the hole with the topsoil you set aside earlier. Gently firm the soil around the base of the coyotillo to eliminate air pockets, but avoid compacting the soil too much. It might help to have a companion to hold the coyotillo steady while you backfill. Inspect the root ball for any circling roots and prune them if necessary using a pruner or a sharp knife. Use the watering can to give the coyotillo a good initial watering. If your coyotillo has a larger size, it might be advantageous to use stakes and ties for additional support. Disperse the soil evenly while backfilling and water once more lightly after planting the coyotillo.
Final Touches
Clean the area around the new planting site of coyotillo. Create a shallow moat around the base to assist with water retention using the back of a shovel or hands. Properly dispose of any plant debris to keep the area tidy and disease-free. If needed, apply a layer of mulch around coyotillo but keep it a few inches away from the stem to prevent rot. Finally, install any necessary support like stakes, and use ties to anchor the coyotillo if it's in a windy area or unstable. Remember to tidy up the planting area to prevent any disease spread and to give coyotillo a neater appearance.
How Do You Care For Coyotillo After Transplanting?
Watering
Water the coyotillo thoroughly immediately after transplanting. Continue to provide moisture regularly, especially during the initial weeks, to aid root establishment. Monitor soil dampness frequently as coyotillo adapts to its new environment.
Mulching
Apply a layer of organic mulch around the base of the coyotillo to help retain soil moisture and regulate temperature. Be sure not to let the mulch touch the stem of the plant to avoid the risk of rot.
Monitoring
Observe the coyotillo for indications of transplant shock, which may include wilting, leaf drop, or discoloration. If these symptoms appear, ensure you are not over or under-watering and that the plant is not exposed to extreme temperatures.
Staking
If you have used stakes to secure coyotillo after transplanting, check them regularly to ensure they are not too tight, damaging the plant, or too loose, failing to support it adequately.
Pruning
Trim away any dead or damaged branches to encourage new growth and maintain the health of coyotillo. Clean cuts will help the plant recover faster from any transplant stress.
Avoid Fertilization
Do not fertilize the coyotillo immediately after transplanting, as the new roots can be sensitive to the salts in fertilizers. Wait until coyotillo has shown signs of new growth and has settled into the new location.
Troubleshooting Common Issues with Coyotillo Transplantation.
When is the best time to transplant coyotillo?
Choose to transplant coyotillo from mid to late spring, the ideal season for root establishment.
How far apart should coyotillo be planted from each other?
Space coyotillo approximately 10-15 feet (3-4.5 meters) apart to ensure sufficient growth area.
What should I do if leaves wilt after transplanting coyotillo?
Provide consistent moisture without overwatering, and shade from intense sun until coyotillo recovers.
Why is my coyotillo not thriving after transplanting?
Ensure it's not planted too deeply, in well-drained soil, and protected from high winds.
How can I tell if my coyotillo has transplant shock?
Signs include leaf drop, slow growth, or branches dying back. Mitigate with care and patience.
What type of soil is best for transplanting coyotillo?
Plant coyotillo in fertile, well-drained soil with a mix of loam for optimal growth.
Can I transplant coyotillo during summer or fall?
It's risky; the ideal time is spring. Transplanting during off-seasons increases stress and failure risk.
How big of a root ball do I need when transplanting coyotillo?
Aim for a root ball 12-20 inches (30-50 cm) in diameter to capture vital roots.
Can I trim coyotillo roots when transplanting?
Trim only damaged or excessively long roots to minimize transplant shock and promote health.
How do I water coyotillo after transplanting?
Water generously after transplanting, then maintain a routine to keep soil evenly moist, not soggy.



