How to Transplant Sheep's-bit?
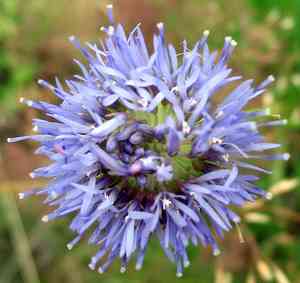
The ideal period for relocating sheep's-bit extends from the onset of early spring through the peak of late spring, fostering vigorous development. Establish sheep's-bit in soil that drains effectively, within an area receiving full sun to partial shade. Provide ample water immediately following transplantation to facilitate its adjustment.
What Preparations are Needed Before Transplanting Sheep's-bit?
What is the Ideal Time for Transplanting Sheep's-bit?
The perfect time for moving sheep's-bit is during the garden's awakening, between winter's end and the start of summer's warmth. Relocating sheep's-bit then allows them to establish roots before intense summer growth and benefit from spring's moist soil. This early action supports their development in cool, mild weather, building a strong base for future seasons. Remember: careful attention during these months gives sheep's-bit a great start for a flourishing life cycle!
How Much Space Should You Leave Between Sheep's-bit Plants?
When getting your sheep's-bit ready for a new spot, picture them as comfortable sunbathers with ample room. Target a spacing that's both generous and snug, roughly 6-8 inches (15-20 cm). This provides each plant sufficient area to thrive without feeling cramped.
What is the Best Soil Mix for Sheep's-bit Transplanting?
Your sheep's-bit will love well-drained soil, similar to a rich, crumbly cake. Mix in some organic compost as a foundational fertilizer to nourish your green companions. This hearty meal will aid in developing strong roots and vibrant blooms.
Where Should You Relocate Your Sheep's-bit?
Select a sunny location where sheep's-bit can soak up the light like a cat on a windowsill – full sun to partial shade will keep them content. This solar embrace will ensure they shine in your garden.
What Equipments Should You Prepare Before Transplantation Sheep's-bit?
Gardening Gloves
To safeguard your hands while handling soil and plants.
Shovel or Spade
For digging and moving the sheep's-bit.
Watering Can or Hose
To hydrate the plant before and after its relocation.
Garden Trowel
For smaller or more precise digging, especially with young plants or seedlings.
Measuring Tape
To ensure proper distances between transplanted specimens.
Pruning Shears
To trim any dead or damaged roots or leaves prior to transplanting.
Wheelbarrow or Garden Cart
To transport the sheep's-bit and soil efficiently.
Organic Mulch
To help retain moisture and prevent weed growth around the new planting area.
How Do You Remove Sheep's-bit from the Soil?
How Do You Remove Sheep's-bit from the Soil?
From Ground: Water the sheep's-bit the day before to ensure moist soil, which helps keep the root ball intact. Use a shovel to dig a wide circle around the sheep's-bit, then carefully work the shovel deep into the soil to get under the root ball. Gently lift the sheep's-bit out of the ground.From Pot: Water the sheep's-bit and let it drain. Tilt the pot sideways and gently tap it to loosen the soil. Slowly ease the plant out of the pot, supporting it by the base of its stem.From Seedling Tray: Water the seedling tray to moisten the soil, which helps prevent root damage. Use a garden trowel or your fingers to gently lift the seedling from the tray, making sure to keep a good amount of soil with the roots to maintain their integrity.
Step-by-Step Guide for Transplanting Sheep's-bit
Preparation
Gather all necessary tools and thoroughly water your sheep's-bit before beginning the transplanting process.
Removal
Depending on its origin, carefully extract the sheep's-bit from the ground, pot, or seedling tray, retaining as much root and surrounding soil as possible.
Inspect Roots
Examine the root system. Trim any broken or damaged roots using pruning shears. Gently loosen the root ball to encourage outward growth.
Planting Hole
Dig a hole in the soil that is twice as wide and the same depth as the root ball of your sheep's-bit.
Placing the Plant
Gently place the sheep's-bit into the hole, ensuring it sits at the same depth it was previously growing. The transition should be as smooth as possible to avoid shock.
Backfilling
Carefully refill the hole with soil, tamping lightly to remove air pockets without overly compacting the soil.
Watering In
Thoroughly water the sheep's-bit after planting to help settle the soil around the roots and aid in recovery from transplant shock.
Mulching
Apply organic mulch around the base of the sheep's-bit to retain moisture and protect the roots.
How Do You Care For Sheep's-bit After Transplanting?
Watering
Ensure the soil around the sheep's-bit stays moist to promote new root development. Be careful not to overwater, which can lead to waterlogged soil.
Staking
If the sheep's-bit is tall or in a windy spot, provide a stake for support until its roots firmly establish in the surrounding soil.
Pruning
Trim back any damaged or excessively long shoots to encourage denser new growth.
Monitoring
Keep a close watch on the sheep's-bit for any signs of stress or disease. Early detection is crucial for successful recovery.
Feeding
A few weeks post-transplant, apply a balanced, slow-release fertilizer to encourage healthy growth, unless the soil is already nutrient-rich.
Troubleshooting Common Issues with Sheep's-bit Transplantation.
When is the optimal time to transplant sheep's-bit?
The best time is during the mild conditions of early to late spring, when the soil begins to warm.
How far apart should I space sheep's-bit when transplanting?
Position sheep's-bit approximately 6-8 inches (15-20 cm) apart to allow each plant ample room to thrive.
What should I do if sheep's-bit's leaves wilt after transplanting?
Ensure it receives adequate water and protection from intense sunlight. Wilting indicates stress during adjustment.
Why is my sheep's-bit not blooming after being transplanted?
It may require time to acclimate. Confirm it has sufficient light, water, and avoid over-fertilizing.
How deep should I plant sheep's-bit's root ball?
Plant the root ball so its top is level with the surrounding soil surface.
What soil conditions are best for transplanting sheep's-bit?
Aim for well-draining soil rich in organic matter to foster robust root development.
How do I ensure sheep's-bit recovers quickly after transplanting?
Water it consistently without over-saturating, and mulch to maintain soil moisture and temperature.
Can sheep's-bit be transplanted on a rainy day?
Yes! Overcast weather with light rain can help sheep's-bit settle in without added stress.
What's the right way to handle sheep's-bit's roots when transplanting?
Gently untangle the roots and spread them out carefully to promote outward growth.
Should I fertilize sheep's-bit immediately after transplanting?
Refrain from fertilizing until sheep's-bit shows signs of new growth to prevent root burn.



