How to Transplant Low bulrush?
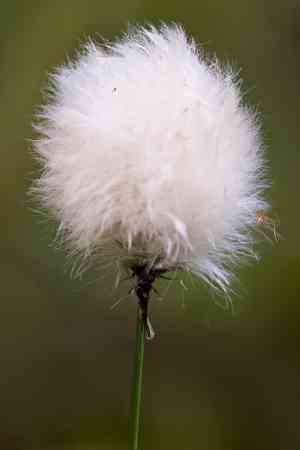
The ideal period for transplanting low bulrush is mid-spring, leveraging peak growth circumstances. Select a site with good drainage, protecting low bulrush from intense warmth. Should it be necessary, carefully untangle roots to foster expansion in their new environment.
Necessary Preparations Before Relocating Low Bulrush?
Optimal Period for Moving Low Bulrush?
When the gentle warmth returns and days lengthen, typically from mid to late spring, this offers the ideal window to relocate low bulrush. This period aligns with low bulrush's natural growth cycle, allowing it to settle in its new spot with ample sunlight and moderate temperatures. Transplanting during this mild part of the growing season helps low bulrush root firmly and flourish vigorously, avoiding winter's harshness and summer's intense heat. The soil is usually rich and perfectly moist, ready to receive your low bulrush's roots. Embrace this time of renewal to give your low bulrush a fresh start!
Required Spacing Between Low Bulrush Plants?
When preparing to move your low bulrush, ensure adequate spacing. Ideally, each plant needs about 0.5-1 foot (15-30 cm) of room in all directions. This provides sufficient space for them to grow and spread their foliage without hindering adjacent plants.
Best Soil Blend for Low Bulrush Relocation?
Your low bulrush will thrive best in soil that drains well. Aim to replicate its natural environment by creating a sandy soil mixture. To boost soil fertility, mix in a base fertilizer. Composted manure or a slow-release granular fertilizer will work effectively.
Where to Replant Your Low Bulrush?
Your low bulrush loves sunlight. Find a garden spot that receives full sun or partial shade, as this is crucial for its healthy and robust growth. Avoid overly shaded areas, as they can impede your low bulrush's development.
Equipment Needed Before Relocating Low Bulrush?
Gardening Trowel
For digging into the soil when removing the plant from its original spot and creating a new hole for transplanting.
Gardening Gloves
To protect your hands while working with soil and extracting the plant.
Watering Can
To hydrate the plant before and after relocation. This minimizes root stress.
Spade
Necessary for digging around the plant for removal and making larger holes for planting in the new location.
Wheelbarrow
Required for safely moving the plant from its initial spot to the new one.
How to Extract Low Bulrush from the Ground?
How to Extract Low Bulrush from the Ground?
From Ground: Start by watering the low bulrush plant to moisten the soil, making extraction easier. Use a gardening trowel or spade to dig a wide trench around the plant, ensuring the root ball remains intact. Gently work the spade beneath the root ball to lift the plant from its original position.From Pot: If the low bulrush plant is in a pot, water it first to facilitate removal. Turn the pot sideways, hold the plant gently, and tap the pot's rim against a surface, like a bench or step. Carefully pull the plant out, ensuring its root ball doesn't break.From Seedling Tray: If the low bulrush is in a seedling tray, gently push from the bottom, applying pressure to lift it. Handle the seedling by its leaves to prevent damage to the stem or roots.
Step-by-Step Guide for Relocating Low Bulrush
Preparation
Water the low bulrush plant before beginning the relocation process to reduce root stress. Prepare the new planting hole in the new location; it should be twice the width and the same depth as your plant's root ball.
Plant Removal
Using a trowel or spade, carefully dig around the plant to keep the root ball intact and lift the plant.
Transplantation
Place the plant in the new hole, ensuring the top of the root ball is level with the soil surface. Fill the space around the root ball with soil and gently firm it.
Watering
Thoroughly water the plant after relocation. The soil should be moist but not waterlogged.
Post-Transplant Care for Low Bulrush
Watering
After relocation, consistent watering is vital until the low bulrush establishes itself in its new spot. Water the plant thoroughly after planting and regularly thereafter, never allowing the soil to dry out.
Protection
Shield the plant from harsh weather and intense sunlight for the first few days post-transplant. A temporary shade can greatly assist the plant in adapting to its new environment.
Pruning
Lightly prune the plant to remove any damaged or broken leaves and stems. This ensures the plant's energy is directed towards establishing new roots, rather than maintaining unnecessary foliage.
Addressing Common Issues with Low Bulrush Relocation.
When is the best time to move low bulrush?
The most suitable period to relocate low bulrush is between late Spring and early Autumn.
What should be the ideal spacing when planting low bulrush?
For healthy growth, maintain a distance of approximately 0.5 to 1 foot (or between 15 to 30 cm) between each low bulrush.
What to do if low bulrush is wilting after transplant?
Low bulrush may initially wilt due to transplant shock. Keep it hydrated, and it should recover over time. If wilting persists, consider providing shade.
Why doesn't low bulrush establish well after transplanting?
Ensure the relocation depth is correct; low bulrush doesn't establish well when planted too deeply. Also, check for appropriate soil and watering.
How much water should I give low bulrush after transplanting?
Keep the soil consistently moist, but not overly saturated. Both over-watering and under-watering can impede low bulrush's establishment.
How to handle low bulrush for transplanting without damaging it?
Handle the plant by its root ball, not by the plant itself. Ensure the root system is intact and undamaged during relocation.
Why are the leaves of low bulrush turning yellow?
Yellowing leaves could indicate water stress or nutrient deficiency. Adjust your watering and consider using a water-soluble fertilizer.
What kind of soil is suitable for relocating low bulrush?
Low bulrush prefers well-drained soil with a slightly acidic to neutral pH. Incorporate organic matter to improve soil conditions if needed.
Is there a specific pot size recommended for relocating low bulrush?
The pot should be at least 6 inches (15 cm) deep to accommodate the low bulrush's root system. Larger pots encourage better growth.
How long does it take for low bulrush to establish after transplant?
It takes low bulrush approximately one to two weeks to establish after relocation, given suitable conditions and care.



