How to Transplant Elecampane?
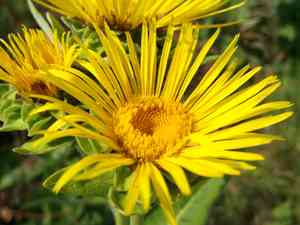
Reinvigorate your outdoor space by transplanting elecampane during the initial period of spring's arrival. Choose a brightly lit location featuring soil that drains effectively, and if the elecampane's strong root system appears congested, carefully separate it to foster enhanced growth.
What Preparations are Needed Before Transplanting Elecampane?
What is the Ideal Time for Transplanting Elecampane?
The perfect time for moving elecampane is in the spring, specifically when the ground is workable and all danger of frost has passed. This timing promotes strong root development prior to summer's heat. Relocating elecampane during this period takes advantage of longer days and moderate temperatures, which are beneficial for root establishment. Ensuring elecampane is settled in its new spot at this time guarantees a smooth transition, fostering vigorous growth and optimal health in your garden.
How Much Space Should You Leave Between Elecampane Plants?
When relocating elecampane, ensure ample room for each plant. Allow approximately 1.5 to 2 feet (45 to 60 cm) between individual plants. This spacing enables each elecampane to grow and thrive without competition.
What is the Best Soil Mix for Elecampane Transplanting?
Prepare the soil with a rich, loamy foundation, as elecampane thrives in nutrient-dense environments. Incorporate a slow-release fertilizer to provide sustained nourishment for the plants. Time-released nutrients help ensure the plant receives sustenance throughout the growing season.
Where Should You Relocate Your Elecampane?
Select a garden location that receives full sun for optimal elecampane growth. They flourish with a minimum of six hours of direct sunlight but can endure partial shade.
What Equipments Should You Prepare Before Transplantation Elecampane?
Gardening Gloves
These will protect your hands when working with soil and the plant.
Shovel or Spade
You'll need this tool to excavate the elecampane plant from its original spot or to dig a suitable hole in the new location.
Trowel
This small hand tool can be useful for managing seedlings or smaller plants.
Watering Can
It will be used to moisten the soil before and after the relocation process.
Pruning Shears
These might be necessary for trimming roots or stems during the procedure.
Wheelbarrow or Bucket
This will be used to transport the elecampane plant from its initial position to the new planting site.
How Do You Remove Elecampane from the Soil?
How Do You Remove Elecampane from the Soil?
From Ground: Start by watering the elecampane plant to moisten the soil, which facilitates removal. Dig a wide circle around the plant with your shovel or spade, being careful not to harm the root ball. Gently work your spade beneath the root ball and slowly lift the plant from its current spot.From Pot: If your elecampane plant is currently in a container, ensure it's watered beforehand as well. Turn the pot sideways and gently squeeze or tap it to ease the plant out. Support the plant by its root ball to prevent damage.From Seedling Tray: For seedlings, use a small trowel or your fingers to carefully lift them out, taking care not to injure the delicate roots. It's best to transplant them once they have developed their first set of true leaves.
Step-by-Step Guide for Transplanting Elecampane
Preparation
Prepare your new planting hole. It should be twice the width of the elecampane plant's root ball and of equal depth. Form a small mound of soil in the center of your hole for the root ball to rest upon.
Arrangement
Position your elecampane plant in the prepared hole. Its root ball should sit on the soil mound, and its top should be level with the ground. Ensure the plant is upright and backfill the hole with soil.
Watering
Water the area generously after transplanting to help the soil settle around the root ball. Avoid excessive watering to prevent waterlogging.
Monitoring
Observe the plant closely over the next few days, especially for indications of transplant shock, such as wilting or yellowing leaves.
How Do You Care For Elecampane After Transplanting?
Watering
Maintain consistent soil moisture for the initial weeks after relocating elecampane until it becomes well-established in its new environment.
Protection
Elecampane is a resilient plant, but it's wise to shield it from harsh weather conditions like heavy rain or intense heat immediately following transplantation.
Pruning
Minor pruning may be necessary if any branches or leaves begin to wilt or turn yellow. This helps the plant direct its energy towards new growth.
Troubleshooting Common Issues with Elecampane Transplantation.
What's the best season for transplanting elecampane?
The optimal periods for relocating elecampane are during seasons S1 to S3. This offers the perfect balance of temperature and rainfall for successful transplantation.
How much space should elecampane have between each plant?
Elecampane requires ample space, between 1.5-2 feet (45-60 cm) apart. This spacing ensures sufficient room for growth without competition for nutrients and light.
What soil is best for transplanting elecampane?
Elecampane thrives in well-drained soil rich in organic matter. If the soil is too dense, incorporating compost or peat moss can enhance its structure and nutrient content.
Why is my transplanted elecampane wilting?
Wilting can be a symptom of transplant shock. Ensure you water the elecampane regularly and thoroughly after transplanting to provide adequate hydration and aid its recovery.
What depth should elecampane be planted?
Elecampane should be planted at the same depth it was growing previously. This depth typically corresponds to the top of the root ball or plant base.
Do I need to trim elecampane before transplanting?
Trimming isn't essential, but it helps reduce stress by balancing the top growth of elecampane with its root system. Only remove unhealthy or damaged parts.
How to water elecampane after transplanting?
Water elecampane deeply after transplanting. It's crucial to keep the soil moist but not waterlogged. Overwatering can lead to root rot and other problems.
What time of the day is the best for transplanting elecampane?
The best time to relocate elecampane is early in the morning or late in the evening. Cooler temperatures reduce evaporation and minimize stress on the plant.
What if the leaves of my transplanted elecampane start turning yellow?
Yellow leaves could indicate overwatering or insufficient nutrition. Adjust your watering schedule and consider adding a balanced, slow-release fertilizer to improve leaf color and plant health.
Do I need to fertilize elecampane immediately after transplanting?
No. It's better to wait a few weeks until elecampane has begun to establish roots. Then, a mild, slow-release fertilizer can support healthy growth.



