How to Propagate Elecampane?
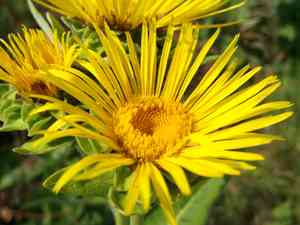
Inula helenium can be successfully multiplied by planting seeds. To achieve the best outcomes, utilize newly harvested seeds and formulate a growing medium that drains efficiently to foster more robust root formation. It is crucial to uphold steady hydration without saturating the soil. Carefully handling the young plants during relocation will lessen root trauma, thereby stimulating more vigorous development.
Optimal Time for Elecampane Propagation
Propagation Method
Seeding
Propagation Period
Spring
Tools for Elecampane Propagation
Seed trays
Seed trays are vital for starting elecampane's seeds in a controlled setting. They aid in even seed distribution and offer ample room for proper germination. They simplify moisture level management, which is crucial for successful elecampane germination.
Potting mix
A premium potting mix guarantees elecampane's seeds receive essential nutrients and aeration for optimal development. The mix should be light, well-draining, and fertile to support the initial root and shoot stages.
Watering can with a fine rose
This tool enables gentle watering that won't disturb elecampane's soil or seed placement. The fine rose attachment helps distribute water evenly, ensuring seeds and emerging seedlings stay hydrated without being dislodged or exposed.
Labels and markers
Labels and markers assist in identifying different stages or groups of elecampane's seeds, especially when propagating multiple varieties. This organization helps monitor growth and apply specific care for each stage.
Plastic cover or humidity dome
A plastic cover or humidity dome helps maintain a stable, high-humidity environment ideal for elecampane's seed germination. It also keeps the temperature consistent and protects seeds from pests or excessive airflow.
How to Propagate Elecampane
Propagation Type
Simple
Caring for Newly Propagated Elecampane
Caring for Newly Propagated Elecampane
Once elecampane's seedlings have emerged and developed a few true leaves, gradually acclimate them to outdoor conditions if started indoors. Transplant them to a sunny, well-drained yet moisture-retentive final growing spot. Provide consistent watering, especially during dry periods, and mulch to retain soil moisture and suppress weeds. Fertilize lightly with a balanced organic fertilizer. Monitor for pests and diseases and treat as needed.
Common Errors to Avoid When Propagating Elecampane
Overwatering
Watering elecampane too often can cause root rot, as the plant prefers well-drained soil. Excessive moisture can suffocate the roots, hindering nutrient absorption and increasing disease susceptibility.
Deep planting
Planting elecampane's root cuttings too deeply can impede their ability to sprout effectively. Roots placed too far down in the soil may struggle to reach the surface or develop correctly, leading to poor growth or no sprouting.
Neglecting division care
Failing to properly care for the plant after division can lead to stress and reduced vitality in elecampane. Inadequate post-division care, such as insufficient watering or not placing divisions in a suitable environment, can severely impact the plant's recovery and growth.
Tips for Propagating Elecampane
Soil preparation
Using well-drained soil enriched with organic matter is vital for elecampane's growth. This ensures roots access necessary nutrients while preventing detrimental water-logged conditions.
Appropriate depth for root cuttings
Planting elecampane's root cuttings at a shallow depth allows for effective sprouting. Ensuring cuttings are just below the soil surface, lightly covered, promotes better shoot initiation and root development.
Careful division
Divide elecampane carefully to ensure each section has sufficient roots and at least one shoot. This improves survival chances and successful propagation, ensuring each division is viable and capable of independent growth.



