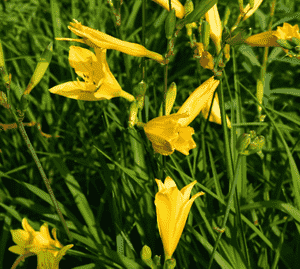
How to Transplant Dwarf yellow daylily?
The most favorable period for relocating dwarf yellow daylily is during the early to mid-spring season, capitalizing on vigorous development. Select a location that receives ample sunlight and possesses soil with good drainage. When separating, confirm that every segment includes a cluster of foliage and roots to ensure successful integration.
What Preparations are Needed Before Transplanting Dwarf Yellow Daylily?
What is the Ideal Time for Transplanting Dwarf Yellow Daylily?
The perfect time to move dwarf yellow daylily is during the gentle period of early to mid-spring. This season provides ideal growing conditions, from the warming soil to the promise of longer, sunny days. Transplanting dwarf yellow daylily at this time promotes strong root development before summer's intense heat. By choosing this suitable timeframe, you allow dwarf yellow daylily to flourish, taking advantage of the moist, cool soil that spring offers. It's the perfect base for dwarf yellow daylily to grow, ensuring a vibrant display as the seasons progress. Our green friend, dwarf yellow daylily, thrives with an early start, moving vigorously into the growing season with strength and vitality.
How Much Space Should You Leave Between Dwarf Yellow Daylily Plants?
When relocating dwarf yellow daylily, position their bases 2-3 feet (60-90cm) apart. This spacing provides ample room for growth without competing for essential resources.
What is the Best Soil Mix for Dwarf Yellow Daylily Transplanting?
As part of your pre-transplantation preparations, prepare the soil using a blend of well-drained loam and compost as a foundational fertilizer. This will create the nutrient-rich environment your dwarf yellow daylily needs to thrive.
Where Should You Relocate Your Dwarf Yellow Daylily?
For your dwarf yellow daylily to flourish, select a location that receives abundant sunlight. If you have an area that gets sun for most of the day, this would be your optimal choice!
What Equipments Should You Prepare Before Transplantation Dwarf Yellow Daylily?
Gardening Gloves
To safeguard your hands while handling the plant and soil.
Shovel or a Garden Trowel
Used for digging and relocating dwarf yellow daylily, ensuring the root ball remains undamaged.
Watering Can
To supply adequate water to the plant both before and after its relocation.
Garden Fork
It's useful for loosening the soil at the new site prior to transplanting.
Mulch
After moving dwarf yellow daylily, mulch helps maintain soil moisture around the plant.
Organic Fertilizer
Crucial for supplying vital nutrients to the plant post-transplant. While we avoid discussing specific fertilizer types, it's worth noting this will eventually be necessary for the plant's well-being.
How Do You Remove Dwarf Yellow Daylily from the Soil?
How Do You Remove Dwarf Yellow Daylily from the Soil?
From Ground: Begin by watering the dwarf yellow daylily plant to moisten the soil, which facilitates easier removal. Carefully dig a wide trench around the plant using a shovel or spade, ensuring no damage to the root ball. Loosen the earth around the roots with a garden fork, then gently work the spade beneath the root ball to free the plant.From Pot: If moving from a pot, water the plant first, then turn the pot sideways with your hand on the soil and the dwarf yellow daylily's stems between your fingers. Gently remove the pot while supporting the root ball. Remember to handle the plant by its root ball, not its stems, to prevent damage.From Seedling Tray: Once the dwarf yellow daylily seedling is large enough to handle, moisten the soil, and use a spoon or plant label to lift it from the tray, aiming to keep as many roots intact as possible. Handle the seedling by its leaves to avoid harming the stem.
Step-by-Step Guide for Transplanting Dwarf Yellow Daylily
Hole Preparation
Dig a hole in the chosen spot that is twice as wide and equally deep as the dwarf yellow daylily's root ball. Loosen the soil at the bottom with a garden fork.
Placing the Plant
Gently position the plant in the hole, ensuring it is level with the soil surface. The top of the root ball should be slightly above ground level to allow for settling.
Backfilling
Carefully refill the hole with the excavated soil, gently but firmly compacting the soil around the plant's base.
Watering
Immediately after backfilling, water generously to help the soil settle around the roots. Allow the water to fully drain into the soil.
Mulching
Spread a layer of mulch around the plant, keeping it a few inches away from the stem. This will help retain moisture and suppress weeds.
How Do You Care For Dwarf Yellow Daylily After Transplanting?
Monitoring
Inspect dwarf yellow daylily daily for any indications of transplant shock, such as wilting or discolored leaves. If observed, keep the plant adequately watered but avoid over-watering.
Pruning
If you notice any parts of dwarf yellow daylily that appear to be struggling or dying after the transplant, remove these sections to help the plant direct its energy towards new growth.
Fertilizing
Wait 4-6 weeks before applying slow-release organic fertilizer to allow dwarf yellow daylily to acclimate. Too much too soon can damage the roots.
Continued Care
Ensure your dwarf yellow daylily continues to receive appropriate care as previously described: regular watering (but avoid overwatering), exposure to sufficient sunlight according to prior sections, etc. Always remember, patience is crucial for a successful transplant.
Troubleshooting Common Issues with Dwarf Yellow Daylily Transplantation.
What's the best time of year to relocate dwarf yellow daylily?
The ideal time for moving dwarf yellow daylily is during S1-S2. They can adapt to changing weather, providing them with an excellent start in their new location.
How much space should I leave between my dwarf yellow daylily when transplanting?
Aim for a comfortable distance of about 2-3 feet (60-90 cm) between each plant. This spacing allows dwarf yellow daylily to grow without overcrowding.
How deep should the hole be when transplanting dwarf yellow daylily?
Prepare a hole twice as wide as the plant's root ball and equally deep. This provides ample space for the roots to expand and anchor in their new home.
How can I ensure my dwarf yellow daylily establishes successfully after transplanting?
After transplanting dwarf yellow daylily, water it thoroughly. Over the next few weeks, pay close attention to its watering needs and protect it from extreme weather to ensure successful establishment.
What should I do if the leaves of my transplanted dwarf yellow daylily start to wilt?
Wilting may indicate water stress. Adjust your watering schedule and ensure your dwarf yellow daylily isn't exposed to overly harsh sunlight. Remember, patience is key during this process.
How do I prepare the soil for dwarf yellow daylily transplanting?
Before transplanting, loosen the soil, removing any debris. Incorporate some organic matter like compost to enrich it, providing a nourishing environment for the dwarf yellow daylily.
My transplanted dwarf yellow daylily doesn't seem to be growing. What might be wrong?
Remember, dwarf yellow daylily needs time to establish. Allow a few weeks before expecting visible growth. If the problem persists, check your watering routine or soil condition.
Do I need to prune dwarf yellow daylily before transplanting?
Trimming back foliage can reduce stress during transplanting. However, with dwarf yellow daylily, pruning isn't essential. If the plant appears excessively large, consider a light trim.
How long does dwarf yellow daylily take to establish after transplanting?
Depending on conditions, dwarf yellow daylily typically takes 2-3 weeks to settle in its new spot. Don't be concerned if initial growth is slow; it's part of the process.
Do I need to fertilize dwarf yellow daylily immediately after transplanting?
Not immediately. Initially, water well and let the plant settle. After a couple of weeks, adding a balanced, slow-release fertilizer can promote healthy growth in dwarf yellow daylily.


