How to Prune Dwarf yellow daylily?
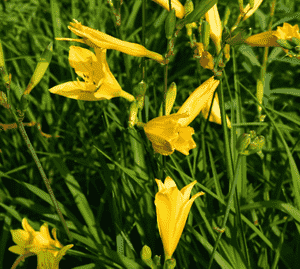
A perennial herb valued for its vivid, trumpet-shaped blossoms and slender leaves. Essential trimming methods involve removing faded flowers to encourage further flowering and eliminating aged foliage to sustain vitality. The most effective time for pruning is after blooming and during its dormant period in autumn or early spring. Particular attention should be paid to severing foliage at the ground level and making precise, clean cuts to avert illness. Trimming benefits 'dwarf yellow daylily' by stimulating increased blooms, lowering disease susceptibility, and preserving the plant's well-being and aesthetic appeal.
Advantages of Trimming Dwarf Yellow Daylily
Advantages of Trimming Dwarf Yellow Daylily
Trimming dwarf yellow daylily promotes fresh growth, resulting in more vibrant blossoms. It also helps maintain a compact shape, preventing dwarf yellow daylily from becoming too large. Robust growth is stimulated, enhancing the plant's overall health and visual appeal.
Optimal Time for Trimming Dwarf Yellow Daylily
Optimal Time for Trimming Dwarf Yellow Daylily
The best times to trim dwarf yellow daylily are late spring, once frost danger has passed and new growth begins, early summer, immediately after its flowering period, and late fall, when the plant enters dormancy. Late spring trimming ensures the plant can recover without cold weather threats and prepares it for vigorous growth. Early summer trimming is ideal for removing spent flowers and encouraging reblooms, as dwarf yellow daylily often has multiple blooming cycles. Finally, late fall trimming is beneficial for tidying the plant for winter and removing any dead or diseased foliage that could harbor pests or diseases during colder months. Trimming outside these periods, especially during flowering, can reduce the bloom display and potentially stress dwarf yellow daylily, hindering its overall health and development.
Tools Required for Trimming Dwarf Yellow Daylily
Bypass Pruners
Perfect for making precise cuts on dwarf yellow daylily, bypass pruners create a clean incision without crushing plant tissues, aiding quicker recovery.
Scissors
Useful for removing faded blossoms of dwarf yellow daylily, scissors allow for targeted trimming without disturbing nearby foliage.
Garden Knife
Helpful for separating clumps of dwarf yellow daylily for propagation or revitalization. Garden knives offer precision and control for cutting through roots.
Long-handled Loppers
Recommended for reaching thick, mature stems of dwarf yellow daylily if needed, providing leverage without straining the gardener.
Pruning Saw
Only necessary for dwarf yellow daylily if there are exceptionally thick stems that other tools cannot handle, a pruning saw can manage tougher cuts.
Shears
For shaping and controlling the growth of dwarf yellow daylily, shears are practical for trimming large sections uniformly in one go.
How to Trim Dwarf Yellow Daylily
Clean Tools
Before starting, sanitize your pruning shears or scissors to prevent the spread of any diseases to dwarf yellow daylily.
Remove Diseased
Carefully cut off any diseased leaves from dwarf yellow daylily, ensuring you cut at the base of the leaf, near the plant's crown without causing damage.
Remove Withered Leaves
Snip away withered leaves on dwarf yellow daylily in the same manner, cutting at the base to encourage healthy new growth.
Deadhead Flowers
Deadhead dwarf yellow daylily by snipping off the faded flowers at the base of the bloom stalk to encourage reblooming and maintain a neat appearance.
Dispose
Dispose of all removed material from dwarf yellow daylily in a bin or compost area away from your garden to prevent any potential disease spread.
Common Trimming Errors with Dwarf Yellow Daylily
Excessive Trimming
Removing too much foliage can stress dwarf yellow daylily by reducing its ability to photosynthesize and store energy, which is crucial for its growth and flowering.
Cutting Into Old Wood
Dwarf yellow daylily, like many perennials, may not respond well if trimmed into the old, mature base of the plant. This can lead to less vigorous growth or even damage the plant's ability to produce new shoots.
Ignoring Deadheading
Failing to regularly remove spent flowers (deadheading) can lead to fewer blooms as dwarf yellow daylily may start investing energy into seed production instead of new flowers.
Improper Disinfection
Not disinfecting tools between cuts and plants can spread diseases. Clean, sharp trimming tools are essential to prevent infection and ensure clean cuts.
Incomplete Cleanup
Neglecting to remove and dispose of trimming debris can attract pests and diseases, which may linger and affect the health of dwarf yellow daylily.
Uneven Cuts
Making jagged or uneven cuts may hinder the healing process of dwarf yellow daylily, making it more susceptible to diseases and pests.
General Trimming Advice for Dwarf Yellow Daylily
Selective Trimming
Trim selectively by removing only dead, diseased, or broken foliage and spent flowers. This maintains the health and appearance of dwarf yellow daylily without over-trimming.
Regular Deadheading
Encourage more blooms by regularly deadheading, which directs dwarf yellow daylily's energy towards flower production rather than seed setting.
Cut Above Growth Point
When cutting, make the cut just above a new growth point or a set of leaves to promote healthy regeneration of dwarf yellow daylily.
Post Bloom Trim
After the main bloom cycle, a light trim can help rejuvenate dwarf yellow daylily and prompt it to produce a second round of flowers.
Clump Division
For healthy growth and to maintain the size, divide dwarf yellow daylily's clumps every few years. This also increases air circulation and reduces disease risk.
Proper Tool Use
Use clean, sharp tools suitable for the size of stems being trimmed to ensure clean cuts that heal quickly and minimize stress on dwarf yellow daylily.


