How to Transplant Shrubby Haloragis?
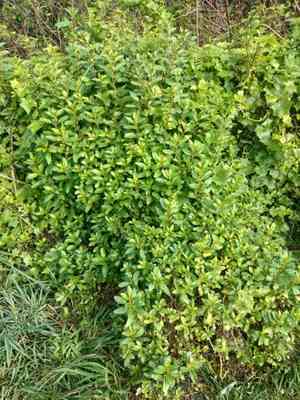
For the best outcome, relocate shrubby Haloragis from early spring through the beginning of summer to ensure robust development. Choose a location that receives ample sunlight and has soil that drains effectively. A helpful tip: prevent shrubby Haloragis from becoming oversaturated with water to promote successful rooting.
Essential Preparations Before Relocating Shrubby Haloragis?
Optimal Timing for Moving Shrubby Haloragis?
The ideal period to move shrubby Haloragis spans from the onset of early spring's thaw to the brink of summer. This timeframe allows the plant to establish its root system in mild soil, promoting vigorous development. Transplanting shrubby Haloragis during this window maximizes recovery and minimizes stress. By settling in prior to summer's heat, it adapts smoothly, thriving in its new spot. This timing, aligning with natural growth cycles, ensures a successful transition for shrubby Haloragis.
Recommended Spacing Between Shrubby Haloragis Plants?
When getting ready to move your shrubby Haloragis, aim to position each plant approximately 15-18 inches (38-46 cm) apart. This will provide your shrubby Haloragis with ample room to flourish and reach their full potential, preventing overcrowding.
Best Soil Blend for Shrubby Haloragis Relocation?
For your shrubby Haloragis, select well-draining soil rich in organic material. Before transplanting, incorporate a balanced, slow-release fertilizer to give your shrubby Haloragis an excellent start. This enriches the soil with beneficial nutrients.
Where to Replant Your Shrubby Haloragis?
Locate a sunny area for your shrubby Haloragis that receives at least 6 hours of daily sunlight. Shrubby Haloragis thrives best with abundant light, so a spot with morning sun and some afternoon shade would be perfect to encourage healthy growth.
Equipment Needed Before Transplanting Shrubby Haloragis?
Gardening Gloves
To safeguard your hands while handling soil and plants.
Spade or Shovel
For excavating the plant and preparing the new planting site.
Hand Trowel
For detailed work around roots and smaller digging tasks.
Watering Can or Hose
To hydrate the plant before and after its relocation.
Wheelbarrow
To transport the shrubby Haloragis if necessary.
Pruning Shears
For trimming any damaged roots or foliage.
Garden Fork
To assist in loosening the soil surrounding the root system.
Mulch
To help retain moisture and stabilize soil temperature post-planting.
Rooting Hormone (optional)
To stimulate root development in the new location.
Soil Amendment (as appropriate for your soil type)
To blend with existing soil to enhance conditions for the shrubby Haloragis.
How to Extract Shrubby Haloragis from the Ground?
How to Extract Shrubby Haloragis from the Ground?
From Pot: Start by watering the shrubby Haloragis to ensure the soil is moist, which will facilitate its removal. Turn the pot on its side and gently tap or press the pot's edges to loosen the soil's grip. Carefully ease the plant out, supporting the main stem with one hand, and set it aside for transplanting.From Seedling Tray: Similarly, water the shrubby Haloragis first. With care, use a hand trowel or your fingers to gently lift the seedling from its compartment, striving to preserve the root ball and surrounding soil.From Ground: Water the shrubby Haloragis generously before beginning. Use a spade or shovel to dig around the plant, ensuring a wide perimeter to avoid cutting into the root zone. Gently pry up under the root ball, and once it's loose, carefully lift the shrubby Haloragis from the ground.
Step-by-Step Guide for Relocating Shrubby Haloragis
Preparing New Site
Prepare the new planting hole in advance. It should be twice as wide and the same depth as the root ball of the shrubby Haloragis.
Roots Pruning
Inspect the roots, cutting away any that are broken or damaged using pruning shears.
Placing in Hole
Position the shrubby Haloragis in the center of the new hole. The top of the root ball should be level with the surrounding ground.
Backfilling Soil
Gently backfill the hole with soil around the root ball. If the soil is poor, mix in some soil amendment before backfilling.
Watering
Thoroughly water the shrubby Haloragis, ensuring the soil settles around the root ball. Avoid over-watering to the point where there is standing water.
Mulching
Apply a 2-3 inch layer of mulch around the base of the shrubby Haloragis, keeping it away from the stem to prevent rot.
Final Adjustments
Make any final adjustments to the position of the shrubby Haloragis, checking for upright stature, and firming the soil once more.
Post-Transplant Care for Shrubby Haloragis
Consistent Watering
Maintain consistently moist soil around the shrubby Haloragis for several weeks to aid root establishment in its new environment.
Checking Plant Stability
Ensure the shrubby Haloragis remains upright and stable as roots take hold. Adjust soil or stake the plant if needed.
Observation for Stress
Monitor the shrubby Haloragis for signs of transplant shock, such as wilting or discolored leaves, and adjust care as required.
Pruning Dead or Broken Branches
Remove any broken or dead material from the shrubby Haloragis to redirect energy towards new growth.
Protection from Extremes
Provide shade or wind protection in the initial weeks if the shrubby Haloragis is exposed to harsh conditions.
Troubleshooting Common Issues with Shrubby Haloragis Relocation.
What's the best season for transplanting shrubby Haloragis?
Move shrubby Haloragis during the revitalizing period of early to mid-spring for optimal growth.
How much space does shrubby Haloragis need when transplanting?
Ensure to space shrubby Haloragis about 15-18 inches (38-45 cm) apart to give each plant room to thrive.
Why is my shrubby Haloragis wilting after transplanting?
Wilting could indicate shock or dehydration. Keep the soil moist and protect from strong sunlight temporarily.
What soil conditions favor shrubby Haloragis after transplanting?
Well-draining soil rich in organic matter supports shrubby Haloragis's growth. Avoid waterlogged or very dry soil.
How do I prepare the hole for transplanting shrubby Haloragis?
Dig a hole twice as wide as the root ball and just as deep to encourage root expansion.
Can I fertilize shrubby Haloragis during transplanting?
Wait a few weeks post-transplant before introducing a balanced, slow-release fertilizer to avoid root burn.
Should I prune shrubby Haloragis when transplanting?
Light pruning can help shrubby Haloragis focus on root establishment but isnât mandatory. Remove only dead parts.
How often should I water shrubby Haloragis post-transplanting?
Water shrubby Haloragis thoroughly at planting and then regularly until it's established, adjusting for rainfall and soil type.
What's the sign of too much water for shrubby Haloragis after transplanting?
Yellow leaves or a mushy stem base may indicate overwatering. Allow the soil to dry slightly between waterings.
How deep should I plant shrubby Haloragis?
Plant shrubby Haloragis at the same depth it was in its previous container to prevent stem rot or drying out.



