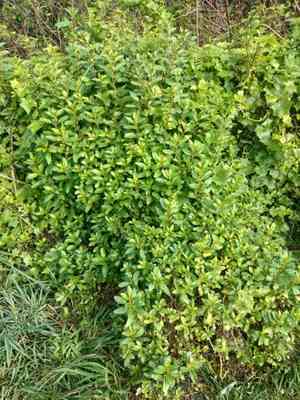
Shrubby Haloragis (Haloragis erecta)
Also known as: Toatoa
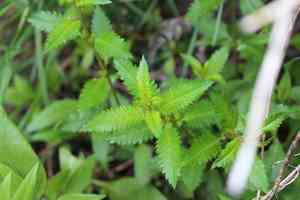
Native to New Zealand, the shrubby Haloragis is a semi-evergreen perennial known for its distinct foliage. It features bronze-colored, serrated leaves that add a unique texture to gardens. In the fall, the plant produces small, subtle flowers that are not particularly showy. Often cultivated for its striking leaf color and texture, Haloragis is a popular choice for adding visual interest to various landscape settings.
In This Article
Attributes of Shrubby Haloragis
Lifespan
Perennial
Plant Type
Shrub
Plant Height
1.2 m
Spread
1.2 m
Leaf Color
Bronze Green
Flower Size
0.3-0.5 cm
Flower Color
Yellow Green Red Brown
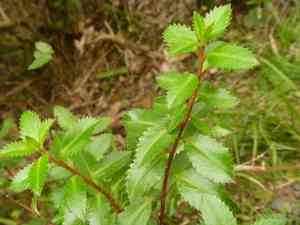
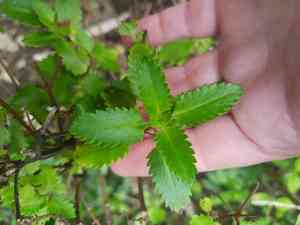
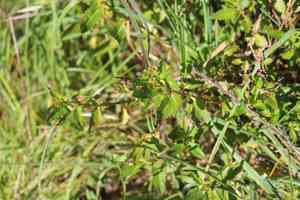
Images of Shrubby Haloragis
Quickly Identify Shrubby Haloragis
1
Look for the square, upright stems and deeply serrated leaves, along with small greenish flowers that are not very conspicuous.
Scientific Classification of Shrubby Haloragis
Phylum
Vascular plants
Class
Dicotyledons
Order
Saxifragales
Family
Water milfoil
Genus
Haloragis
Species
Shrubby Haloragis
Planting and Growing of Shrubby Haloragis
Care Difficulty
Easy
Watering Schedule
Every 2 days
Sunlight Requirements
Partial sun
Sunshine Duration
6-10 hours
Ideal Temperature
60-75℉
Soil Type
Potting Mix, Peat Mix
Soil pH
6-7.5
Fertilizer Type
Balanced
Pruning Season
Spring, Summer
Pruning Area
Branches, Leaves
Pruning Frequency
2 times a year
Repotting Season
Spring
Pot Type
Ceramic, Plastic
 How to Water Shrubby Haloragis?
Haloragis erecta prefers a moderate watering approach where the soil is kept consistently moist but not waterlogged. Around 500 ml of water is generally sufficient. It is crucial to ensure the water penetrates deeply into the soil but does not accumulate at the base.
What are the symptoms of an underwatered Shrubby Haloragis?
›
What should I do if my Shrubby Haloragis is not getting enough water?
›
What are the symptoms of an overwatered Shrubby Haloragis?
›
How to save an overwatered Shrubby Haloragis?
›
 What Are the Sunlight Requirements for Shrubby Haloragis?
Haloragis erecta thrives in partial sun, benefiting from filtered light that fosters strong, healthy growth. The ideal light range supports optimal photosynthesis, ensuring lush foliage and vibrant flowering.
More About Sunlight Requirements Techniques→
Why is partial sun ideal?
›
How to achieve partial sun exposure?
›
Benefits of receiving partial sun?
›
 What Is the Ideal Temperature Range for Shrubby Haloragis?
The ideal temperature range for Haloragis erecta generally falls between 60°F and 75°F. At these temperatures, the plant can efficiently carry out physiological processes like photosynthesis and nutrient absorption. This range also helps in maintaining optimal growth and preventing stress-related symptoms, thereby ensuring that the plant thrives in its environment.
 What Soil is Best for Shrubby Haloragis?
Haloragis erecta prefers soil that allows excellent drainage, preventing waterlogging. Well-drained loam or sandy loam delivers perfect moisture balance, crucial for its root health and growth vigor. Incorporating organic matter, such as compost, enriches the soil, providing essential nutrients for robust development. This improves soil structure and retains sufficient moisture while supporting beneficial microorganisms. Maintaining a soil pH between 6.0 and 7.5 ensures optimal nutrient availability. This range supports healthy growth and vibrant foliage through balanced mineral intake.
 How to Fertilize Shrubby Haloragis?
For Haloragis erecta, the appropriate amount of fertilizer is critical for promoting optimal growth. When using liquid fertilizer, dilute it to half the recommended strength on the packaging to avoid any potential nutrient burn. Apply approximately 100 ml of this solution per plant. For slow-release fertilizers, spread about 15 grams evenly around the base of each plant, ensuring the granules do not come into direct contact with the stem.
 How to Prune Shrubby Haloragis?
Begin by removing any dead, damaged, or diseased stems. Cut them back to the nearest healthy growth to ensure the plant directs its energy towards vigorous shoots. This cleaning sets the stage for more precise shaping and stimulating new growth. Haloragis erecta can quickly become unruly if not regularly trimmed. Focus on shaping the plant by cutting branches that disrupt the desired form. Thin out excess shoots within dense areas to improve airflow and light penetration. For promoting bushier growth, pinch back the tips of branches. This practice encourages new shoots to develop at the sides of the pinched areas, resulting in a fuller, more robust plant over time.
More About Pruning Techniques→
 How to Propagate Shrubby Haloragis plant?
1
Seeds of Haloragis erecta should be collected from mature pods, dried, and stored in a cool, dry place until ready for sowing. This ensures maximum germination rates.
2
Cuttings should be about 4-6 inches long, taken from healthy, vigorous shoots. Remove lower leaves and dip the cut end into a rooting hormone to encourage root development.
3
Divide the clump carefully in early spring when the plant is not actively growing. Use a sharp spade to separate and then plant the divided sections immediately in prepared soil.
 How to Repot Shrubby Haloragis plant?
1
Haloragis erecta typically requires repotting when you notice poor growth, roots emerging from the drainage holes, or the potting medium drying out more quickly. These signs indicate the plant has outgrown its container and requires more space to thrive.
2
Select a pot that is one size larger than the current container. Ensure it has adequate drainage holes to prevent waterlogged soil. Using the right size and type of pot maximizes root growth and helps prevent rot or fungal issues.
3
Opt for a well-draining potting mix rich in organic matter. A mix that includes perlite or sand can be beneficial for Haloragis erecta. This type of soil mimics the plant's natural environment and aids in preventing root rot.
Learn More About Shrubby Haloragis Diseases
Anthracnose
Bacterial Leaf Spot
Bacterial Soft Rot
Bacterial Wilt
Black Spot
Chemical Injury
Crown Gall
Cyst Nematode
Damping-off
Downy Mildew
Drought Stress
Fusarium Wilt
Gray Mold
Leaf Curl
Leaf Spot
Mosaic
Nutrient Deficiency
Nutrient Toxicity
Powdery Mildew
Root Rot
Root-knot Nematode
Rusts
Sooty Mold
Spider Mites
Temperature Stress
Thrips Damage
White Mold



