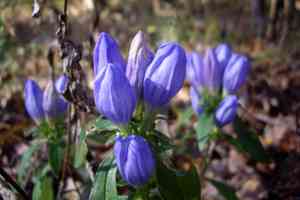
How to Transplant Harvestbells?
The ideal period for relocating harvestbells is in the prime of late spring through early summer, facilitating robust root establishment prior to the colder months. Select a location offering adequate drainage and dappled sunlight. Bear in mind that delicate manipulation is crucial for harvestbells's prosperous relocation.
What Preparations are Needed Before Transplanting Harvestbells?
What is the Ideal Time for Transplanting Harvestbells?
The most favorable period for relocating harvestbells occurs at the transition from the cold season to the warmer months. Moving harvestbells during this timeframe ensures mild temperatures and stable weather, crucial for root establishment, without the strain of extreme heat or cold. This timing aligns with their natural growth cycle, fostering robust development and thriving in their new environment.
How Much Space Should You Leave Between Harvestbells Plants?
Hello there! Prior to rehousing your harvestbells, it's advisable to provide ample spacing. Aim for approximately 12-15 inches (30-38 cm) between them. This grants each plant sufficient room to thrive and achieve its full potential!
What is the Best Soil Mix for Harvestbells Transplanting?
To prepare the ground for your harvestbells, create a loamy soil blend enriched with organic matter, such as compost. Before planting, incorporate a balanced, slow-release fertilizer to give your harvestbells a nutrient-rich beginning.
Where Should You Relocate Your Harvestbells?
For your lovely harvestbells, selecting a location with bright, yet indirect, light will be ideal. Think of it as a cozy spot where sunlight filters in gently, avoiding harsh intensity. A bit of morning sun and afternoon shade will make your harvestbells very content!
What Equipments Should You Prepare Before Transplantation Harvestbells?
Gardening Gloves
To safeguard your hands while handling soil and plants.
Hand Trowel
For excavating small holes and placing young plants.
Shovel or Spade
To extract the plant from its original location if it's in the ground.
Garden Fork
Useful for loosening the earth around the plant's root mass.
Watering Can or Hose
To hydrate the plant following its relocation.
Pruning Shears
To trim any lifeless or damaged roots or leaves.
Wheelbarrow
For moving the plant and soil if required.
Mulch
To aid in retaining soil moisture and regulating temperature after transplant.
How Do You Remove Harvestbells from the Soil?
How Do You Remove Harvestbells from the Soil?
From Ground: Start by watering the harvestbells to moisten the soil, facilitating easier removal. Dig a wide circle around the plant with a shovel, being careful not to harm the root system. Gently lift the root ball with a garden fork or by sliding the shovel underneath, keeping the soil intact around the roots.From Pot: Water the harvestbells and allow it to absorb. Turn the pot on its side, grasp the plant's base, tap the bottom, and carefully ease the plant out while supporting the root ball.From Seedling Tray: Use a hand trowel to loosen the soil surrounding each harvestbells seedling. Carefully lift the seedling by its leaves, not the stem, to prevent damage, ensuring the root ball comes along with minimal disruption.
Step-by-Step Guide for Transplanting Harvestbells
Preparation
Gather all necessary tools and ensure the watering can is filled and ready.
Plant Removal
Execute the appropriate removal procedure to extract the harvestbells from its initial spot, taking care to preserve the root ball.
Transplant Hole
Excavate a hole in the ground twice the width of the root ball and of equal depth, ensuring the harvestbells will be planted at its previous growing level.
Plant Placement
Gently position the harvestbells in the center of the hole. Spread the roots evenly and confirm the plant is standing upright.
Backfilling
Gradually add soil around the root ball, lightly tamping it down to eliminate air pockets but being careful not to compact the soil too firmly.
Watering
Thoroughly water the harvestbells to settle the soil and hydrate the roots. Ensure runoff does not erode the soil around the plant.
Mulching
Apply a layer of mulch around the base of the harvestbells to conserve moisture and deter weed growth. Keep the mulch a few inches away from the stems to prevent rot.
How Do You Care For Harvestbells After Transplanting?
Watering
Maintain consistent soil moisture around the harvestbells for the initial weeks, avoiding overwatering. Regularly check the soil's moisture levels.
Observation
Monitor the harvestbells for indications of transplant shock, such as wilting or discolored leaves, and take suitable action if needed.
Pruning
Trim away any dead or damaged foliage to encourage healthy growth. Focus on allowing the harvestbells to establish its root system.
Mulching
Verify that the mulch remains in place and add more if it settles or shifts to continuously protect the harvestbells.
Support
Provide stakes or other forms of support if the harvestbells shows signs of leaning or instability as it adjusts to its new location.
Troubleshooting Common Issues with Harvestbells Transplantation.
When is the best time to transplant harvestbells?
The ideal time for transplanting harvestbells is during the pleasant early bloom season, typically from late spring to early summer.
How much space is needed between harvestbells plants?
Allow a generous spacing of approximately 12-15 inches (30-38 cm) between each harvestbells to permit ample growth.
What soil conditions favor harvestbells after transplanting?
Ensure rich, well-drained soil with a slightly acidic pH to help harvestbells acclimate comfortably post-transplant.
Why are my transplanted harvestbells's leaves wilting?
Wilting may indicate stress from insufficient water, so provide a gentle yet thorough watering after transplanting.
How deep should I plant harvestbells's roots?
Place harvestbells's roots in a hole that matches their previous depth, allowing them to feel established.
Can I transplant harvestbells on a hot, sunny day?
It's best to transplant harvestbells on a cool, overcast day to minimize sun stress on their delicate foliage.
How do I prepare harvestbells for transplanting?
Ease harvestbells into the move by hydrating it the day before, and gently trim any excessively long roots.
Should I fertilize harvestbells right after transplanting?
Refrain from fertilizing until harvestbells has settled in its new home and exhibits signs of new growth.
What if harvestbells doesn't flower after transplanting?
Patience is essential; harvestbells may forgo blooming as it prioritizes root development. Anticipate blooms next year.
Why is my harvestbells not standing upright after transplanting?
This could be transplant shock. Gently stake for support and keep the soil consistently moist to aid its recovery.


