How to Transplant Mountain stopper?
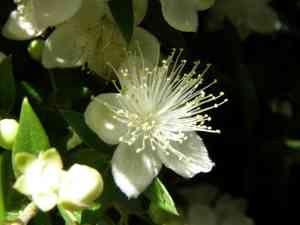
For mountain stopper, the arrival of warmer temperatures in early to mid-spring, when plants emerge from their dormant state, presents an ideal period for relocation. Select a sun-exposed location with soil that drains effectively to foster vigorous development. Bear in mind that attentiveness and diligence during this phase guarantee a seamless adjustment for mountain stopper.
What Preparations are Needed Before Transplanting Mountain Stopper?
What is the Ideal Time for Transplanting Mountain Stopper?
The beginning of spring, specifically its early to mid-stages, presents the optimal window for relocating mountain stopper. This timeframe allows the plant ample opportunity to establish its root system in soft, receptive soil, prior to the onset of summer's intensity. Utilizing this season for transplanting mountain stopper ensures a combination of moderate temperatures and replenished post-winter soil moisture – crucial for root development. A friendly reminder: this proactive step guarantees mountain stopper a strong start to growth, paving the way for a year adorned with vibrant foliage.
How Much Space Should You Leave Between Mountain Stopper Plants?
When transplanting mountain stopper, aim to maintain a separation of approximately 1.5-2.5 feet (45-76 cm) between each specimen. This ensures they each receive sufficient room to develop without competing for resources. Rest assured, you're doing well!
What is the Best Soil Mix for Mountain Stopper Transplanting?
Obtain a soil mixture that drains effectively. A combination of sand, silt, and a small amount of clay would greatly benefit mountain stopper! Before planting, incorporate a slow-release granular fertilizer into the soil. This will supply long-term nutrients.
Where Should You Relocate Your Mountain Stopper?
Select a site for mountain stopper that receives partial to full sun exposure, roughly 4-8 hours of sunlight daily. A bit of shade is also acceptable. And remember, every experience is a chance to learn!
What Equipments Should You Prepare Before Transplantation Mountain Stopper?
Gardening Gloves
To keep your hands clean and shield them from any sharp roots or stones.
Trowel
This tool is used to excavate the planting hole and to carefully extract the plant from its original spot.
Wheelbarrow
Perfect for moving mountain stopper from its initial location to its new home.
Watering Can
Used to hydrate mountain stopper before and after its relocation.
Pruning Shears
These are necessary for trimming any damaged roots or leaves that might impede the plant's recovery after transplant.
Mulch
Mulch assists in retaining soil moisture following transplantation.
How Do You Remove Mountain Stopper from the Soil?
How Do You Remove Mountain Stopper from the Soil?
From Ground: Carefully use your trowel to dig around the mountain stopper plant, taking care not to damage any roots. Attempt to dig deep enough to get beneath the plant's main root ball. Once loosened, gently lift mountain stopper from the ground, ensuring the root ball remains intact.From Pot: Thoroughly water the plant, then turn the pot on its side, hold the plant steady with one hand, and tap the pot's rim against a hard surface to dislodge it. If the plant doesn't come loose, run a knife around the inside edge of the pot to free the soil and roots.From Seedling Tray: Water the tray completely and allow it to drain. Using a small spade, carefully loosen the soil around the mountain stopper's root ball and gently lift it from the tray with your hand, supporting it by the root ball.
Step-by-Step Guide for Transplanting Mountain Stopper
Preparation
Prepare the new site by digging a hole that is twice the size of the mountain stopper plant's root ball. The hole should be deep enough so the plant sits at the same soil level as it did in its previous spot.
Insertion
Carefully place the mountain stopper into the excavated hole. Spread out its roots and ensure it is centrally positioned.
Filling
Backfill the hole with soil, making sure no roots are exposed.
Watering
Thoroughly water the plant after transplanting to help settle the surrounding soil.
Mulching
Apply a layer of mulch around the plant, keeping it away from the stem, to help retain moisture.
How Do You Care For Mountain Stopper After Transplanting?
Regular Check-Up
Be sure to monitor mountain stopper closely during the initial few weeks. Look for indications of transplant shock, such as wilting, yellowing, or dropped leaves. If these appear, increase watering.
Pruning
If any leaves or branches die back after transplant, trim them off to enhance mountain stopper's overall health and appearance. This also helps redirect energy to the plant's healthier sections.
Watering
Water mountain stopper daily for the first week, then reduce to every other day in the second week, and subsequently to just twice a week. The aim is to mimic rainfall, so apply water until the soil is moist, but not waterlogged.
Troubleshooting Common Issues with Mountain Stopper Transplantation.
What's the best timing for transplanting mountain stopper?
Timing is crucial when relocating mountain stopper. The optimal season is between S1 and S2, when environmental conditions are most favorable for root development.
How far apart should I space mountain stopper plants?
When arranging multiple mountain stopper plants, it's advisable to maintain a distance of approximately 1.5-2.5 feet (~45-75 cm) between them. This promotes robust growth by minimizing competition for resources.
How deep should I transplant mountain stopper?
The mountain stopper should be planted at the same depth it was growing in its previous location. This is typically around 10 inches (25 cm).
What type of potting mix is suitable for transplanting mountain stopper?
Mountain stopper thrives in well-drained soil with a good amount of organic material. A blend of potting soil, compost, and a small quantity of sand would significantly aid its growth.
Do I need to water mountain stopper immediately after transplanting?
Yes, watering right after transplanting mountain stopper is essential. It helps settle the soil around the roots and assists the plant in establishing itself in its new environment.
Can I prune mountain stopper after transplanting?
Yes, pruning is recommended after transplanting to help alleviate stress. Remove damaged or excessively long branches to improve shape and encourage new growth.
How much sunlight does mountain stopper require post-transplantation?
Mountain stopper prefers a location with full to partial sun. Too much shade might weaken the plant and result in less vigorous growth.
Should I add fertilizer immediately after transplanting mountain stopper?
Avoid applying heavy fertilizer immediately after transplanting. Allow a few weeks for the plant to settle, then you can add a slow-release, balanced fertilizer to stimulate growth.
What if mountain stopper shows signs of wilting after transplantation?
Wilting may occur due to transplant shock. Ensure it receives adequate water, but prevent water-logging. If the problem persists, consider using root-stimulating hormones.
What if the leaves of mountain stopper turn yellow after relocation?
Yellowing leaves could indicate over-watering or insufficient nutrient absorption. Adjust watering practices and ensure the soil drains well. If no improvement is observed, try a mild, balanced fertilizer.



