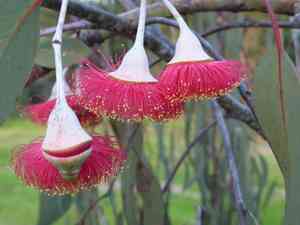
How to Transplant Gungurru?
Gungurru flourishes most effectively when relocated during the mild, intermediate phases of early to mid-spring or early to late winter. Select a bright area featuring soil that drains efficiently to boost its development. Confirm the fresh site replicates its native environment for peak performance.
Necessary Preparations Before Relocating Gungurru?
What is the Best Period for Relocating Gungurru?
The most favorable times for moving gungurru, a perennial plant, are from early to mid-spring or from early to late winter. Moving during these periods minimizes stress and encourages strong root development before the active growth phase. This timing maximizes survival rates and promotes vigorous growth, crucial for gungurru's long-term health.
What Distance Should You Maintain Between Gungurru Plants?
When planning to relocate gungurru, ensure a spacing of 24-36 inches (60-90 cm) between your plants. This provides ample room for them to grow and thrive without becoming overcrowded.
What is the Ideal Soil Blend for Gungurru Relocation?
For gungurru, prepare the soil by ensuring it is well-draining and either sandy or loamy. Incorporate a phosphorus-rich base fertilizer to support healthy root growth.
Where Should You Move Your Gungurru?
Relocate gungurru to a spot that receives direct sunlight for at least 6-8 hours daily. This will ensure optimal development and blooming.
What Tools Should You Prepare Before Relocating Gungurru?
Gardening Gloves
To safeguard your hands while handling soil and the plant.
Shovel or Spade
For excavating the plant from its original spot and preparing the new planting hole.
Trowel
Useful for smaller, more precise digging tasks.
Watering Can or Hose
To hydrate the plant before and after its relocation.
Pruners
For trimming any damaged or dead sections of the plant.
Bucket or Wheelbarrow
To transport the plant from its initial location to its new planting site.
Stakes and Ties
To offer support for the plant if required after relocation.
How Do You Extract Gungurru from the Soil?
How Do You Extract Gungurru from the Soil?
From Ground: First, moisten the gungurru plant to dampen the soil. Then, dig a wide trench around the plant using a shovel or spade, ensuring the plant's root ball remains intact. Carefully work the spade under the root ball to lift the plant from its original location.From Pot: Gently tilt the pot to its side and slide the gungurru plant out by supporting the stem. If the plant is resistant, tap the sides of the pot to loosen the soil. Be sure to handle the plant by the root ball, not the stem or roots directly.From Seedling Tray: Dampen the soil in the seedling tray. Use a small trowel or your fingers to gently lift the gungurru plant from the tray, ensuring the roots and some soil are intact. Handle the plant with care to avoid damaging the delicate roots.
Step-by-Step Guide for Relocating Gungurru
Site Preparation
Prepare the new planting spot by digging a hole twice as wide and as deep as the gungurru's root ball. Ensure the soil at the bottom of the hole is loose to encourage root growth.
Soil Preparation
Incorporate some compost or organic material into the soil that will be used to backfill around the plant. This will provide nutrients and help the soil retain moisture.
Plant Placement
Carefully position the gungurru plant into the hole, ensuring it sits at the same depth as it was in its original location. The top of the root ball should be level with the ground surface.
Backfilling
Fill in around the gungurru plant with the prepared soil, gently firming it down as you go to eliminate air pockets. Be careful not to compact the soil too much.
Watering
Water the gungurru plant thoroughly after relocation to help settle the soil and provide the roots with good access to moisture. Keep the soil consistently moist for the first few weeks.
How Do You Care For Gungurru After Relocation?
Watering
Keep the soil around the gungurru consistently moist, but not waterlogged, for the first few weeks after relocation to help establish strong roots.
Mulching
Apply a layer of mulch around the base of the plant to help retain moisture and regulate soil temperature.
Pruning
Trim any damaged or dead parts of the gungurru to encourage new growth and reduce stress on the plant.
Sun Protection
If the weather is particularly hot, provide some temporary shade for the gungurru to prevent relocation shock.
Staking
If the gungurru is tall or appears unstable, use stakes and ties to provide support until it becomes well-established.
Addressing Common Issues with Gungurru Relocation.
When is the optimal time to relocate gungurru?
The best times are early to mid-spring, and early to late winter.
What spacing should I use for gungurru plants?
Space plants 24-36 inches (60-90 cm) apart to ensure healthy growth.
What soil type does gungurru prefer?
Gungurru thrives in well-draining soil with a slightly acidic to neutral pH.
How deep should I plant gungurru during relocation?
Ensure the root ball is level with or slightly above the ground surface.
How much sunlight does gungurru need?
Gungurru requires full sun for optimal growth, ideally 6-8 hours daily.
Should I water gungurru immediately after relocation?
Yes, water thoroughly after relocation to help settle the soil around the roots.
How do I avoid relocation shock in gungurru?
Minimize root disturbance and water consistently after relocation to prevent shock.
Can I use fertilizer when relocating gungurru?
Avoid immediate fertilizing; wait a few weeks to let the plant settle in its new location.
What should I do if gungurru shows signs of wilting?
Increase watering frequency and provide temporary shade until the plant recovers.
How can I protect gungurru from pests after relocation?
Inspect regularly for pests and use organic insecticides if necessary to protect the plant.


