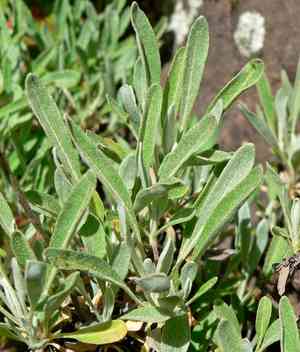
How to Transplant Snow buckwheat?
Snow buckwheat flourishes most effectively when relocated in the period spanning early to late spring, or during the tranquil onset of late autumn, as these times facilitate superior root development. Provide a bright, adequately drained spot to foster its expansion.
What Preparations are Needed Before Transplanting Snow Buckwheat?
What is the Ideal Time for Transplanting Snow Buckwheat?
Snow buckwheat, a perennial, flourishes when moved from early to late spring or during late autumn. These periods offer optimal soil temperature and moisture, encouraging robust root development. The mild conditions of these seasons minimize transplant shock and support vigorous growth, establishing a strong foundation for healthy progress.
How Much Space Should You Leave Between Snow Buckwheat Plants?
When preparing to transplant snow buckwheat, aim to position each plant 18-24 inches (45-60 cm) apart. This spacing guarantees ample room for growth and development without competition for resources. Enjoy your planting!
What is the Best Soil Mix for Snow Buckwheat Transplanting?
For snow buckwheat, you'll need well-drained soil, enriched with compost or organic material. To give them a head start, incorporate a balanced fertilizer, such as a 10-10-10 ratio, prior to transplanting. This will ensure their successful establishment!
Where Should You Relocate Your Snow Buckwheat?
Snow buckwheat loves absorbing sunlight! Select a spot that receives full sun for at least 6 hours daily. A sunny location will help them thrive and display their beautiful blossoms.
What Equipments Should You Prepare Before Transplantation Snow Buckwheat?
Gardening Gloves
To safeguard your hands while handling soil and plants.
Shovel or Spade
For excavating the snow buckwheat plant and preparing the new planting site.
Garden Fork
To gently loosen soil around roots without causing harm.
Watering Can or Hose
For hydrating the plant before and after relocation.
Wheelbarrow
Useful for moving the snow buckwheat plant if it's large or the new spot is distant.
Mulch
To aid in moisture retention and protect the plant's roots post-transplant.
How Do You Remove Snow Buckwheat from the Soil?
How Do You Remove Snow Buckwheat from the Soil?
From Ground: First, moisten the snow buckwheat plant's soil. Then, dig a wide trench around the plant with a shovel or spade, ensuring the root ball stays intact. Carefully work the spade beneath the root ball to lift the plant from its original spot.From Pot: Water the snow buckwheat plant thoroughly a few hours before moving it. Gently tap the pot's edges to loosen the soil, then carefully tip the plant out, supporting the root ball with your hand.From Seedling Tray: Water the seedlings completely before transplanting. Use a small tool like a dibber or a spoon handle to gently lift each seedling by its leaves or root ball, taking care not to harm the delicate roots.
Step-by-Step Guide for Transplanting Snow Buckwheat
Site Preparation
Excavate a hole at the new location that is twice as wide and equally deep as the snow buckwheat plant's root ball. Ensure the hole is fully prepared before extracting the plant from its initial position.
Plant Removal
Refer to the 'removal process' section for detailed instructions based on the plant's current growing environment (ground, pot, or seedling tray).
Transferring
Place the snow buckwheat plant into the prepared hole, making sure the top of the root ball is level with the soil surface. Backfill around the root ball with soil, gently firming it down to eliminate air pockets.
Watering
Thoroughly water the snow buckwheat plant immediately after transplanting to settle the soil around the roots and help reduce transplant shock.
Mulching
Apply a layer of mulch around the base of the snow buckwheat plant to help retain moisture and keep the roots cool. Be careful not to pile mulch against the stem of the plant.
How Do You Care For Snow Buckwheat After Transplanting?
Watering
Maintain consistent moisture in the soil around the snow buckwheat, avoiding sogginess, for the initial weeks post-transplant to encourage strong root development.
Monitoring
Regularly inspect the snow buckwheat plant for signs of stress like wilting or yellowing leaves, and adjust care as necessary.
Weeding
Keep the area surrounding the snow buckwheat plant free of weeds to minimize competition for nutrients and water.
Protection
Shield the snow buckwheat plant from strong winds or heavy rain during the early transplanting stages by using plant supports or temporary windbreaks if needed.
Troubleshooting Common Issues with Snow Buckwheat Transplantation.
When is the best time to transplant snow buckwheat?
The optimal period for relocating snow buckwheat is from early to late spring and late autumn.
What is the ideal spacing for snow buckwheat plants?
Space snow buckwheat plants 18-24 inches (45-60 cm) apart to ensure healthy growth.
How deep should I plant snow buckwheat in the new location?
Plant snow buckwheat at the same depth it was previously growing to prevent stress.
What type of soil is best for transplanting snow buckwheat?
Snow buckwheat thrives in well-draining, sandy or loamy soil to facilitate proper root development.
How often should I water snow buckwheat after transplanting?
Water snow buckwheat regularly but avoid waterlogging. Ensure the soil stays moist, not soggy.
Should I use fertilizer when transplanting snow buckwheat?
Use a balanced, slow-release fertilizer sparingly to help snow buckwheat establish in its new location.
How can I minimize transplant shock for snow buckwheat?
Transplant snow buckwheat carefully, keeping the root ball intact, and water thoroughly after planting.
What should I do if snow buckwheat shows signs of wilting after transplanting?
Ensure proper watering and shading; consider mulch to retain soil moisture and reduce stress.
Can snow buckwheat be transplanted during the summer?
Avoid summer transplanting as high temperatures can cause stress. Stick to spring or fall.
How can I improve the survival rate of transplanted snow buckwheat?
Prepare the site well, handle roots gently, water properly, and mulch to maintain moisture.


