How to Transplant Common spikerush?
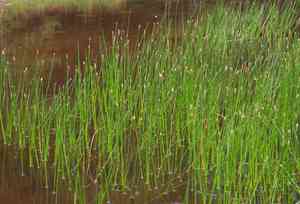
Relocate common spikerush during the warmer period of late spring or the cooler phase of mid-autumn for optimal rooting. Select a damp, brightly lit spot, and guarantee careful handling to safeguard its fragile root system.
What Preparations are Needed Before Transplanting Common Spikerush?
What is the Ideal Time for Transplanting Common Spikerush?
Select early spring or mild fall for relocating common spikerush. These periods allow roots to establish robustly before intense summer heat or winter dormancy.
How Much Space Should You Leave Between Common Spikerush Plants?
Gardeners, when preparing for common spikerush, spacing is crucial. Aim for approximately 6-12 inches (15-30 cm) between plants to allow each ample room for growth and access to light and nutrients.
What is the Best Soil Mix for Common Spikerush Transplanting?
Common spikerush thrives in damp, well-draining soil. Support their preference for moist conditions by enriching the planting area with organic compost. A slow-release fertilizer application will ensure sustained nourishment in their new spot.
Where Should You Relocate Your Common Spikerush?
Choose a location for your common spikerush that receives full sun to partial shade. These plants enjoy bright light but benefit from protection during the hottest part of the day. An area with morning sun and afternoon shade would be ideal for common spikerush.
What Equipments Should You Prepare Before Transplantation Common Spikerush?
Shovel or Spade
To excavate the common spikerush without harming its root ball.
Garden Fork
To loosen the surrounding soil before removal, if necessary.
Gardening Gloves
To safeguard your hands while handling soil and plants.
Watering Can or Hose
To hydrate the common spikerush prior to and following transplantation.
Wheelbarrow or Plant Cart
To move the common spikerush from its original spot to the new planting location.
How Do You Remove Common Spikerush from the Soil?
How Do You Remove Common Spikerush from the Soil?
From Ground: First, moisten the common spikerush's soil to facilitate easier plant removal and reduce stress. Use a shovel or spade to dig a wide trench around the common spikerush, ensuring enough distance to avoid cutting into the root system. Gently pry the spade under the plant and lift carefully to preserve the root ball.From Pot: Water the common spikerush in its container to ensure root hydration. Invert the pot and gently tap its sides and bottom to loosen the root ball. If needed, use a garden knife along the pot's inner edge. Then, carefully slide the common spikerush out while supporting the stem base and root ball.From Seedling Tray: Water the seedlings thoroughly. Gently push the common spikerush from the cell's bottom, supporting the root ball to prevent damage. If the root system resists, use a tool like a chopstick or pencil to assist in removing the seedling without harming the roots.
Step-by-Step Guide for Transplanting Common Spikerush
Prepare New Location
Excavate a hole roughly twice the root ball's width and similar in depth. Amend the soil as needed. Clear debris and loosen the soil at the hole's base to promote easy root penetration.
Root Ball Inspection
Examine the common spikerush's root ball, trimming any damaged or overly long roots. If roots are densely packed, gently separate them with your fingers to encourage outward growth.
Positioning the Plant
Place the common spikerush into the prepared hole, ensuring the root ball's top is level with the surrounding soil surface. Adjust the soil beneath the root ball if necessary.
Refilling the Hole
Backfill the hole around the root ball with soil, gently patting it down to remove air pockets. Confirm the common spikerush is stable and upright.
Watering Thoroughly
Water the common spikerush immediately after planting to settle the soil around the roots and help minimize transplant shock.
Mulching
Apply a layer of mulch around the common spikerush's base to help retain soil moisture and suppress weed growth.
How Do You Care For Common Spikerush After Transplanting?
Initial Watering
Water the common spikerush generously right after transplanting and maintain consistent soil moisture for the initial weeks to aid root establishment. Avoid excessive watering to prevent root rot.
Mulching
Maintain the mulch layer to conserve moisture and stabilize soil temperature.
Observation
Regularly check the common spikerush for signs of stress like wilting or discolored leaves, which might indicate watering issues or transplant shock. Adjust care as needed.
Support Structures
If required, provide support structures such as stakes to help the common spikerush remain upright in windy conditions or if it begins to lean.
Gradual Adjustment
If common spikerush was previously grown in significantly different conditions, acclimate it to its new environment by providing shade or protection from harsh elements for the first few days post-transplant.
Troubleshooting Common Issues with Common Spikerush Transplantation.
When is the best time to transplant common spikerush?
Choose late spring to early summer or mid-to-late autumn for successful common spikerush transplanting.
How far apart should I space common spikerush when transplanting?
Space common spikerush 6-12 inches (15-30 cm) apart to allow ample room for growth and spread.
Why is my transplanted common spikerush wilting after planting?
Wilting can occur if roots are overly disturbed. Water regularly and provide initial shade to ease the transition.
Is it necessary to amend the soil before transplanting common spikerush?
Yes, adding organic matter improves drainage and nutrients, giving common spikerush a better start in its new location.
How deep should I plant common spikerush?
Dig a hole as deep as the root ball and twice as wide to ensure roots have sufficient space.
Can I transplant common spikerush in waterlogged soil?
Transplanting common spikerush in waterlogged soil can lead to root rot. Ensure the area drains well before planting.
How much should I water common spikerush after transplanting?
Water thoroughly immediately after transplanting and keep the soil consistently moist, but not saturated, during the first few weeks.
How do I protect common spikerush from transplant shock?
Minimize root disturbance, water adequately, ensure correct planting depth, and shield from extreme weather initially.
What signs indicate successful common spikerush transplantation?
New growth and green, vibrant blades are indicators that common spikerush is adapting well to its new home.
Can I transplant common spikerush under full sun exposure?
While common spikerush enjoys sunlight, avoid harsh midday sun right after transplanting. Opt for light shade to help it settle into the new site.



