How to Transplant Needle spikerush?
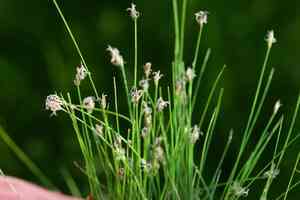
The ideal period for relocating needle spikerush is in the initial to middle stages of spring's new growth, which helps the plant establish itself effectively. Choose a site that retains constant moisture, and, if necessary, carefully untangle any compressed roots to stimulate development.
Preparations Required Before Relocating Needle Spikerush?
Optimal Period for Moving Needle Spikerush?
The prime time for relocating needle spikerush is when the earth awakens in early to mid-spring. The gentle warmth promotes robust root development, while the still-cool evenings minimize plant stress. Introducing needle spikerush to its new location during this period leverages the season's mild rainfall, fostering root establishment. This strategic timing for needle spikerush ensures vigorous, lush growth, setting the stage for a healthy future.
Recommended Spacing Between Needle Spikerush Plants?
Prepare your garden for the needle spikerush! Allow approximately 1-2 inches (2.5-5 cm) of distance between each plant during transplantation. This provides your needle spikerush ample room to expand and flourish!
Ideal Soil Blend for Needle Spikerush Relocation?
Ensure the vitality of your needle spikerush with the appropriate soil type. Utilize well-draining soil, rich in organic matter. A balanced foundational fertilizer, such as a 10-10-10, supplies the essential nutrients your needle spikerush needs to thrive!
Where to Replant Your Needle Spikerush?
Placement is crucial for your needle spikerush! Select a spot where it receives full or partial sunlight daily. Sunlight fuels the photosynthesis process, aiding your needle spikerush in growing healthily and happily!
Equipment to Prepare Before Transplanting Needle Spikerush?
Gardening Gloves
These are essential for safeguarding your hands while handling the soil and the needle spikerush plant.
Trowel
This tool is used to carefully excavate the needle spikerush plant without harming its roots when extracting it from its original spot.
Gardening Spade
This larger implement will be useful for digging the new planting cavity.
Watering Can
To hydrate the plant before and after its relocation.
Organic compost
It supplies vital nutrients to the plant and aids in developing strong roots.
How to Extract Needle Spikerush from the Soil?
How to Extract Needle Spikerush from the Soil?
From Ground: Start by moistening the needle spikerush plant to dampen the soil. Using the trowel, dig a perimeter around the plant, ensuring sufficient depth to keep the plant's root ball intact. Carefully attempt to lift the plant from beneath the root ball with the trowel. Gently remove any excess soil and inspect the roots, confirming their health and absence of pests.From Pot: Water the needle spikerush plant in its container before beginning. Tilt the pot sideways while holding your hand over the soil, allowing the plant stem to pass between your fingers. Pull the pot away, leaving the plant in your hand. Gently shake off surplus soil and examine the roots.From Seedling Tray: Hydrate the seedlings to facilitate their removal. Gently grasp the needle spikerush plant by its leaves (not the stem) and use a small implement like a dibber or even a pencil to carefully lift it from the bottom. Exercise extreme caution to avoid damaging the delicate roots.
Step-by-Step Guide for Relocating Needle Spikerush
Plant Extraction
Adhere to the preceding instructions for removing the needle spikerush from its initial location, ensuring the root ball remains as undisturbed as possible.
Hole Preparation
Excavate a hole with the garden spade in your chosen spot. The hole should be twice the width and the same depth as the root ball.
Plant Positioning
Gently place the needle spikerush plant into the hole. The root ball should be level with the ground surface.
Backfilling
Refill the hole with soil, gently compacting it around the plant's base to provide stability.
Watering
Carefully water the plant with a watering can after planting. This helps the soil establish better contact with the roots.
Final Checks
Confirm the needle spikerush plant is upright and adjust if necessary before adding a final layer of soil and firming it down once more.
Post-Transplantation Care for Needle Spikerush?
Watering
Regularly irrigate the needle spikerush plant, particularly during the initial weeks following transplantation. The soil should be moist, but not waterlogged. Excessive watering can lead to root rot and other ailments.
Pruning
Pruning helps the needle spikerush plant direct its energy towards new growth. Sanitize your pruning shears before use, and remove any dead or yellowing leaves and stems.
Weed Management
Monitor for and eliminate weeds that might compete with your plant for nutrients.
Pest and Disease Monitoring
Frequently inspect for indications of pests or diseases. Early detection can simplify and enhance the effectiveness of treatment.
Resolving Common Issues with Needle Spikerush Transplantation.
What is the optimal season for transplanting needle spikerush?
The most suitable period for relocating needle spikerush is between the beginning of the first season (S1) and the conclusion of the second (S2). This allows the plant ample time to establish roots before the growing season.
What spacing should needle spikerush seedlings have during transplantation?
When positioning needle spikerush seedlings, maintain a distance of approximately 1-2 inches (2.5-5 cm) between each. This provides them sufficient room for optimal growth.
How can I ensure successful transplantation of needle spikerush?
For successful transplantation, thoroughly water needle spikerush the day prior to the move. This softens the soil and reduces stress on the plant during relocation.
What should I do if the transplanted needle spikerush wilts after relocation?
Wilting often indicates transplant shock. Keep the soil moist but not saturated, shield it from extreme weather, and be patient as it adapts to its new surroundings.
Why is proper soil important when transplanting needle spikerush?
Needle spikerush thrives in well-draining soil. Too much water can cause root rot, while too little hinders growth. Thus, selecting the correct soil significantly impacts your plant's survival.
Why are my transplanted needle spikerush seedlings turning yellow?
Yellow leaves could signify overwatering, nutrient deficiency, or disease. Adjust your watering schedule, assess the soil condition and, if necessary, apply appropriate plant nourishment.
Should I fertilize needle spikerush after transplanting?
Refrain from fertilizing immediately after transplanting to prevent root burn. Wait 2-4 weeks for the plant to acclimate to its new environment, then gradually begin fertilizing.
Can needle spikerush survive transplantation shock?
Yes, needle spikerush can recover from transplant shock. Simply ensure it receives adequate water, proper sunlight, and protection from extreme temperatures during this period.
Are there any indicators that needle spikerush has acclimated well after transplantation?
Yes, new growth is a positive sign that needle spikerush has adjusted well after being transplanted. Be patient, as this may take a few weeks.
How deeply should I plant needle spikerush during transplantation?
Plant needle spikerush at the same depth it was previously growing. Planting too deep can suffocate the plant, while too shallow can cause the roots to dry out.



