How to Transplant Japanese millet?
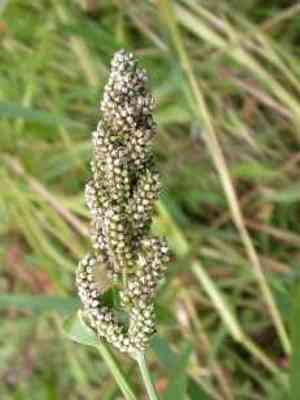
Japanese millet thrives when relocated from the beginning to the end of spring, benefiting from ideal cultivation circumstances. Choose a bright spot with rich, permeable earth for peak development. Refrain from moving the plants during severe temperatures to guarantee proper acclimation.
What Preparations are Needed Before Transplanting Japanese Millet?
What is the Ideal Time for Transplanting Japanese Millet?
The best time to move japanese millet is from early to late spring, a period when ground temperatures are rising, and the danger of frost lessens. Relocating japanese millet in spring promotes robust root development and quick growth, utilizing the mild weather to build a strong base before summer's heat.
How Much Space Should You Leave Between Japanese Millet Plants?
Ensure each japanese millet is spaced 12-18 inches (30-45 cm) apart to provide ample growth room and good air circulation. This helps prevent overcrowding and leads to healthier plants.
What is the Best Soil Mix for Japanese Millet Transplanting?
Select soil that drains well and is fertile. Incorporate a foundational fertilizer such as compost or aged manure to enrich the soil, supplying your japanese millet with the necessary nutrients to flourish.
Where Should You Relocate Your Japanese Millet?
Choose a spot that gets full sunlight for at least 6 hours daily. This ensures your japanese millet receives sufficient light to grow strong and healthy.
What Equipments Should You Prepare Before Transplantation Japanese Millet?
Gardening Gloves
To safeguard your hands while handling soil and plants.
Hand Trowel
For excavating the new planting site and gently loosening earth around the plant.
Shovel or Spade
To dig a perimeter around the plant if removing it from the ground.
Watering Can or Hose
To hydrate the plant before and after its relocation.
Bucket or Container
For moving the plant to its new spot if needed.
Mulch
To aid in retaining soil moisture post-transplant.
How Do You Remove Japanese Millet from the Soil?
How Do You Remove Japanese Millet from the Soil?
From Ground: First, water the japanese millet plant to moisten the soil. Then, dig a wide trench around the plant using a shovel or spade, making sure the plant's root ball stays intact. Carefully work the spade beneath the root ball to lift the plant from its original spot.From Pot: Water the japanese millet plant to make the soil easier to manage. Gently tap the pot's sides to loosen the soil. Tilt the pot and carefully slide the plant out, supporting the root ball with your hand.From Seedling Tray: Water the japanese millet seedlings to dampen the soil. Use a hand trowel or your fingers to gently loosen the soil around each seedling. Carefully lift the seedlings out, ensuring as much soil as possible remains around the roots.
Step-by-Step Guide for Transplanting Japanese Millet
Prepare the New Site
Ensure the chosen location is ready by removing any weeds and loosening the soil. Dig a hole that is twice the width and the same depth as the japanese millet plant's root ball.
Transplanting the Plant
Place the japanese millet plant into the hole, making sure it is positioned at the same depth as it was in its original spot. Backfill the hole with soil, gently pressing it down to eliminate air pockets.
Watering
Water the japanese millet plant thoroughly after transplanting to help the soil settle around the roots.
Mulching
Apply a layer of mulch around the plant's base to help retain moisture and prevent weed growth.
How Do You Care For Japanese Millet After Transplanting?
Watering
Keep the soil around the japanese millet consistently moist, but not waterlogged, for the initial weeks post-transplant to aid in establishing strong roots.
Monitoring
Observe the japanese millet plant for indications of transplant shock, such as wilting leaves, and provide extra water if necessary. Mulching will assist in maintaining soil moisture and regulating temperature.
Troubleshooting Common Issues with Japanese Millet Transplantation.
When is the best time to transplant japanese millet?
Transplant japanese millet from early to late spring for optimal growth and establishment.
What is the ideal spacing for japanese millet?
Space japanese millet plants 12-18 inches (30-45 cm) apart to ensure adequate room for growth.
How should I prepare the soil for japanese millet?
Use well-draining soil enriched with organic matter to enhance the growth of japanese millet.
What should I do if japanese millet looks wilted after transplanting?
Ensure japanese millet receives consistent moisture and partial shade to recover from transplant shock.
Is it necessary to fertilize japanese millet after transplanting?
A balanced fertilizer can be applied post-transplant to help japanese millet establish robustly.
How deep should I plant japanese millet seedlings?
Plant japanese millet seedlings at the same depth they were growing in their original container.
Can I water japanese millet immediately after transplanting?
Yes, water japanese millet thoroughly after transplanting to settle the soil around the roots.
What should I do to protect japanese millet from pests?
Consider using organic pest control methods and regularly inspect japanese millet for signs of infestation.
Does japanese millet need mulching after transplanting?
Apply a light mulch around japanese millet to retain moisture and suppress weeds.
How can I ensure japanese millet roots establish well?
Keep japanese millet consistently moist and avoid disturbance to encourage strong root establishment.



