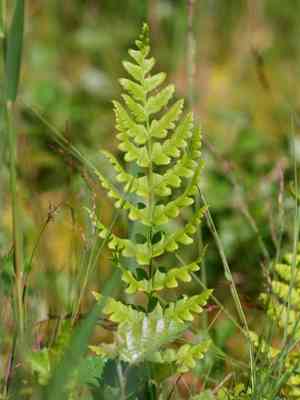
How to Transplant Crested woodfern?
The optimal period for transplanting crested woodfern extends from the invigorating chill of early spring through the gentle warmth of late spring. Locate a damp, shaded area to replicate its native environment, guaranteeing your crested woodfern flourishes after relocation.
What Preparations are Needed Before Transplanting Crested Woodfern?
What is the Ideal Time for Transplanting Crested Woodfern?
The perfect time for moving crested woodfern is from the refreshing period of early spring until the start of late spring. This timing allows crested woodfern to settle in before the summer heat. Transplanting during this window ensures roots strengthen in milder conditions, boosting the vitality and stability of crested woodfern. Relocating crested woodfern at this stage promises a smooth transition, as the ground warms and nature awakens, giving crested woodfern an excellent start in its new spot.
How Much Space Should You Leave Between Crested Woodfern Plants?
Let's give those crested woodfern ample room! Aim to plant them approximately 12 inches (30 cm) to 3 feet (91 cm) apart. This provides each crested woodfern enough space to thrive without becoming too crowded.
What is the Best Soil Mix for Crested Woodfern Transplanting?
For thriving crested woodfern, blend some organic compost into the soil to create a rich, loamy environment. Add a balanced, slow-release fertilizer to provide a gentle nutrient boost as they adapt to their new home.
Where Should You Relocate Your Crested Woodfern?
Choose a location for your crested woodfern that resembles a cozy forest clearing – filtered sunlight or partial shade will make them feel perfectly at home. Avoid full, direct sun to keep their fronds lush and green.
What Equipments Should You Prepare Before Transplantation Crested Woodfern?
Gardening Gloves
To safeguard your hands while handling soil and the plant.
Shovel or Spade
For excavating the crested woodfern and preparing the new planting hole.
Watering Can or Hose
To hydrate the crested woodfern before and after its relocation.
Pruning Shears
To trim any dead or damaged fronds prior to transplanting.
Wheelbarrow or Garden Cart
For moving the crested woodfern and soil.
Garden Trowel
To refine the hole for transplanting the smaller root system.
Mulch
To help maintain soil moisture and regulate temperature around the crested woodfern's roots after transplant.
Measuring Tape
To ensure correct spacing between plants when moving multiple ferns.
How Do You Remove Crested Woodfern from the Soil?
How Do You Remove Crested Woodfern from the Soil?
From Ground: First, thoroughly water the crested woodfern a day before the transplant to ensure the root ball is moist. Then, use a shovel or spade to dig a wide circle around the plant, being careful to dig deep enough to include all the roots. Insert the tool beneath the root ball and gently rock it back and forth to loosen it from the soil. Once the root ball is free, carefully lift it from the ground.From Pot: Water the crested woodfern well before starting. Gently turn the pot on its side and tap the bottom to loosen the soil and roots. If the plant doesn't come out easily, slide a garden trowel around the inner edge of the pot to free the root ball. Tilt the pot and carefully guide the plant out, supporting the root ball with your hands.From Seedling Tray: Moisten the crested woodfern's soil before transplanting. Use a garden trowel or your fingers to gently lift the seedling out of its tray cell, being careful not to harm the delicate roots. Support the root ball and soil as you remove it to retain as much of the original soil as possible.
Step-by-Step Guide for Transplanting Crested Woodfern
Preparing the New Site
Choose an appropriate location based on the mature size of the crested woodfern. Use a shovel or spade to dig a hole that is twice as wide and as deep as the root ball. Loosen the soil at the bottom of the hole for improved root penetration.
Plant Positioning
Place the crested woodfern in the center of the prepared hole. The top of the root ball should be level with the ground to ensure proper root spread and health.
Soil Refinement
Fill in around the root ball with the excavated soil, gently pressing it down to remove any air pockets, which can dry out the roots. Ensure the crested woodfern is securely in place but not overly compacted.
Watering
Immediately after planting, thoroughly water the crested woodfern to settle the soil around the roots and help reduce transplant shock.
Mulching
Apply a layer of mulch around the base of the crested woodfern, keeping it away from the direct stem to prevent rot. Mulch helps to conserve moisture and keep the roots warm.
How Do You Care For Crested Woodfern After Transplanting?
Watering
Maintain a regular watering schedule, allowing the soil to slightly dry out between waterings to encourage strong root development. Avoid overwatering to prevent root rot.
Monitoring
Regularly check the crested woodfern for signs of stress, such as wilting or yellowing fronds. If symptoms appear, adjust care as needed.
Pruning
Trim off any fronds damaged during the transplant to stimulate new growth. Continue to remove any dead fronds in the future to keep the crested woodfern healthy and neat.
Troubleshooting Common Issues with Crested Woodfern Transplantation.
Why is my crested woodfern wilting after transplanting?
Wilting can occur if roots are excessively disturbed. Ensure gentle handling and adequate watering post-transplant.
When is the best time to transplant crested woodfern?
Transplant during the mild period of early to late spring for optimal root establishment.
How much space does crested woodfern need when transplanting?
Space crested woodfern from 12 inches to 3 feet (30 cm to 91 cm) to allow for growth.
What light conditions are ideal for crested woodfern after transplanting?
Position crested woodfern in partial to full shade, mimicking its natural forest environment.
How do I prepare the soil for transplanting crested woodfern?
Incorporate organic matter to enhance drainage and nutrients in the soil before transplanting.
Can I transplant crested woodfern during the summer?
It's best to avoid summer transplanting; heat stress can hinder crested woodfern's establishment.
What is the correct depth to plant crested woodfern?
Plant crested woodfern so the crown sits at the same level as the soil surface to prevent rot.
How often should I water crested woodfern after transplanting?
Water deeply at planting time, then regularly until crested woodfern is established, avoiding waterlogging.
Why are my crested woodfern's leaves turning yellow?
Yellow leaves can indicate over-watering or poor soil drainage. Check soil conditions and adjust watering.
Should I fertilize crested woodfern after transplanting?
Wait a few weeks before fertilizing to avoid burning new roots. Use a balanced fertilizer.


