How to Transplant Coastal woodfern?
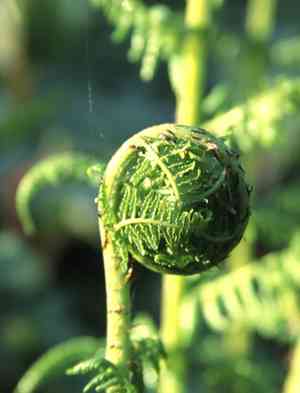
The optimal period for transplanting coastal woodfern extends from the onset of spring's mild temperatures through the initial weeks of summer, allowing sufficient time for establishment. Select locations offering shade and damp earth. Careful handling during the move is crucial.
Essential Preparations Before Relocating Coastal Woodfern
Optimal Timing for Transplanting Coastal Woodfern
The perfect window for moving coastal woodfern spans from early spring to the start of summer. This period ensures coastal woodfern can recover from the shock of relocation in moderate temperatures, fostering strong root development. Transplanting coastal woodfern during this timeframe allows the plant to benefit from spring's moisture and extended daylight, promoting vigorous growth before the intensity of summer heat. A helpful tip: this timing helps coastal woodfern establish itself well in its new spot, ready to flourish in upcoming seasons!
Recommended Spacing Between Coastal Woodfern Plants
When preparing a new home for coastal woodfern, ensure adequate room for their development. Aim for a separation of approximately 18-24 inches (45-60 cm) between plants. This provides sufficient space for growth and guarantees they have ample room to thrive.
Ideal Soil Mixture for Coastal Woodfern Transplantation
Before introducing coastal woodfern to your garden, prepare a suitable area with nutrient-rich, well-draining soil. Incorporating organic compost will provide a beneficial start. A balanced, slow-release fertilizer can also aid coastal woodfern in settling in happily and healthily.
Selecting the New Location for Your Coastal Woodfern
Consider coastal woodfern as a plant that prefers filtered light and partial shade. Choose a site that resembles a forest environment, shielded from intense afternoon sun. A location receiving morning sun with some afternoon shade offers the perfect balance for coastal woodfern.
Equipment Needed for Transplanting Coastal Woodfern
Gardening Gloves
To safeguard your hands while handling soil and plants.
Garden Trowel
For excavating smaller plants or creating holes for relocation.
Shovel or Spade
To dig around plants in the ground and lift the root mass.
Pruning Shears
For trimming any damaged roots or foliage prior to transplanting.
Watering Can or Hose
To hydrate the plant in its new position after relocation.
Wheelbarrow or Garden Cart
Useful for transporting the plant and soil.
Root Pruning Saw or Knife
If necessary, for cutting through larger, matted roots.
Mulch
To apply around the plant's base post-transplant for moisture retention.
Stakes or Plant Supports
To provide stability for the plant in its new location if required.
How to Extract Coastal Woodfern from the Soil
How to Extract Coastal Woodfern from the Soil?
From Ground: Thoroughly water coastal woodfern to moisten the soil. Using a shovel or spade, dig a wide circle around the plant to include the root ball. Gently lift the plant from the ground, striving to keep the root ball as intact as possible.From Pot: Tilt the pot sideways and gently tap the bottom to loosen the soil. Support the stem of coastal woodfern with one hand and use the other to pull the pot away. If the plant is root-bound, carefully separate the roots.From Seedling Tray: Water the seedling tray to ensure the soil is damp. Use a garden trowel or your fingers to carefully lift the seedling of coastal woodfern by holding the base of the stem. Avoid pulling the plant by its leaves.
Detailed Guide for Transplanting Coastal Woodfern
Prepare the New Site
Clear any weeds or debris from the planting area and loosen the soil to create a welcoming environment for the roots of coastal woodfern.
Excavate the Hole
Dig a hole in the ground that is twice as wide and equally as deep as the root ball of coastal woodfern. This allows the roots to spread out easily.
Plant Placement
Position coastal woodfern in the center of the hole. The top of the root ball should be level with the surrounding ground to encourage proper growth.
Backfill the Hole
Gently refill the hole with the excavated soil, lightly firming it down as you go to remove air pockets without overly compacting the soil.
Watering
Water coastal woodfern generously after transplanting to settle the soil around the roots and eliminate air gaps.
Apply Mulch
Spread a layer of mulch around the base, but not touching the stem, of coastal woodfern to help maintain soil moisture and regulate temperature.
Stake if Necessary
If coastal woodfern is tall or in a windy location, use stakes or plant supports to prevent it from bending or breaking.
Post-Transplant Care for Coastal Woodfern
Consistent Watering
Ensure coastal woodfern receives regular moisture, especially during its initial growing season, to establish a strong root system.
Growth Monitoring
Observe coastal woodfern for any indications of stress, such as yellowing or wilting leaves, and address these issues promptly.
Support Structure
Inspect and adjust stakes or supports if used, ensuring they are effective but not overly restrictive as coastal woodfern grows.
Pruning
Remove any dead or damaged fronds to encourage healthy growth and improve air circulation around coastal woodfern.
Pest Management
Be vigilant for any pests that might affect the health of coastal woodfern and take appropriate action if necessary.
Addressing Common Issues with Coastal Woodfern Transplantation
Why is my coastal woodfern struggling after transplant?
Ensure it's not root-bound and that the soil is well-draining and fertile. Consistent watering is vital for root establishment.
Is it advisable to transplant coastal woodfern during hot weather?
It's best to transplant coastal woodfern when temperatures are mild, typically from early spring to early summer, to minimize stress.
How much room does coastal woodfern require when transplanted?
Ample space for growth is essential! Position coastal woodfern about 18-24 inches (45-60 cm) apart to allow for its natural spread.
What is the ideal soil for transplanting coastal woodfern?
Rich, well-draining soil with some organic matter is perfect for coastal woodfern. It aids in moisture retention and root health.
How deep should I plant coastal woodfern during transplanting?
Plant coastal woodfern so its crown is at soil level, with the root system adequately covered but not excessively deep.
How can I tell if my coastal woodfern is getting enough water after transplant?
The soil should be moist but not waterlogged. Check by touching the soil; water when the top inch (2.5 cm) feels dry.
Should I fertilize coastal woodfern immediately after transplanting?
Wait 4-6 weeks before fertilizing to allow coastal woodfern to settle. Use a balanced, slow-release fertilizer according to product directions.
How can I prevent transplant shock in coastal woodfern?
Minimize root disturbance, water thoroughly after transplanting, and provide shade if the weather is unusually warm or bright.
Why are the fronds on coastal woodfern turning brown after transplant?
Browning fronds may indicate over or under-watering, or transplant shock. Adjust watering and protect from harsh sun.
Can coastal woodfern be moved from a pot to the ground?
Yes, carefully remove coastal woodfern from the pot, loosen the roots, and follow the same transplanting procedure as for garden-grown plants.



