How to Transplant Florida beggar weed?
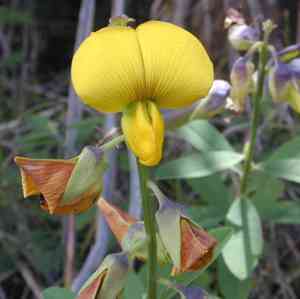
The most favorable period for relocating florida beggar weed is from late spring to mid-summer, when temperatures are warm, enabling its root system to properly settle in a welcoming environment. Select a location that receives ample sunlight and has well-draining, rich earth, then irrigate the recently moved florida beggar weed to stimulate its development.
What Preparations are Needed Before Transplanting Florida Beggar Weed?
What is the Ideal Time for Transplanting Florida Beggar Weed?
The best time to move florida beggar weed is from late spring through mid-summer. This period offers mild temperatures and ample daylight, promoting strong growth and root development. Relocating florida beggar weed during these favorable conditions enhances its chances of successful establishment and vigorous health.
How Much Space Should You Leave Between Florida Beggar Weed Plants?
When relocating florida beggar weed, provide sufficient room for growth. Aim for a spacing of approximately 24-36 inches (61-91 cm) between plants. This spacing ensures each florida beggar weed has adequate area for root expansion and leaf spread, optimizing nutrient and sunlight absorption.
What is the Best Soil Mix for Florida Beggar Weed Transplanting?
For florida beggar weed, the soil should be fertile and drain well. A loamy soil mixed with compost is perfect. Before planting, enrich your garden bed with a balanced, slow-release fertilizer to give your florida beggar weed a strong start. Check pH levels to match florida beggar weed's preference, typically near neutral.
Where Should You Relocate Your Florida Beggar Weed?
Select a sunny spot for your florida beggar weed, as they thrive in bright conditions. A location receiving full to partial sunlight for at least 6 hours daily will help florida beggar weed flourish. In very hot regions, some afternoon shade can prevent overheating.
What Equipments Should You Prepare Before Transplantation Florida Beggar Weed?
Gardening Gloves
To safeguard your hands while handling soil and the plant.
Shovel or Spade
For digging and carefully moving florida beggar weed with minimal root disturbance.
Pruning Shears
To trim any dead or excess foliage before the transplanting process.
Watering Can or Hose
Crucial for hydrating florida beggar weed both before and after its relocation.
Wheelbarrow or Garden Cart
Useful for transporting florida beggar weed if it's large, or for moving soil amendments.
Root Pruning Saw or Knife
If roots require clean cuts for removal or to fit into the new planting hole.
Stakes or Plant Supports
To offer stability to florida beggar weed post-transplant, if deemed necessary.
How Do You Remove Florida Beggar Weed from the Soil?
How Do You Remove Florida Beggar Weed from the Soil?
From Ground: First, moisten the soil around florida beggar weed. Then, dig a wide trench around florida beggar weed using a shovel or spade, keeping the root ball intact. Gently slide the spade beneath the root ball to lift florida beggar weed from its original spot.From Pot: Water florida beggar weed to facilitate root ball removal. Incline the pot and tap its base to loosen the soil. Carefully pull florida beggar weed by the stem's base; if it resists, run a knife around the pot's inner edge to help free the roots.From Seedling Tray: Water the tray's soil to simplify florida beggar weed removal. Use a spoon or dibber to gently lift the seedling, ensuring the root ball is supported to prevent damage.
Step-by-Step Guide for Transplanting Florida Beggar Weed
Preparation
Confirm the new site lacks issues with space, sunlight, or soil as previously discussed. Ensure the new hole is twice as wide and as deep as florida beggar weed's root ball. Water the new location to prepare the soil for transplanting florida beggar weed. Gather any amendments or tools needed immediately after the transfer.
Root Pruning
If florida beggar weed is root-bound or its roots are tightly packed, use the pruning saw or knife to carefully trim some outer roots. This promotes new growth and eases the transplant process.
Plant Positioning
Center florida beggar weed in the prepared hole. The top of the root ball should be level with the surrounding ground to allow for proper water absorption and root spread.
Backfilling
Carefully refill the hole with soil around florida beggar weed's root ball. Firm the soil gently to eliminate air pockets, but avoid over-compacting, which can hinder water from reaching the roots.
Supporting florida beggar weed
If florida beggar weed seems unstable or is exposed to strong winds, place stakes around the plant and loosely tie florida beggar weed to them for support as it settles into its new location.
Watering In
Thoroughly water florida beggar weed after planting to settle the soil around the root ball and remove any remaining air pockets. Ensure good drainage to prevent waterlogging.
Mulching
Apply a layer of mulch around florida beggar weed to help retain moisture, stabilize soil temperature, and reduce weed competition. Keep the mulch a few inches away from the stem to prevent rot.
How Do You Care For Florida Beggar Weed After Transplanting?
Protection
If severe weather is anticipated, or you notice pest activity, take appropriate steps to safeguard florida beggar weed.
Enjoyment
Remember to appreciate the process and take time to observe the progress of your florida beggar weed as it adapts to its new environment.
Troubleshooting Common Issues with Florida Beggar Weed Transplantation.
When is the best time to transplant florida beggar weed?
Ideally, transplant florida beggar weed from late spring to mid-summer, when conditions are optimal for root establishment.
How far apart should I space florida beggar weed when transplanting?
Space florida beggar weed approximately 24-36 inches (60-90 cm) apart to provide ample room for growth.
Why are my transplanted florida beggar weed plants wilting?
Wilting after transplanting florida beggar weed may indicate root shock. Ensure adequate watering and initially avoid direct sunlight to aid recovery.
What soil conditions are best for transplanting florida beggar weed?
Transplant florida beggar weed into well-draining soil enriched with organic matter for optimal results.
How deep should I plant florida beggar weed during transplantation?
Plant florida beggar weed at the same depth as it was in its previous pot or location, not deeper, to prevent stem rot.
Can I transplant florida beggar weed during a heatwave?
Avoid transplanting florida beggar weed during extreme heat. Excessively high temperatures can stress the plant and hinder establishment.
How do I water florida beggar weed after transplanting?
After transplanting, water florida beggar weed thoroughly to settle the soil around the roots and maintain consistent moisture without overwatering.
How much sunlight does florida beggar weed need after transplanting?
Post-transplant, florida beggar weed benefits from partial shade to full sun, with protection from the harshest afternoon light until established.
Should I fertilize florida beggar weed right after transplanting?
Wait a few weeks before fertilizing florida beggar weed to avoid burning the roots. Allow the plant to acclimate to its new location first.
How do I know if florida beggar weed has transplant shock?
Signs of transplant shock in florida beggar weed include drooping leaves, yellowing, and stunted growth. Provide shade and gentle care for recovery.



