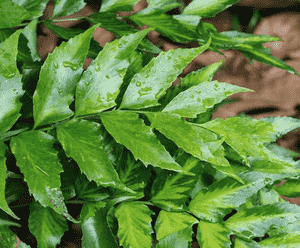
How to Transplant House holly fern?
For best development, relocate your house holly fern during the prime period of mid-spring through mid-summer. Select a site offering shade or partial shade, featuring soil that drains effectively. Carefully untangle the roots prior to placement for superior outcomes. Enjoy your transplanting!
What Preparations are Needed Before Transplanting House Holly Fern?
What is the Ideal Time for Transplanting House Holly Fern?
For a thriving house holly fern, move it between late spring and early summer, its prime growth period. This timeframe guarantees ample sunlight and warmth for vigorous development. Relocating your house holly fern during this interval encourages vibrant fronds and strong root establishment, ensuring a lush, healthy plant year-round.
How Much Space Should You Leave Between House Holly Fern Plants?
When relocating your house holly fern, aim for a spacing of approximately 12-24 inches (30-60 cm) between plants. This provides sufficient room for their expansion and ensures they have adequate space to flourish.
What is the Best Soil Mix for House Holly Fern Transplanting?
Prior to moving your house holly fern, prepare a soil that drains well and is rich in organic material. Incorporate a foundational fertilizer like compost or aged manure to supply essential nutrients for this fern's development.
Where Should You Relocate Your House Holly Fern?
Select a spot for your house holly fern that receives partial to full shade. While these ferns can endure various light conditions, they thrive best in an area with consistent, filtered light for optimal growth.
What Equipments Should You Prepare Before Transplantation House Holly Fern?
Gardening Gloves
To safeguard your hands while handling soil and the house holly fern.
Shovel
To excavate the house holly fern from its current spot and create a new cavity in the ground.
Gardening Trowel
For making any necessary adjustments to the new planting hole before the transfer.
Bucket or Wheelbarrow
To move the house holly fern from its original location to its new one.
Watering Can or Hose
For hydrating the house holly fern in its new position.
Pruners
To trim any damaged roots or leaves as needed.
Gardening Fork
To loosen the soil around the house holly fern's rootball in its initial placement.
How Do You Remove House Holly Fern from the Soil?
How Do You Remove House Holly Fern from the Soil?
From Ground: If the house holly fern is currently in the ground, start by moistening the surrounding soil. Use a garden shovel to dig a wide circle around the plant, extending about 12 inches beyond the widest spread of its leaves. Dig deep enough to get beneath the root system and carefully lift it from the ground, avoiding root damage. Gently place the plant in your bucket or wheelbarrow for transport.From Pot: To extract the house holly fern from a pot, tilt the pot sideways, grasp the plant at its base, and gently pull. Ensure you support the bottom of the root ball with your other hand to prevent the plant from falling or the root ball from disintegrating.From Seedling Tray: If the house holly fern is in a seedling tray, water the tray first to hydrate the roots and facilitate removal. Invert the tray and tap gently to dislodge the house holly fern. Carefully separate the plants if multiple emerge simultaneously.
Step-by-Step Guide for Transplanting House Holly Fern
Preparation
Thoroughly water the house holly fern before beginning the transplanting process. A well-hydrated plant will experience less stress during the move.
Hole Digging
Excavate a hole in your chosen location that is twice as wide and the same depth as the house holly fern's root ball.
Placing the Plant
Position the house holly fern in the center of the hole. Ensure the top of the plant's root ball is level with or slightly above the surrounding soil to prevent water accumulation at the base.
Backfilling
Refill the hole with soil, gently tamping it down as you go to eliminate air pockets.
Final Watering
After transplanting, water the house holly fern thoroughly, saturating the soil around the root ball.
How Do You Care For House Holly Fern After Transplanting?
Watering
Immediately after transplanting, water the house holly fern generously. Subsequently, maintain consistent moisture levels for the plant, but be careful not to overwater.
Protection
Depending on the season, you might need to offer some protection for your newly transplanted house holly fern. This could involve a plant cover or mulch to regulate soil temperature and retain moisture.
Pruning
It's common for your house holly fern to shed some leaves after transplanting due to the stress of relocation. Trim off these leaves to encourage healthier growth.
Monitoring
Closely observe the house holly fern for the initial few weeks post-transplant. Pay attention to both the foliage and the root zone. Any changes could indicate the plant isn't adapting well, and adjustments may be necessary.
Troubleshooting Common Issues with House Holly Fern Transplantation.
When is the ideal time to transplant house holly fern?
The optimal period to relocate house holly fern is between mid-spring and mid-summer, when the weather is mild.
What's the ideal spacing when transplanting house holly fern?
Allow 12-24 inches (30-60 cm) of space between each house holly fern to ensure proper growth and vitality.
Why are the house holly fern yellowing after the transplantation?
If your house holly fern turns yellow after transplanting, it might be due to transplant shock, insufficient water, excessive sunlight, or nutrient deficiency. Review these factors.
My house holly fern's leaves wilted after transplantation, what could be the reason?
Wilting leaves may indicate water stress. Ensure the house holly fern receives a good soaking regularly, but be cautious not to overwater.
Does the size of the hole matter when transplanting the house holly fern?
Yes, it should be twice as wide as the root ball. This provides ample space for the roots to spread and develop in the new location.
Should I amend the soil when transplanting house holly fern?
Absolutely! Incorporating organic matter, such as compost or well-rotted manure, into the soil aids in improved drainage and root development.
How can I help my house holly fern recover from transplant shock?
Water it immediately after transplanting and maintain a consistent watering schedule. Additionally, try not to move it frequently; allow it to acclimate to its new surroundings.
Why does my house holly fern lose leaves after transplanting?
Leaf drop is a typical reaction to transplant stress. Keep your house holly fern hydrated and provide partial shade until it has fully recovered.
What type of soil does house holly fern prefer for transplanting?
House holly fern thrives in well-draining, slightly acidic to neutral soil. Adding organic matter will ensure it supplies the necessary nutrients for your plant.
Can other plants affect the growth of my transplanted house holly fern?
Yes, nearby plants can compete for water, nutrients, and sunlight. Therefore, maintain a reasonable distance of 12-24 inches (30-60 cm) when placing your house holly fern next to other plants.


